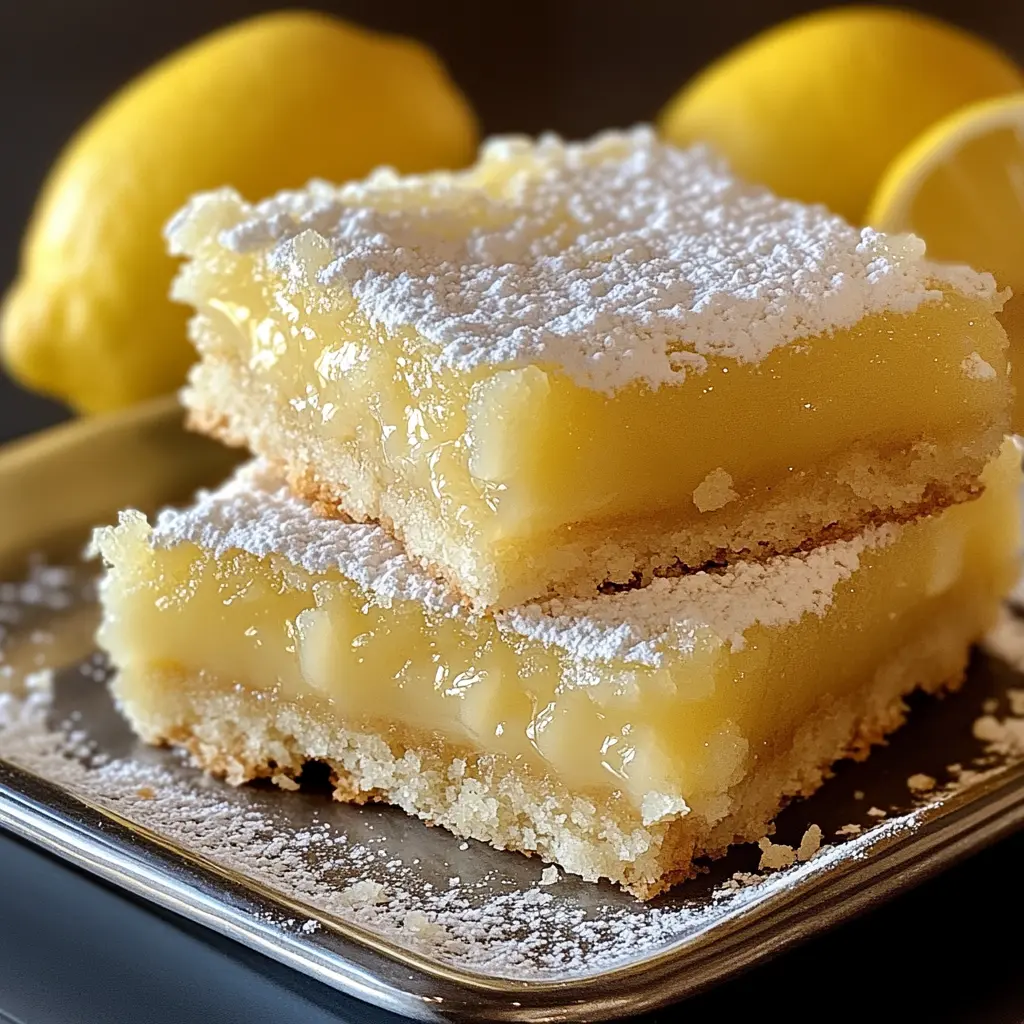
Description of this recipe: These remarkably simple Lemon Cake Bars are the perfect solution when you crave a light, bright, and utterly delicious treat without the fuss. Requiring only two ingredients, these bars deliver a burst of tangy lemon flavor nestled within a fluffy, angel food cake-like texture. They are incredibly easy to make, making them ideal for busy weeknights, unexpected guests, or anytime you need a quick and satisfying dessert.
Why you will love this recipe: You’ll absolutely adore these Lemon Cake Bars because of their unbelievable simplicity. Imagine a dessert that requires practically no effort and yet tastes like you spent hours in the kitchen. The combination of angel food cake mix and lemon pie filling creates a symphony of flavor and texture that is both light and satisfying. Plus, they are naturally low in fat due to the angel food cake base, making them a guilt-free indulgence. Whether you’re a seasoned baker or a complete novice, you can whip up these bars in minutes and enjoy the delightful taste of sunshine with every bite. They are also easily customizable with additions like berries or a simple glaze, making them a versatile treat for any occasion. Introduction
In the world of baking, sometimes the simplest recipes are the most rewarding. These 2-Ingredient Lemon Cake Bars are a testament to that philosophy. They’re a game-changer for anyone who loves baking but lacks the time or energy for complicated recipes. Forget measuring out a dozen ingredients and spending hours mixing; this recipe streamlines the process to its absolute core.
The beauty of these cake bars lies in the magical transformation that occurs when angel food cake mix meets lemon pie filling. The angel food cake mix, known for its airy and delicate texture, provides the perfect foundation for the tangy sweetness of the lemon pie filling. The result is a light, moist cake bar that is both satisfying and refreshing. It’s like biting into a cloud of lemon sunshine!
This recipe is not just about simplicity; it’s about creating a delightful dessert experience with minimal effort. It’s perfect for beginner bakers who want to build confidence in the kitchen, as well as experienced bakers looking for a quick and easy treat. And let’s be honest, who doesn’t appreciate a dessert that’s ready in under an hour with only two ingredients to clean up?
Whether you’re craving a sweet treat for yourself, need a last-minute dessert for a potluck, or want to impress your family with a simple yet delicious dessert, these Lemon Cake Bars are the answer. They are proof that great taste doesn’t always require great effort. So, grab your angel food cake mix, lemon pie filling, and let’s get baking!
Ingredients:
- 1 box (approximately 15 ounces) angel food cake mix (be sure it’s just the mix, not the kind that requires eggs, oil, or water)
- 1 (22-ounce) can lemon pie filling (ensure it’s a good quality pie filling for the best flavor)
- Powdered sugar, for dusting (optional, but adds a lovely visual appeal and a hint of extra sweetness)
Preparation:
Step 1: Preheat and Prepare Your Pan
Begin by preheating your oven to 350°F (175°C). This is crucial for ensuring the cake bars bake evenly and achieve the desired light and fluffy texture. While the oven is heating, prepare a 9 x 13-inch baking pan. Grease the pan thoroughly with nonstick cooking spray. This step is essential to prevent the cake bars from sticking to the bottom of the pan, making them easy to remove once they’ve cooled. You can also line the pan with parchment paper, leaving an overhang on the sides, for even easier removal.
Step 2: Combine the Ingredients
In a large mixing bowl, combine the angel food cake mix and the lemon pie filling. Ensure you’re using just the dry cake mix – the kind that doesn’t require any additional wet ingredients like eggs, oil, or water. Pour the entire can of lemon pie filling into the bowl with the cake mix. Using a spatula or a large spoon, gently mix the two ingredients together until they are well combined. Be careful not to overmix the batter, as this can result in a tougher cake. The batter will be thick and slightly lumpy, which is perfectly normal. The key is to ensure that the cake mix is fully incorporated into the pie filling and there are no dry pockets of cake mix remaining.
Step 3: Pour and Spread the Batter
Once the batter is thoroughly mixed, pour it into the prepared baking pan. Use a spatula or the back of a spoon to spread the batter evenly across the bottom of the pan. Aim for a consistent thickness to ensure even baking. Gently tap the pan on the counter a few times to release any trapped air bubbles and to help the batter settle evenly. This will contribute to a smoother and more uniform final product.
Step 4: Bake to Golden Perfection
Place the baking pan in the preheated oven and bake for approximately 30-35 minutes. Keep a close eye on the cake bars during the last few minutes of baking to prevent them from over-browning. The cake bars are done when they are golden brown on top and a toothpick inserted into the center comes out clean or with just a few moist crumbs attached. The edges of the cake bars should also appear slightly pulled away from the sides of the pan.
Step 5: Cool and Serve
Once the cake bars are baked, remove the pan from the oven and place it on a wire rack to cool completely. Allow the cake bars to cool completely before cutting them into bars. This is important because the cake bars are delicate when warm and can crumble if cut too soon. Once the cake bars are cool, use a sharp knife to cut them into desired sizes. Dust the bars generously with powdered sugar for an extra touch of sweetness and visual appeal. Serve and enjoy!
COOKING Rating:
- Ease of Preparation: 5/5 (Incredibly simple and beginner-friendly)
- Taste: 4.5/5 (Bright, tangy, and satisfying)
- Ingredient Accessibility: 5/5 (Easily found in most grocery stores)
- Overall: 4.5/5 (A delightful and convenient dessert option)
Serving Suggestions:
- Enjoy these Lemon Cake Bars as a simple afternoon treat with a cup of tea or coffee.
- Serve them as a light dessert after a meal, especially during the warmer months.
- Add a scoop of vanilla ice cream or a dollop of whipped cream for a more indulgent experience.
- Garnish with fresh berries, such as raspberries, blueberries, or strawberries, for added flavor and visual appeal.
- Pair with a refreshing glass of lemonade or iced tea.
Tips:
- Don’t Overmix: Overmixing the batter can result in a tougher cake. Mix just until the ingredients are combined.
- Use Quality Pie Filling: The flavor of the lemon pie filling will greatly impact the final taste of the cake bars. Choose a brand you trust and enjoy.
- Cool Completely: Allow the cake bars to cool completely before cutting them to prevent them from crumbling.
- Add a Glaze: For an extra touch of sweetness and flavor, drizzle the cooled cake bars with a simple lemon glaze made from powdered sugar and lemon juice.
- Customize with Add-Ins: Feel free to add other ingredients to the batter, such as chopped nuts, shredded coconut, or chocolate chips, to customize the flavor.
Prep Time: 5 minutes
Cook Time: 30-35 minutes
Total Time: 35-40 minutes
Nutritional Information (per serving, estimate):
Calories: 150-200 (depending on serving size)
Protein: 2-3 grams
Sodium: 150-200mg (depending on the brand of cake mix and pie filling)
Conclusion
These 2-Ingredient Lemon Cake Bars are a testament to the fact that delicious desserts don’t have to be complicated or time-consuming. With just two simple ingredients, you can create a light, bright, and satisfying treat that is perfect for any occasion. Whether you’re a seasoned baker or a complete beginner, this recipe is sure to become a go-to favorite. So, next time you’re craving a sweet treat but short on time, reach for your angel food cake mix and lemon pie filling and whip up a batch of these irresistible Lemon Cake Bars. Your taste buds will thank you!
Question and Answer Section:
Q1: Can I use a different flavor of pie filling?
A: Absolutely! While this recipe specifically calls for lemon pie filling for that bright, citrusy flavor, you can certainly experiment with other flavors. Cherry, apple, or even blueberry pie filling would all work beautifully. Just keep in mind that the flavor profile of the cake bars will change depending on the pie filling you choose. If you use a sweeter pie filling, you might want to reduce the amount of powdered sugar you dust on top, or omit it altogether. The beauty of this recipe is its versatility – feel free to get creative and try different combinations to find your favorite!
Q2: My cake bars came out a bit dry. What did I do wrong?
A: Several factors could contribute to dry cake bars. First, make sure you are using the correct type of angel food cake mix – it should be the kind that only requires water (or nothing extra at all), not the type that requires eggs, oil, and water. If you use the wrong type, the ratio of dry to wet ingredients will be off, resulting in a drier cake. Second, be careful not to overbake the cake bars. Overbaking can dry them out significantly. Start checking for doneness around the 30-minute mark and remove them from the oven as soon as a toothpick inserted into the center comes out clean or with just a few moist crumbs attached. Finally, ensure your oven temperature is accurate. An oven that runs too hot can also lead to a dry cake. Consider using an oven thermometer to verify the temperature.
Q3: Can I add a glaze to these Lemon Cake Bars?
A: Absolutely! A glaze is a wonderful addition to these Lemon Cake Bars and adds an extra layer of sweetness and flavor. A simple lemon glaze is a perfect complement to the existing lemon flavor. To make a lemon glaze, whisk together powdered sugar and lemon juice until you reach a smooth, pourable consistency. Start with a small amount of lemon juice and add more gradually until you achieve the desired thickness. You can also add a touch of lemon zest for extra flavor and aroma. Drizzle the glaze over the cooled cake bars and let it set before cutting and serving. You could also use a cream cheese glaze for a richer flavor profile.
Q4: Can I make these cake bars ahead of time?
A: Yes, you can definitely make these Lemon Cake Bars ahead of time! They actually taste even better the next day, as the flavors have had more time to meld together. Allow the cake bars to cool completely, then store them in an airtight container at room temperature for up to 2-3 days. If you’re making them more than a day or two in advance, you can also store them in the refrigerator to extend their shelf life. Just be sure to bring them back to room temperature before serving for the best texture and flavor. Avoid dusting with powdered sugar until just before serving, as the powdered sugar can dissolve over time and make the cake bars look soggy.
Q5: Can I freeze these Lemon Cake Bars?
A: Yes, these Lemon Cake Bars can be frozen for longer storage. Allow the cake bars to cool completely, then cut them into individual bars. Wrap each bar tightly in plastic wrap, then place them in a freezer-safe bag or container. They can be stored in the freezer for up to 2-3 months. When you’re ready to enjoy them, thaw the bars in the refrigerator overnight or at room temperature for a few hours. Dust with powdered sugar before serving. Freezing may slightly alter the texture of the cake bars, but they will still be delicious.