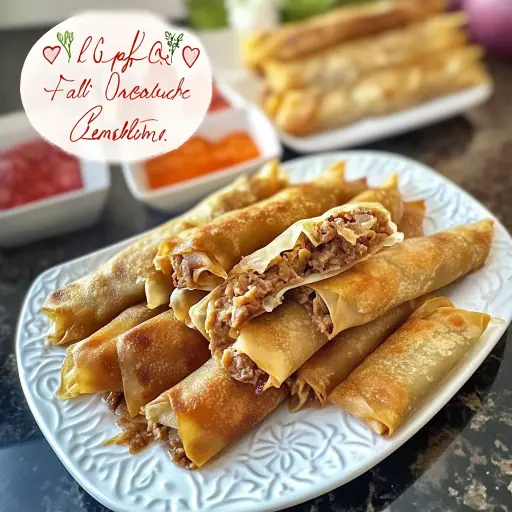
Description: Lumpia are the ultimate crowd-pleaser – crispy, savory, and utterly addictive. These Filipino egg rolls are packed with a flavorful meat filling and fried to golden perfection. Whether you’re hosting a party, craving a satisfying snack, or simply want to experience a taste of Filipino cuisine, this recipe is a guaranteed hit. They’re incredibly versatile and can be customized to your liking. Get ready to enjoy the delightful crunch and savory goodness of homemade lumpia!
Ingredients:
- 1 pound ground beef (or ground pork, chicken, turkey, or a combination)
- 1 small onion, finely chopped
- 3 cloves garlic, minced
- 1 cup shredded carrots
- 1/2 cup finely chopped water chestnuts (optional, for added texture)
- 1/4 cup finely chopped green onions (scallions)
- 1 tablespoon soy sauce
- 1/2 teaspoon ground black pepper
- 1/4 teaspoon salt (or to taste)
- 1 package (approximately 25-30) egg roll wrappers (spring roll wrappers can also be used, but egg roll wrappers provide a sturdier, crispier result)
- Vegetable oil or canola oil for deep frying
- Sweet chili sauce, vinegar dipping sauce (with garlic, onions, and chili flakes), or your favorite dipping sauce for serving
Preparation:
Step 1: Prepare the Meat Filling In a large skillet or wok, heat a small amount of oil over medium-high heat. Add the ground meat (beef, pork, chicken, or turkey) and cook, breaking it up with a spoon, until it is browned and fully cooked. Drain off any excess grease from the pan.
Step 2: Sauté the Aromatics Add the chopped onion and minced garlic to the skillet with the cooked meat. Cook, stirring frequently, until the onion becomes translucent and the garlic is fragrant, about 2-3 minutes.
Step 3: Incorporate the Vegetables Add the shredded carrots, water chestnuts (if using), and green onions (scallions) to the skillet. Cook for another 2-3 minutes, stirring occasionally, until the carrots are slightly softened.
Step 4: Season the Filling Stir in the soy sauce, ground black pepper, and salt. Mix well to ensure all the ingredients are evenly coated with the seasonings. Taste the filling and adjust the seasonings as needed. You can add a pinch of sugar for a touch of sweetness if desired. Remove the skillet from the heat and let the filling cool slightly before assembling the lumpia.
Step 5: Assemble the Lumpia Lay an egg roll wrapper on a clean, flat surface. Position it so that one of the corners is pointing towards you (diamond shape). Place about 1 1/2 to 2 tablespoons of the meat filling in the center of the wrapper, closer to the bottom corner.
Step 6: Fold and Roll Fold the bottom corner of the wrapper over the filling, tucking it in tightly. Then, fold in the left and right sides of the wrapper towards the center, creating a closed envelope shape.
Step 7: Seal the Lumpia Moisten the top corner of the wrapper with a little water. Roll the lumpia up tightly, starting from the bottom folded edge, until you reach the moistened top corner. Press gently to seal the edge.
Step 8: Repeat and Arrange Repeat the process with the remaining wrappers and filling. Arrange the assembled lumpia on a baking sheet lined with parchment paper to prevent them from sticking together.
COOKING Instructions:
Step 1: Heat the Oil In a large, deep pot or Dutch oven, heat about 2-3 inches of vegetable oil or canola oil over medium-high heat. The oil should be hot enough for deep frying (around 350°F or 175°C). You can test the oil temperature by dropping a small piece of wrapper into the oil; it should sizzle and turn golden brown in about 30-60 seconds.
Step 2: Fry the Lumpia Carefully place a few lumpia into the hot oil, making sure not to overcrowd the pot. Overcrowding can lower the oil temperature and result in soggy lumpia.
Step 3: Cook Until Golden Brown Fry the lumpia for about 2-3 minutes per side, or until they are golden brown and crispy. Use a slotted spoon or tongs to turn them occasionally for even cooking.
Step 4: Remove and Drain Once the lumpia are golden brown, remove them from the oil with a slotted spoon or tongs and transfer them to a wire rack lined with paper towels. This will help to drain off any excess oil and keep the lumpia crispy.
Step 5: Repeat and Serve Repeat the frying process with the remaining lumpia. Serve them hot and crispy with your favorite dipping sauce.
Why You Will Love This Recipe
- Crispy and Delicious: The combination of the crispy egg roll wrapper and the savory meat filling is simply irresistible.
- Versatile Filling: You can customize the filling to your liking by using different types of meat, vegetables, and seasonings.
- Perfect for Sharing: Lumpia are a great appetizer or snack to share with family and friends at gatherings and parties.
- Freezer-Friendly: You can easily make a big batch of lumpia and freeze them for later. Simply thaw them before frying.
- Authentic Filipino Flavor: This recipe captures the authentic taste of Filipino lumpia, bringing a taste of the Philippines to your kitchen.
Serving Suggestions:
- Dipping Sauces: Serve lumpia with sweet chili sauce, vinegar dipping sauce (with garlic, onions, and chili flakes), plum sauce, or your favorite dipping sauce.
- Appetizer: Arrange lumpia on a platter as an appetizer for parties, potlucks, or family gatherings.
- Side Dish: Serve lumpia as a side dish with Filipino dishes like pancit (noodles) or adobo (meat braised in soy sauce and vinegar).
- Snack: Enjoy lumpia as a satisfying snack any time of day.
- Garnish: Garnish with chopped green onions or a sprinkle of sesame seeds for added visual appeal.
Tips:
- Don’t Overfill: Avoid overfilling the wrappers, as this can cause them to tear during frying.
- Seal Tightly: Make sure to seal the edges of the wrappers tightly with water to prevent the filling from leaking out during frying.
- Fry at the Right Temperature: Fry the lumpia at the correct oil temperature (around 350°F or 175°C) to ensure they cook evenly and become crispy.
- Don’t Overcrowd the Pot: Avoid overcrowding the pot when frying, as this can lower the oil temperature and result in soggy lumpia.
- Drain Well: Drain the fried lumpia on a wire rack lined with paper towels to remove any excess oil and keep them crispy.
- Make Ahead: You can assemble the lumpia ahead of time and store them in the refrigerator for up to 24 hours before frying. Cover them with a damp paper towel to prevent them from drying out.
- Freezing: To freeze lumpia, place the assembled lumpia on a baking sheet lined with parchment paper and freeze until solid. Then, transfer them to a freezer bag or container and store in the freezer for up to 2-3 months. Thaw them completely before frying.
- Vegetarian Option: For a vegetarian version, replace the meat with finely chopped tofu, mushrooms, or a combination of vegetables.
Prep Time: 30 minutes
Cook Time: 20 minutes
Total Time: 50 minutes
Nutritional Information:
(Note: Nutritional information is an estimate and may vary depending on the specific ingredients and portion sizes used.)
Calories: Approximately 150-200 calories per lumpia
Protein: Approximately 5-8 grams per lumpia
Sodium: Approximately 150-250 milligrams per lumpia
Conclusion
Filipino Lumpia are a delicious and versatile dish that is perfect for any occasion. With their crispy exterior and savory filling, they are sure to be a crowd-pleaser. This recipe provides a detailed guide on how to make authentic lumpia at home, with tips and suggestions for customization. Whether you’re a seasoned cook or a beginner, you’ll find this recipe easy to follow and the results incredibly satisfying. So, gather your ingredients, roll up your sleeves, and get ready to enjoy the irresistible taste of homemade lumpia!
Questions and Answers about this Recipe
Q1: Can I use different types of meat for the filling?
A: Absolutely! While this recipe calls for ground beef, you can easily substitute it with ground pork, chicken, turkey, or even a combination of meats. Each type of meat will impart a slightly different flavor, so feel free to experiment and find your favorite. Just make sure to cook the meat thoroughly before adding the other ingredients.
Q2: What can I use if I don’t have egg roll wrappers?
A: If you can’t find egg roll wrappers, you can use spring roll wrappers as a substitute. However, keep in mind that spring roll wrappers are thinner and more delicate than egg roll wrappers, so they may not be as crispy when fried. You’ll also need to be more careful when assembling the lumpia to avoid tearing the wrappers.
Q3: Can I bake the lumpia instead of frying them?
A: Yes, you can bake the lumpia for a healthier alternative to frying. Preheat your oven to 400°F (200°C). Place the assembled lumpia on a baking sheet lined with parchment paper and brush them with a little oil. Bake for about 15-20 minutes, or until they are golden brown and crispy, turning them halfway through the baking time. The baked lumpia will not be as crispy as the fried ones, but they will still be delicious.
Q4: How can I prevent the lumpia from becoming soggy after frying?
A: To prevent the lumpia from becoming soggy, make sure to fry them at the correct oil temperature (around 350°F or 175°C). Also, avoid overcrowding the pot when frying, as this can lower the oil temperature and result in soggy lumpia. After frying, drain the lumpia on a wire rack lined with paper towels to remove any excess oil.
Q5: Can I add other vegetables to the filling?
A: Of course! Feel free to add other vegetables to the filling to customize the flavor and texture. Some popular additions include finely chopped cabbage, bean sprouts, mushrooms, and bamboo shoots. Just make sure to chop the vegetables finely so they cook evenly and don’t make the lumpia too bulky.