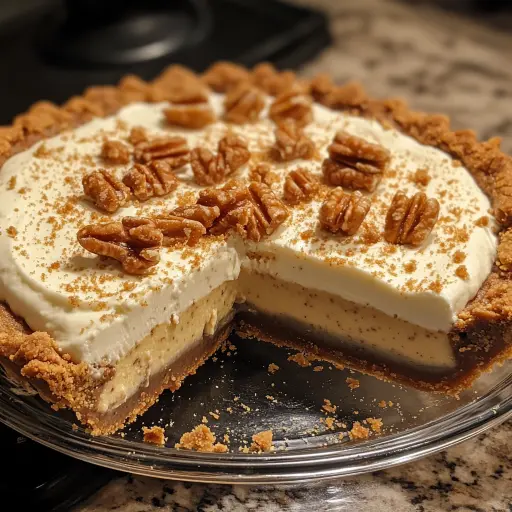
Description: A no-bake delight featuring a creamy peanut butter filling loaded with crushed Butterfinger candy, all nestled in a buttery graham cracker crust. This pie is a crowd-pleaser, perfect for parties, holidays, or any time you crave a sweet and satisfying treat.
Ingredients:
For the crust:
- 1 ½ cups graham cracker crumbs
- 6 tablespoons unsalted butter, melted
- 2 tablespoons granulated sugar
For the filling:
- 8 oz cream cheese, softened
- 1 cup powdered sugar
- 1 cup creamy peanut butter
- 8 oz whipped topping (e.g., Cool Whip)
- 4 regular-size Butterfinger bars, crushed
Optional toppings:
- Extra crushed Butterfinger
- Whipped cream
- Chopped pecans or peanuts
Preparation:
Step 1: Prepare the Graham Cracker Crust: In a medium-sized mixing bowl, combine the graham cracker crumbs, melted butter, and granulated sugar. Stir until the mixture is evenly moistened and resembles wet sand.
Step 2: Press into Pie Dish: Transfer the graham cracker mixture to a 9-inch pie dish. Using your fingers or the bottom of a measuring cup, press the mixture firmly and evenly into the bottom and slightly up the sides of the pie dish. Ensure the crust is compact and consistent in thickness.
Step 3: (Optional) Bake the Crust: For a firmer crust, preheat your oven to 350°F (175°C). Bake the crust for 8 minutes. This step is optional, but it helps the crust hold its shape better. If skipping this step, simply chill the crust for about 30 minutes.
Step 4: Cool Completely: Allow the crust to cool completely before adding the filling. This prevents the filling from melting and ensures the crust remains crisp.
Step 5: Prepare the Cream Cheese Filling: In a large mixing bowl, beat the softened cream cheese with an electric mixer until smooth and creamy. Make sure the cream cheese is at room temperature to avoid lumps in the filling.
Step 6: Add Powdered Sugar and Peanut Butter: Add the powdered sugar and creamy peanut butter to the cream cheese mixture. Beat until well combined, smooth, and free of any lumps. Ensure the peanut butter is well incorporated for a consistent flavor throughout.
Step 7: Fold in Whipped Topping: Gently fold in the whipped topping (such as Cool Whip) until just combined. Be careful not to overmix, as this can deflate the whipped topping.
Step 8: Add Crushed Butterfinger: Crush the Butterfinger bars into small pieces. Gently fold the crushed Butterfinger bars into the cream cheese mixture, distributing them evenly.
Step 9: Assemble the Pie: Pour the filling into the cooled graham cracker crust. Spread the filling evenly and smooth the top with a spatula or knife.
Step 10: Optional Toppings: If desired, sprinkle the top of the pie with extra crushed Butterfinger pieces, a dollop of whipped cream, or chopped pecans or peanuts. These toppings add extra flavor and visual appeal.
Step 11: Chill the Pie: Cover the pie with plastic wrap and refrigerate for at least 4 hours, or preferably overnight. This chilling time allows the filling to set properly and the flavors to meld together.
Step 12: Slice and Serve: Once the pie is chilled, slice it into wedges and serve cold. Garnish with additional whipped cream or a sprinkle of crushed Butterfinger, if desired.
Why You Will Love This Recipe:
This Butterfinger Pie is an absolute delight for several reasons. First, it’s incredibly easy to make. With its no-bake filling and simple crust preparation, this recipe is perfect for beginner bakers or anyone looking for a quick and satisfying dessert. The combination of creamy peanut butter, sweet powdered sugar, and crunchy Butterfinger candy creates an irresistible flavor and texture profile.
The pie is also highly customizable. You can easily swap out the Butterfinger candy for other chocolate bars like Reese’s or Snickers, or adjust the amount of peanut butter to your liking. The no-bake nature of this dessert makes it ideal for warm weather, and it’s a guaranteed hit at any gathering. Whether you’re hosting a party or simply treating yourself, this Butterfinger Pie is sure to impress with its rich flavor and effortless preparation.
Serving Suggestions:
- Classic Slice: Serve the pie chilled as a standalone dessert. It’s rich and satisfying on its own.
- With Whipped Cream: Add a dollop of freshly whipped cream on top of each slice for extra creaminess.
- Chocolate Sauce: Drizzle chocolate sauce over the slice for an extra layer of chocolatey indulgence.
- Ice Cream Pairing: Serve the pie with a scoop of vanilla or chocolate ice cream. The cold ice cream complements the creamy filling perfectly.
- Coffee or Milk: Enjoy a slice with a cup of hot coffee or a glass of cold milk to balance the sweetness.
Tips:
- Softened Cream Cheese: Ensure the cream cheese is fully softened before mixing. This will prevent lumps and result in a smoother filling.
- Even Crust: Press the graham cracker crust firmly and evenly into the pie dish for a stable base.
- Chill Time: Allow the pie to chill for at least 4 hours, or preferably overnight, for the best texture and flavor.
- Candy Bar Variety: Experiment with different candy bars for a unique twist. Reese’s, Snickers, or even Heath bars can be used instead of Butterfinger.
- Make Ahead: This pie can be made up to 2 days in advance and stored in the refrigerator.
- Freezing: Butterfinger pie freezes well. Wrap it tightly in plastic wrap and aluminum foil before freezing. Thaw overnight in the refrigerator before serving.
- Mini Pies: For individual servings, use muffin tins with liners to make mini Butterfinger pies.
Prep Time: 20 minutes Cook Time: 8 minutes (optional, for baking the crust) Chill Time: 4 hours (minimum) Total Time: 4 hours 28 minutes
Nutritional Information:
- Calories: Approximately 525 per serving
- Protein: 8g per serving
- Sodium: 310mg per serving
Conclusion:
The Butterfinger Pie is a delightful dessert that combines the creamy richness of peanut butter with the crunchy sweetness of Butterfinger candy. Its easy, no-bake preparation makes it a go-to recipe for any occasion. Whether you’re a seasoned baker or a beginner, this pie is sure to impress with its simplicity and flavor. Perfect for parties, holidays, or a simple sweet treat, the Butterfinger Pie is a guaranteed crowd-pleaser. Enjoy the delectable blend of textures and flavors in every bite!
Questions and Answers About This Recipe:
- Can I use a different type of crust for this pie? Yes, you can substitute the graham cracker crust with an Oreo cookie crust or a pre-made pie crust. An Oreo crust would add a chocolatey twist, while a pre-made crust can save you some preparation time. Ensure the crust is properly baked or chilled before adding the filling.
- Is it necessary to chill the pie for 4 hours? While 4 hours is the minimum chilling time, it’s best to chill the pie overnight for the optimal texture and flavor. The longer chilling time allows the filling to set properly, making it easier to slice and serve. If you’re short on time, 4 hours will suffice, but overnight chilling is highly recommended.
- Can I make this pie ahead of time? Yes, this pie is perfect for making ahead of time. You can prepare it up to 2 days in advance and store it in the refrigerator. Just make sure to cover it tightly with plastic wrap to prevent it from absorbing any odors. This makes it an excellent dessert option for parties or gatherings where you need to prepare in advance.
- What can I substitute for Butterfinger candy bars? If you don’t have Butterfinger candy bars on hand, you can substitute them with other similar candy bars like Reese’s Peanut Butter Cups, Snickers, or Heath bars. Each of these will give the pie a slightly different flavor profile, but they all work well with the peanut butter and cream cheese filling.
- Can I freeze this pie? Yes, this pie freezes well. To freeze, wrap the pie tightly in plastic wrap and then in aluminum foil. It can be stored in the freezer for up to 2 months. When ready to serve, thaw the pie overnight in the refrigerator. This makes it a convenient dessert to have on hand for unexpected guests or when you want a sweet treat without having to bake.