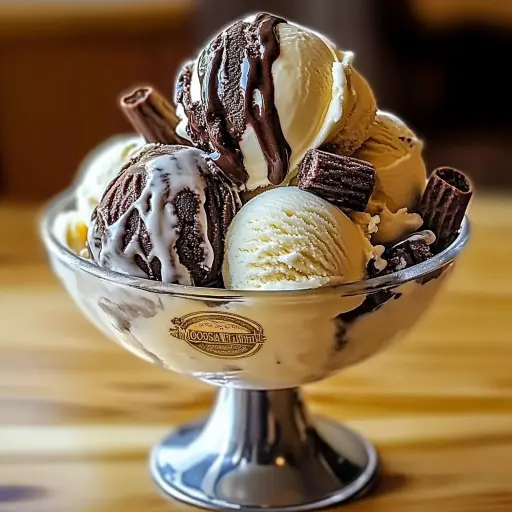
Description: A creamy, indulgent ice cream featuring rich chocolate chunks and mini peanut butter cups swirled throughout a sweet vanilla base. This homemade version of a classic favorite is surprisingly easy to make and guaranteed to satisfy any sweet tooth!
Ingredients:
- 1 gallon half-and-half
- 1 1/2 cups granulated sugar
- 1/2 cup light corn syrup
- 1 tablespoon pure vanilla extract
- 1/2 teaspoon fine sea salt
- 1 cup high-quality semi-sweet chocolate chips or chunks
- 1 cup mini peanut butter cups, coarsely chopped (Reese’s brand recommended for best flavor)
Preparation:
Step 1: Prepare the Ice Cream Base: In a very large mixing bowl (at least a 1-gallon capacity), whisk together the half-and-half, granulated sugar, light corn syrup, pure vanilla extract, and fine sea salt. Continue whisking vigorously until the granulated sugar is completely dissolved. This is an important step because any undissolved sugar will result in a grainy texture in the final ice cream. Taste the base to ensure it’s sweet enough for your liking, adding a bit more sugar if needed, but remember that the cold temperature will slightly reduce the perceived sweetness.
Step 2: Chill the Mixture: Cover the mixing bowl tightly with plastic wrap, pressing the wrap directly onto the surface of the ice cream base. This prevents a skin from forming on top while it chills. Refrigerate the mixture for a minimum of 2 hours, but preferably 4 hours or even overnight. The longer the base chills, the better the ice cream will freeze and the smoother the texture will be. This chilling time allows the ingredients to fully meld together, resulting in a more cohesive and flavorful ice cream.
Step 3: Churn the Ice Cream: Once the ice cream base is thoroughly chilled, prepare your ice cream maker according to the manufacturer’s instructions. This typically involves freezing the ice cream maker bowl for a specific amount of time, usually at least 24 hours in advance. Once the bowl is properly frozen, pour the chilled ice cream base into the prepared ice cream maker. Churn the mixture according to the manufacturer’s instructions, which usually takes around 20-30 minutes, or until the ice cream reaches a soft-serve consistency. Keep a close eye on the ice cream as it churns.
Step 4: Add the Mix-Ins: During the last 2-3 minutes of churning, while the ice cream is still in the machine and has reached a soft-serve consistency, gently add in the semi-sweet chocolate chips (or chunks) and the coarsely chopped mini peanut butter cups. Let the ice cream maker continue churning just long enough to evenly distribute the mix-ins throughout the ice cream, but be careful not to over-churn, as this can make the ice cream icy. The goal is to have pockets of chocolate and peanut butter cups throughout each spoonful.
Step 5: Freeze the Ice Cream: Once the mix-ins are evenly distributed, carefully transfer the freshly churned ice cream to an airtight container. A freezer-safe container with a tight-fitting lid is essential to prevent freezer burn. Gently press a sheet of plastic wrap directly onto the surface of the ice cream inside the container before sealing it with the lid. This extra layer of protection helps prevent ice crystals from forming. Freeze the ice cream for a minimum of 4 hours, or preferably overnight, to allow it to fully harden and develop its final, scoopable texture.
Why You’ll Love This Recipe:
This homemade Moose Tracks ice cream recipe is a delightful twist on a classic flavor, offering a richer, creamier, and more flavorful experience than store-bought versions. The combination of the sweet vanilla base, the decadent chocolate chunks, and the salty-sweet peanut butter cups creates a symphony of flavors that will tantalize your taste buds. What truly sets this recipe apart is the ability to customize the ingredients to your personal preferences. You can use different types of chocolate, experiment with various sizes of peanut butter cups, or even add other mix-ins like chopped nuts or pretzels for an extra layer of texture and flavor. The recipe is also incredibly simple to follow, making it a perfect project for beginner ice cream makers. The entire process, from preparing the base to churning and freezing the ice cream, is relatively straightforward, allowing you to create a truly impressive dessert with minimal effort.
COOKING Rating:
- Ease of Preparation: Easy
- Flavor Complexity: Medium
- Overall Satisfaction: High
Serving Suggestions:
- Serve in a classic waffle cone or sugar cone.
- Enjoy in a bowl with a drizzle of hot fudge sauce, caramel sauce, or chocolate syrup.
- Top with whipped cream and a cherry for a classic ice cream sundae.
- Pair with a warm brownie or cookie for a decadent dessert combination.
- Use to make an over-the-top milkshake or ice cream float.
- Create an ice cream sandwich using your favorite cookies.
Tips:
- Use high-quality ingredients for the best flavor.
- Ensure the ice cream base is thoroughly chilled before churning.
- Don’t over-churn the ice cream, as this can make it icy.
- Freeze the ice cream for at least 4 hours before serving to allow it to fully harden.
- For a softer texture, let the ice cream sit at room temperature for a few minutes before scooping.
- Store leftover ice cream in an airtight container in the freezer for up to 2 weeks.
- Experiment with different mix-ins to customize the flavor to your liking. Consider adding chopped nuts, pretzels, cookie pieces, or other candies.
- If you want a more intense chocolate flavor, use dark chocolate chips or chunks instead of semi-sweet.
- For a peanut-butter-lover’s dream, swirl in a ribbon of peanut butter during the last few minutes of churning.
- To prevent the peanut butter cups from sinking to the bottom of the container during freezing, toss them with a tablespoon of flour before adding them to the ice cream maker.
Prep Time: 10 minutes Chill Time: 2-4 hours (or overnight) Churn Time: 20-30 minutes Total Time: 6-8 hours (including freezing)
Nutritional Information: (per serving, estimated) (Note: Nutritional information is an estimate and may vary based on specific ingredients used and serving size.)
- Calories: Approximately 350-400 calories
- Protein: 5-7 grams
- Sodium: 80-120 mg
Conclusion:
Homemade Moose Tracks Ice Cream is a delightful treat that combines the creamy richness of vanilla ice cream with the satisfying crunch of chocolate and the irresistible flavor of peanut butter cups. This recipe is not only easy to follow but also allows for endless customization, allowing you to create a truly unique and personalized dessert. Whether you’re enjoying it on a warm summer evening or indulging in a sweet treat on a cozy night in, this homemade ice cream is sure to bring a smile to your face. So gather your ingredients, dust off your ice cream maker, and get ready to experience the joy of homemade Moose Tracks Ice Cream!
Questions and Answers:
- Question 1: Can I use milk instead of half-and-half?
- Answer: While you can use milk instead of half-and-half, the ice cream will not be as creamy. Half-and-half has a higher fat content, which contributes to the smooth and rich texture of the ice cream. If you use milk, the ice cream may be slightly icier. For the best results, stick with half-and-half or even a combination of half-and-half and heavy cream.
- Question 2: Can I make this recipe without an ice cream maker?
- Answer: It is difficult to achieve the same texture as churned ice cream without an ice cream maker, but there are no-churn methods available. These methods typically involve whipping heavy cream to stiff peaks and then folding in sweetened condensed milk and any desired flavorings or mix-ins. The mixture is then frozen for several hours until solid. The texture will be denser and icier than churned ice cream, but it’s a good alternative if you don’t have an ice cream maker.
- Question 3: Can I use different types of chocolate?
- Answer: Absolutely! Feel free to experiment with different types of chocolate to customize the flavor of your Moose Tracks ice cream. Dark chocolate, milk chocolate, white chocolate, or even a combination of different chocolates can be used. You can also use chocolate chunks, chocolate shavings, or even chopped chocolate bars. Just make sure to adjust the amount of chocolate to your liking.
- Question 4: Can I add other mix-ins?
- Answer: Definitely! This recipe is very versatile, and you can add all sorts of mix-ins to create your own unique flavor combination. Consider adding chopped nuts, pretzels, cookie pieces, brownie chunks, mini marshmallows, or even a swirl of caramel or fudge sauce. Just be sure not to add too many mix-ins, as this can make the ice cream difficult to churn and freeze properly.
- Question 5: How long will the ice cream last in the freezer?
- Answer: Homemade ice cream is best enjoyed within 1-2 weeks of making it. After that, it may start to develop freezer burn or lose its flavor and texture. To maximize the shelf life of your ice cream, store it in an airtight container in the coldest part of your freezer. Pressing a sheet of plastic wrap directly onto the surface of the ice cream before sealing the container can also help prevent freezer burn.