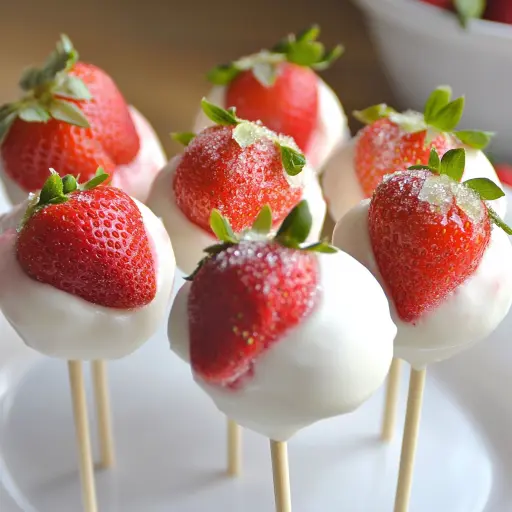
Description: These Strawberry Shortcake Cake Pops are a delightful twist on the classic dessert, transforming the familiar flavors into a fun, portable treat. Combining the light, airy texture of vanilla cake with the sweet tang of strawberries and a creamy white chocolate coating, these cake pops are perfect for parties, holidays, or a simple, satisfying indulgence. Each bite delivers the essence of strawberry shortcake in a convenient, bite-sized form, making them a crowd-pleasing favorite for all ages.
Ingredients:
- 1 box vanilla or white cake mix (plus ingredients listed on the box: eggs, oil, water)
- 1 cup strawberry preserves or strawberry frosting
- 1 ½ cups white chocolate chips or candy melts
- 1 tablespoon vegetable oil (for smoother melting)
- Crushed freeze-dried strawberries or graham cracker crumbs (for coating)
- Cake pop sticks
Preparation:
Before embarking on the creation of these delectable Strawberry Shortcake Cake Pops, it’s essential to prepare the necessary ingredients and equipment. Ensuring everything is readily available will streamline the process and allow for a more seamless baking experience.
Step 1: Bake the Cake
Begin by preparing the vanilla or white cake according to the package instructions. This typically involves mixing the cake mix with eggs, oil, and water. Follow the directions closely to ensure the cake bakes properly. Once baked, allow the cake to cool completely on a wire rack. Cooling the cake thoroughly is crucial, as it prevents the cake from becoming too crumbly or difficult to handle when forming the cake pops. This step lays the foundation for the perfect texture and consistency of the cake pops.
Step 2: Crumble the Cake
Once the cake has cooled completely, the next step is to crumble it into fine crumbs. This can be done in a large mixing bowl using your hands or a fork. Ensure that there are no large chunks of cake remaining, as this will affect the texture of the cake pops. Crumbling the cake evenly will help create a smooth and consistent mixture when combined with the strawberry preserves or frosting. This step is essential for achieving the desired uniformity and mouthfeel of the final product.
Step 3: Mix with Strawberry Preserves or Frosting
Add the strawberry preserves or strawberry frosting to the crumbled cake. This is where the delightful strawberry flavor is infused into the cake pops. Mix the ingredients together until they are thoroughly combined and form a dough-like consistency. The mixture should be moist enough to hold its shape when rolled into balls, but not too sticky. Adjust the amount of preserves or frosting as needed to achieve the perfect consistency. This step is crucial for binding the cake crumbs together and creating a cohesive mixture that can be easily shaped into cake pops.
Step 4: Form the Cake Balls
Scoop out portions of the mixture and roll them into 1-inch balls. A small cookie scoop or spoon can be used to ensure uniform sizing. Place the cake balls on a baking sheet lined with parchment paper to prevent sticking. Insert a cake pop stick into each ball, pushing it gently but firmly into the center. After inserting the sticks, refrigerate the cake balls for 15-20 minutes to allow them to firm up. Chilling the cake balls helps them hold their shape better when dipped in the melted white chocolate. This step is essential for creating neat, well-formed cake pops that are easy to handle and enjoy.
Step 5: Melt the White Chocolate
In a microwave-safe bowl, combine the white chocolate chips or candy melts with vegetable oil. The vegetable oil helps to thin the chocolate, making it smoother and easier to work with. Melt the chocolate in 30-second intervals, stirring in between each interval to prevent burning. Continue heating until the chocolate is completely melted and smooth. Ensure that there are no lumps or unmelted pieces remaining. This step is crucial for achieving a flawless and glossy coating on the cake pops.
Step 6: Coat the Cake Pops
Remove the cake balls from the refrigerator and dip each one into the melted white chocolate, twirling to coat it evenly. Gently tap off any excess chocolate to prevent drips and ensure a smooth finish. This step requires a steady hand and attention to detail. Coating the cake pops evenly ensures that each one is visually appealing and tastes delicious.
Step 7: Add Toppings
Immediately after dipping, sprinkle the cake pops with crushed freeze-dried strawberries or graham cracker crumbs. These toppings add flavor, texture, and visual appeal to the cake pops. Gently press the toppings into the chocolate to ensure they adhere properly. This step is where you can get creative and customize the cake pops with your favorite toppings.
Step 8: Let Them Set
Place the coated cake pops back onto the parchment-lined baking sheet or stand them upright in a Styrofoam block. Allow the chocolate to set completely before serving. This may take anywhere from 30 minutes to an hour, depending on the room temperature. Chilling the cake pops in the refrigerator can speed up the setting process. This step is essential for ensuring that the chocolate coating is firm and doesn’t melt or smudge when handled.
Step 9: Serve and Enjoy
Once the chocolate has set, your Strawberry Shortcake Cake Pops are ready to serve and enjoy! These bite-sized treats are perfect for parties, holidays, or a sweet indulgence any time of day. Arrange them on a platter or display them in a decorative cake pop stand for an extra touch of elegance. This step is the culmination of all your hard work, so take pride in your creation and enjoy the smiles on the faces of those who taste them.
Why You Will Love This Recipe
These Strawberry Shortcake Cake Pops are a delightful twist on a classic dessert, offering a fun and convenient way to enjoy the flavors of strawberry shortcake. The combination of moist vanilla cake, sweet strawberry filling, and creamy white chocolate coating creates a perfect balance of textures and tastes. These cake pops are incredibly versatile, making them ideal for parties, holidays, or a simple sweet treat. They’re easy to make, customizable with different toppings, and always a crowd-pleaser. Plus, their bite-sized form makes them perfect for portion control!
Serving Suggestions:
- Serve as a dessert at parties, birthdays, or holidays.
- Package them in cellophane bags with ribbon for a cute and edible gift.
- Arrange them on a cake pop stand for a visually appealing display.
- Serve with a scoop of vanilla ice cream for an extra decadent treat.
- Offer them as a sweet addition to a brunch spread.
Tips:
- Use high-quality white chocolate for the best flavor and melting properties.
- If the chocolate is too thick, add a little more vegetable oil to thin it out.
- Make sure the cake balls are cold before dipping them in chocolate to help the chocolate set quickly.
- Experiment with different toppings like sprinkles, chopped nuts, or shredded coconut.
- Store the cake pops in an airtight container in the refrigerator to keep them fresh.
Prep Time: 30 minutes
Cook Time: 30 minutes
Total Time: 1 hour (plus setting time)
Nutritional Information: (per cake pop, approximate)
- Calories: 150
- Protein: 2g
- Sodium: 50mg
Conclusion
In conclusion, Strawberry Shortcake Cake Pops are a delightful and inventive way to enjoy the classic flavors of strawberry shortcake in a playful, bite-sized format. These treats combine the moist, tender crumb of vanilla cake with the sweet tang of strawberry preserves or frosting, all encased in a smooth, creamy white chocolate coating. Perfect for parties, celebrations, or simply as a sweet indulgence, these cake pops are sure to impress and delight. Their versatility allows for endless customization with various toppings, making them a fun and engaging treat to create and share. Whether you’re a seasoned baker or a novice in the kitchen, this recipe offers a straightforward and rewarding experience, culminating in a batch of irresistible Strawberry Shortcake Cake Pops that capture the essence of summer in every bite.
Questions and Answers About This Recipe
Q1: Can I use a different flavor of cake mix for these cake pops?
A: Absolutely! While vanilla or white cake mix is traditionally used to mimic the “shortcake” element, you can certainly experiment with other flavors. Strawberry cake mix would intensify the strawberry flavor, while lemon or almond cake mix could add a unique twist. Just keep in mind that the flavor profile of the cake pops will change accordingly.
Q2: What if I don’t have cake pop sticks? Can I use something else?
A: If you don’t have cake pop sticks on hand, you can use lollipop sticks or even wooden skewers as a substitute. Just make sure that whatever you use is sturdy enough to support the weight of the cake ball and coating. You could also serve the cake balls without sticks as bite-sized truffles, simply rolling them in your chosen toppings.
Q3: My white chocolate keeps seizing up when I try to melt it. What am I doing wrong?
A: White chocolate is notoriously finicky when it comes to melting. It’s crucial to melt it slowly and gently to prevent it from seizing. Make sure you’re using a microwave-safe bowl and melting the chocolate in short intervals (30 seconds or less), stirring in between each interval. Adding a tablespoon of vegetable oil or shortening can also help to thin the chocolate and prevent it from seizing. If the chocolate does seize, try stirring in a teaspoon of hot water at a time until it smooths out.
Q4: How long will these cake pops stay fresh?
A: Strawberry Shortcake Cake Pops are best enjoyed within 2-3 days of making them. Store them in an airtight container in the refrigerator to keep them fresh. The moisture from the strawberry filling can cause the cake pops to become slightly sticky over time, so it’s best to consume them as soon as possible.
Q5: Can I freeze these cake pops?
A: While you can freeze these cake pops, the texture may change slightly upon thawing. The white chocolate coating can become a bit grainy, and the cake may become slightly drier. If you do choose to freeze them, wrap them individually in plastic wrap and then place them in an airtight container. Thaw them in the refrigerator overnight before serving.