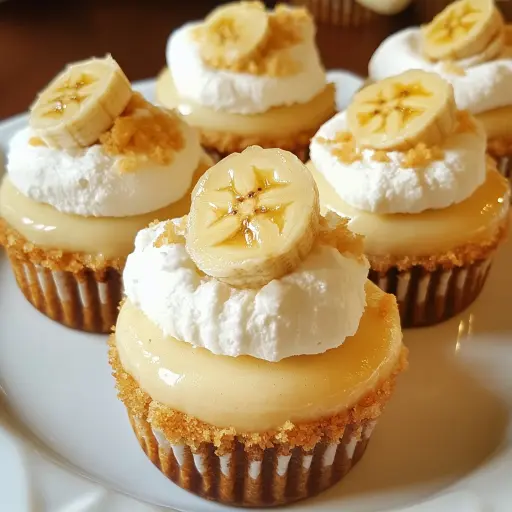
Description: These Mini Banana Pudding Cheesecakes combine the creamy decadence of cheesecake with the comforting flavors of banana pudding. Featuring a buttery graham cracker crust, a smooth banana-infused cheesecake filling, and a delightful whipped cream topping with fresh banana slices, these bite-sized treats are perfect for parties, potlucks, or a simple, satisfying dessert.
Ingredients:
Crust:
- 1 cup graham cracker crumbs
- 3 tablespoons granulated sugar
- 4 tablespoons (1/2 stick) melted unsalted butter
Filling:
- 12 ounces cream cheese, softened to room temperature
- 1/2 cup granulated sugar
- 1 teaspoon pure vanilla extract
- 2 large eggs
- 1/2 cup mashed ripe banana (about 1 medium banana)
- 1/4 cup sour cream
Topping:
- Whipped cream (either homemade or store-bought)
- Sliced fresh bananas
- Crushed vanilla wafers (optional, for added texture and flavor)
Preparation:
Step 1: Preheat and Prep. Preheat your oven to 325°F (163°C). This lower temperature helps to ensure that the cheesecakes bake evenly without cracking. Line a standard 12-cup muffin tin with paper cupcake liners. This will make it easier to remove the cheesecakes once they’re baked and chilled.
Step 2: Make the Crust. In a medium-sized bowl, combine the graham cracker crumbs, granulated sugar, and melted butter. Stir until the mixture is evenly moistened. The mixture should resemble wet sand.
Step 3: Press the Crust into Liners. Scoop about 1 tablespoon of the graham cracker mixture into the bottom of each cupcake liner. Use the bottom of a measuring cup or your fingers to firmly press the crumbs into an even layer. This compacts the crust, preventing it from crumbling too much when you eat the cheesecakes.
Step 4: Bake the Crust (Pre-bake). Place the muffin tin in the preheated oven and bake the crusts for 5 minutes. This short baking time helps to set the crust and add a bit of toasty flavor.
Step 5: Cool the Crust. Remove the muffin tin from the oven and let the crusts cool completely while you prepare the cheesecake filling.
Instructions:
Step 1: Cream the Cheese and Sugar. In a large mixing bowl, beat the softened cream cheese and granulated sugar together using an electric mixer (either a stand mixer or a hand mixer) until the mixture is smooth and creamy. It’s crucial that your cream cheese is properly softened; otherwise, you’ll end up with lumps in your cheesecake filling. Scrape down the sides of the bowl as needed to ensure everything is well combined.
Step 2: Add Vanilla and Eggs. Add the vanilla extract and the eggs, one at a time, beating well after each addition. Be careful not to over-beat the mixture at this stage, as this can incorporate too much air and cause the cheesecakes to puff up and then sink during baking.
Step 3: Incorporate Banana and Sour Cream. Add the mashed ripe banana and sour cream to the mixing bowl. Beat until just combined. Overmixing can lead to a less tender cheesecake. The mashed banana should be smooth; any small lumps will bake into the filling.
Step 4: Fill the Liners. Divide the cheesecake batter evenly among the prepared cupcake liners, filling each about three-quarters full. Using a cookie scoop or a measuring cup can help ensure that each cheesecake is the same size.
Step 5: Bake the Cheesecakes. Place the muffin tin in the preheated oven and bake for 18–20 minutes, or until the centers of the cheesecakes are just set. The edges should be slightly firm, but the centers should still have a slight jiggle.
Step 6: Cool and Chill. Turn off the oven and crack the oven door slightly. Allow the cheesecakes to cool in the oven for about 30 minutes. This gradual cooling helps to prevent cracking. After 30 minutes, remove the cheesecakes from the oven and let them cool completely at room temperature.
Step 7: Chill Completely. Once the cheesecakes are completely cool, cover the muffin tin with plastic wrap and chill in the refrigerator for at least 2 hours, or preferably overnight. This chilling time is essential for the cheesecakes to firm up and develop their characteristic creamy texture.
Step 8: Add Toppings and Serve. Just before serving, top each mini cheesecake with a dollop of whipped cream, a few slices of fresh banana, and a sprinkle of crushed vanilla wafers (if desired). The fresh banana slices are best added just before serving to prevent browning.
Why You Will Love This Recipe:
These Mini Banana Pudding Cheesecakes are a delightful twist on classic desserts, combining the best of both worlds: the rich and creamy texture of cheesecake with the comforting and familiar flavors of banana pudding. The individual serving sizes make them perfect for portion control and easy serving at gatherings. They’re also a crowd-pleaser, appealing to both kids and adults. The combination of a buttery graham cracker crust, smooth banana-infused filling, and fresh toppings creates a symphony of flavors and textures that is both satisfying and irresistible. Plus, the recipe is relatively simple to make, requiring no special equipment and using ingredients that are readily available.
Serving Suggestions:
- For a more decadent dessert, drizzle the cheesecakes with a bit of caramel sauce or chocolate sauce before serving.
- Serve the cheesecakes alongside a scoop of vanilla ice cream or a dollop of Greek yogurt for a more substantial dessert.
- Garnish with chopped nuts, such as pecans or walnuts, for added crunch and flavor.
- These mini cheesecakes are perfect for parties, potlucks, picnics, or any occasion where you need a delicious and portable dessert.
- Serve chilled, directly from the refrigerator, for the best flavor and texture.
- Pair them with coffee, tea, or a glass of cold milk for a delightful treat.
Tips:
- Use very ripe bananas for the sweetest, creamiest texture. The riper the banana, the more intense the flavor and the smoother the mashed banana will be.
- To prevent banana slices from browning, toss them with a squeeze of lemon juice or lime juice before adding them to the cheesecakes.
- Don’t over-bake the cheesecakes, as this can cause them to dry out. They should be just set in the center when you remove them from the oven.
- Chilling the cheesecakes thoroughly is crucial for achieving the right texture. Don’t rush the chilling process.
- If you don’t have vanilla wafers, you can substitute them with other cookies, such as shortbread or gingersnaps.
- For a smoother filling, make sure your cream cheese is completely softened to room temperature before beating it with the sugar.
- To prevent the crust from sticking to the cupcake liners, you can spray the liners with a non-stick cooking spray before pressing in the graham cracker mixture.
- These mini cheesecakes can be made ahead of time and stored in the refrigerator for up to 3 days. Just add the toppings just before serving to prevent them from getting soggy.
Prep Time: 15 minutes
Cook Time: 20 minutes
Chilling Time: 2 hours
Total Time: 2 hours 35 minutes
Nutritional Information:
- Note: Nutritional information is an estimate and can vary based on specific ingredients and brands used.
- Calories: Approximately 215 kcal per mini cheesecake
- Protein: Approximately 4 grams per mini cheesecake
- Sodium: Approximately 150mg per mini cheesecake
Conclusion:
These Mini Banana Pudding Cheesecakes are a delightful and easy-to-make dessert that is sure to impress. With their creamy texture, sweet banana flavor, and buttery graham cracker crust, they are a perfect treat for any occasion. Whether you’re looking for a simple dessert to enjoy at home or a crowd-pleasing treat to bring to a party, these mini cheesecakes are sure to be a hit. So, gather your ingredients, follow the simple steps, and enjoy the deliciousness of these irresistible Mini Banana Pudding Cheesecakes!
Questions and Answers about this Recipe:
Q1: Can I use a different type of crust for these cheesecakes?
A: Absolutely! While the graham cracker crust is a classic choice, you can easily substitute it with other types of cookie crumbs, such as Oreo crumbs (without the filling), shortbread crumbs, or even gingersnap crumbs. Just make sure to adjust the amount of sugar and butter accordingly.
Q2: Can I make these cheesecakes ahead of time?
A: Yes, these mini cheesecakes are perfect for making ahead of time! You can bake them up to 3 days in advance and store them in the refrigerator. However, it’s best to add the toppings (whipped cream, banana slices, and vanilla wafers) just before serving to prevent them from getting soggy.
Q3: Can I freeze these cheesecakes?
A: Yes, you can freeze these mini cheesecakes for longer storage. Wrap them individually in plastic wrap and then place them in a freezer-safe bag or container. They can be frozen for up to 2 months. Thaw them in the refrigerator overnight before serving, and add the toppings just before serving.
Q4: I don’t have sour cream. Can I use something else?
A: Yes, you can substitute the sour cream with plain Greek yogurt. It will provide a similar tanginess and creaminess to the cheesecake filling.
Q5: Can I make these cheesecakes without eggs?
A: It is difficult to make this recipe without eggs. The eggs provide structure and richness to the cheesecake filling. Replacing them requires some experimentation and may alter the final texture.