Description: A classic no-bake cookie that combines creamy peanut butter with sweet vanilla and hearty oats for a delightful treat that requires no oven time! These cookies are quick, easy, and perfect for satisfying your sweet tooth.
Ingredients:
- 1 stick (1/2 cup or 113g) unsalted butter
- 2 cups (400g) granulated sugar
- 1/2 cup (120ml) milk (whole or 2%)
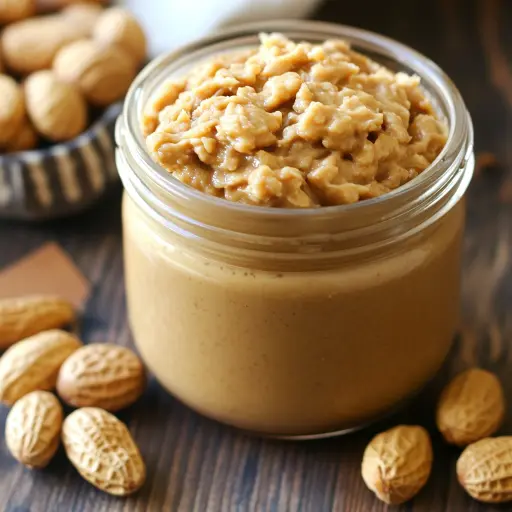
- 1 cup (256g) creamy peanut butter (processed, not natural)
- 2 teaspoons vanilla extract
- 3 cups (240g) quick-cook oats
- 1/4 teaspoon salt
Preparation:
Step 1: Prep the Oats: In a large bowl, combine the 3 cups of quick-cook oats with 1/4 teaspoon of salt. Stir well to ensure the salt is evenly distributed. This step is crucial because it ensures that every bite of the cookie has a balanced flavor. Set the bowl aside.
Step 2: Melt Butter, Sugar, and Milk: In a medium saucepan, place the stick of butter, 2 cups of sugar, and 1/2 cup of milk. Over medium-high heat, whisk these ingredients together continuously. This prevents the sugar from burning and ensures the mixture heats evenly.
Step 3: Bring to a Rolling Boil: Continue whisking the mixture until it comes to a full, rolling boil. A rolling boil is defined by vigorous bubbling that cannot be stirred down. Ensure that the heat is high enough to maintain this vigorous boil.
Step 4: Boil for One Minute: Once the mixture reaches a rolling boil, set a timer for exactly one minute. It is vital to boil for precisely one minute, as this step affects the final texture of the cookies. Boiling for too long can result in hard cookies, while not boiling enough can lead to gooey cookies.
Step 5: Remove from Heat and Add Peanut Butter and Vanilla: Immediately remove the saucepan from the heat. Add 1 cup of creamy peanut butter and 2 teaspoons of vanilla extract to the hot mixture. Whisk vigorously until the peanut butter is completely melted and evenly incorporated. The vanilla enhances the peanut butter flavor, adding depth and warmth to the cookies.
Step 6: Combine Wet and Dry Ingredients: Pour the peanut butter mixture over the oats and salt mixture in the large bowl. Using a spatula or wooden spoon, stir until all the oats are thoroughly coated with the peanut butter mixture. Ensure no dry oats remain at the bottom of the bowl.
Step 7: Form the Cookies: Line a baking sheet with wax paper or parchment paper. This prevents the cookies from sticking and makes cleanup easier. Using a medium cookie scoop or a spoon, drop spoonfuls of the mixture onto the prepared baking sheet.
Step 8: Let Cool Completely: Allow the cookies to cool completely at room temperature. This may take about 30 minutes to an hour. Resist the temptation to refrigerate them immediately, as this can affect their texture. Once cooled, the cookies will firm up and be easy to handle.
Step 9: Storage: After the cookies have cooled completely, transfer them to an airtight container for storage.
Why You Will Love This Recipe:
These Peanut Butter Dream Cookies are a delightful treat for several reasons. First and foremost, they require no baking, making them perfect for hot summer days or when you simply don’t want to turn on the oven. The combination of creamy peanut butter, sweet sugar, and hearty oats creates a satisfying and comforting flavor profile. Plus, they are incredibly easy and quick to make, ideal for a last-minute dessert or a fun activity with kids. The simple ingredient list ensures that you likely have most of the items in your pantry already. These cookies are also highly customizable – you can add chocolate chips, sprinkles, or other mix-ins to make them your own. They offer a perfect balance of sweet and savory, making them a crowd-pleaser for any occasion.
Serving Suggestions:
Serve these Peanut Butter Dream Cookies as a standalone treat with a glass of cold milk or a cup of hot coffee. They make a wonderful addition to a dessert platter for parties or gatherings. You can also crumble them over ice cream or yogurt for a delicious topping. Consider packing them in lunchboxes for a sweet surprise or offering them as a homemade gift. For an extra touch, drizzle melted chocolate over the cooled cookies or sprinkle with sea salt to enhance the flavors.
Tips:
- For the best texture, use processed creamy peanut butter like Jif or Skippy, as natural peanut butter can result in a greasier cookie.
- Ensure that the mixture reaches a full rolling boil before starting the one-minute timer. This step is crucial for achieving the right consistency.
- If the cookies turn out too hard, it means the mixture was boiled for too long. Next time, reduce the boiling time slightly.
- If the cookies are too gooey, it means the mixture wasn’t boiled long enough. Increase the boiling time slightly in your next batch.
- Pulse the oats in a food processor for a finer texture if you prefer a less chunky cookie.
- Get creative with add-ins! Mini marshmallows, chocolate chips, Reese’s Pieces, M&Ms, or a Hershey’s Kiss on top can add extra flavor and visual appeal.
- Store the cooled cookies in an airtight container to maintain their freshness.
- If you live in a humid climate, you may need to adjust the boiling time to prevent the cookies from becoming too soft.
- For a slightly healthier version, you can reduce the sugar by 1/4 cup, but be aware that this may affect the texture.
Prep Time: 10 minutes
Cook Time: 5 minutes
Total Time: 15 minutes (plus cooling time)
Nutritional Information: (per cookie, approximate)
- Calories: 180-220
- Protein: 3-4g
- Sodium: 50-70mg
Conclusion:
Peanut Butter Dream Cookies are more than just a simple no-bake dessert; they’re a nostalgic trip back to childhood kitchens and sweet, carefree moments. Their ease of preparation makes them perfect for beginner bakers and seasoned pros alike, and their customizable nature means you can adapt them to suit your personal tastes. Whether you’re craving a quick treat, need a last-minute dessert for a party, or want to share a homemade gift with loved ones, these cookies are sure to be a hit. So gather your ingredients, grab a saucepan, and get ready to whip up a batch of these irresistible Peanut Butter Dream Cookies! They’re a delightful indulgence that’s guaranteed to bring a smile to your face with every bite.
Questions and Answers About This Recipe:
- Can I use natural peanut butter instead of processed peanut butter? While you can use natural peanut butter, it may affect the texture of the cookies. Natural peanut butter tends to be oilier than processed peanut butter, which can result in a greasier and softer cookie. If you do use natural peanut butter, make sure to stir it very well before measuring to ensure the oil is evenly distributed. You might also consider adding a tablespoon or two of extra oats to help absorb some of the excess oil.
- How long do these cookies last, and what’s the best way to store them? These cookies can last up to a week when stored in an airtight container at room temperature. For longer storage, you can refrigerate them for up to two weeks or freeze them for up to two months. When freezing, make sure to store them in a sealed container or freezer bag to prevent freezer burn. Let them thaw at room temperature before serving.
- Can I make these cookies vegan? Yes, you can make these cookies vegan by substituting the butter with a vegan butter alternative and the milk with a plant-based milk like almond milk, soy milk, or oat milk. Be sure to choose a vegan butter that has a similar fat content to regular butter for the best results.
- What can I do if my cookies turn out too hard? If your cookies are too hard, it likely means that you boiled the sugar mixture for too long. Next time, reduce the boiling time slightly. You can also try adding a small amount of milk (about a tablespoon) to the mixture and stirring well before forming the cookies.
- Can I add other ingredients to these cookies? Absolutely! These cookies are very versatile and can be customized with a variety of add-ins. Popular options include chocolate chips, mini marshmallows, chopped nuts, sprinkles, Reese’s Pieces, M&Ms, or even a drizzle of melted chocolate on top. Feel free to experiment with your favorite flavors and create your own unique version of these cookies.