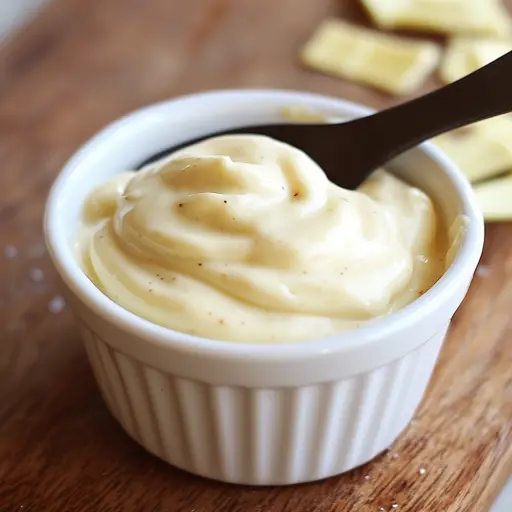
A creamy, delicious, and entirely plant-based mayonnaise that’s perfect for sandwiches, salads, and dips. This recipe uses simple ingredients and comes together in just minutes!
Ingredients:
- 1/2 cup soy milk (unsweetened) or aquafaba (chickpea brine)
- 1/2 cup avocado oil (or light olive oil)
- 1/2 teaspoon granulated sugar
- 1/2 teaspoon sea salt
- 1 tablespoon apple cider vinegar (or white vinegar)
Preparation:
Step 1: Gather Your Ingredients: Ensure all ingredients are measured and ready to go. Having everything prepared beforehand makes the process smoother.
Step 2: Combine Initial Ingredients: In a food processor or using a hand blender in a tall, narrow container, combine the soy milk (or aquafaba), sugar, salt, and vinegar.
Step 3: Slowly Add Oil: With the food processor or blender running, very slowly drizzle in the avocado oil. This gradual addition is crucial for emulsification. Add the oil in a thin, steady stream.
Step 4: Blend Until Creamy: Continue blending until the mixture thickens and transforms into a creamy, mayonnaise-like consistency. This may take a few minutes, so be patient.
Step 5: Check Consistency and Adjust: Once the mayonnaise has reached a thick, creamy state, taste it. If needed, add a tiny pinch more salt or a dash more vinegar to adjust the flavor to your liking.
Step 6: Transfer and Store: Transfer the vegan mayonnaise to a clean jar or airtight container. Store it in the refrigerator.
Why You’ll Love This Recipe:
- Vegan and Allergy-Friendly: Perfect for those with dietary restrictions or allergies, as it’s free from eggs and dairy.
- Quick and Easy: This recipe requires minimal effort and time, making it ideal for busy individuals.
- Delicious Taste: The creamy texture and tangy flavor make it a great substitute for traditional mayonnaise.
- Versatile: Use it in sandwiches, salads, dips, and more!
- Homemade Goodness: Knowing exactly what goes into your mayonnaise is always a plus.
Serving Suggestions:
- Use it as a spread for sandwiches and wraps.
- Mix it into potato salad, coleslaw, or other salads.
- Serve as a dip for fries, vegetables, or vegan nuggets.
- Use as a base for creamy salad dressings.
- Add flavor to burgers and veggie burgers.
Tips:
- Use Cold Ingredients: Ensure your soy milk (or aquafaba) and oil are cold. This helps with emulsification.
- Add Oil Slowly: Adding the oil too quickly can prevent the mayonnaise from thickening properly.
- Adjust Thickness: If your mayonnaise is too thick, add a tiny splash of soy milk or water to thin it out. If it’s too thin, continue blending to see if it thickens further.
- Flavor Variations: Experiment with adding Dijon mustard, garlic powder, or herbs for different flavor profiles.
- Shelf Life: Homemade vegan mayonnaise typically lasts about 5-7 days in the refrigerator.
Preparation Time: 5 minutes
Cook Time: 0 minutes
Total Time: 5 minutes
Nutrition Information (per serving, approximately 1 tablespoon):
- Calories: 70
- Protein: <1g
- Sodium: 80mg
Conclusion:
This Vegan-Friendly Mayonnaise is a game-changer for anyone seeking a plant-based alternative to traditional mayonnaise. It’s easy to make, incredibly versatile, and tastes amazing. Give it a try and elevate your vegan meals!
Questions and Answers:
- Can I use a different type of oil?
- Yes, you can substitute avocado oil with light olive oil or sunflower oil. Avoid using strong-flavored oils like extra virgin olive oil, as they can overpower the taste of the mayonnaise.
- What can I use instead of soy milk?
- Aquafaba (the liquid from a can of chickpeas) is an excellent alternative. It provides a similar texture and emulsifying properties.
- How long does this mayonnaise last in the fridge?
- Homemade vegan mayonnaise typically lasts for about 5-7 days in the refrigerator. Ensure it is stored in an airtight container.
- Can I add other flavors to this recipe?
- Absolutely! Feel free to experiment with adding Dijon mustard, garlic powder, herbs (such as dill or chives), or a pinch of smoked paprika for added flavor.
- Why is it important to add the oil slowly?
- Adding the oil slowly is crucial for proper emulsification. This process allows the oil and liquid to combine and create a stable, creamy texture. Adding the oil too quickly can result in a thin, separated mixture.