Description of this recipe This Condensed Milk Cake is a simple yet exquisite dessert that’s incredibly moist, tender, and infused with a delicate sweetness. It’s a delightful treat that requires minimal effort and showcases the magic of condensed milk in baking. Perfect for tea time, brunch, or a light dessert after dinner, this cake is sure to become a family favorite.
Why you will love this recipe You will absolutely adore this Condensed Milk Cake because of its ease of preparation and incredibly satisfying taste. The condensed milk adds a unique creamy sweetness that sets it apart from traditional cakes. The texture is wonderfully soft and moist, making every bite a genuine pleasure. This recipe is versatile, allowing you to add your own personal touches, such as a lemon zest or a sprinkle of nuts, to customize it to your liking. It’s a guaranteed crowd-pleaser that brings comfort and joy with every slice.
Ingredients:
- 1 1/2 cups all-purpose flour
- 1 tsp baking powder
- 1/2 tsp baking soda
- 1/4 tsp salt
- 1/2 cup unsalted butter, softened
- 1 cup condensed milk
- 1/2 cup granulated sugar
- 1 tsp vanilla extract
- 1/2 cup milk
- 2 large eggs
Preparation: Step 1: Begin by preheating your oven to 350°F (175°C). Ensure that the oven rack is positioned in the center to promote even baking. While the oven is heating, prepare your 9×5 inch loaf pan. Grease the pan generously with butter or cooking spray to prevent the cake from sticking. After greasing, lightly dust the pan with flour, tapping out any excess. This will help the cake release cleanly and maintain its shape.
Step 2: In a medium-sized bowl, prepare the dry ingredients. Measure 1 1/2 cups of all-purpose flour and add it to the bowl. Incorporate 1 teaspoon of baking powder to give the cake a light and airy texture. Add 1/2 teaspoon of baking soda to further enhance the leavening process and ensure a tender crumb. Finally, include 1/4 teaspoon of salt to balance the sweetness and enhance the other flavors. Whisk these dry ingredients together thoroughly until well combined. This ensures that the leavening agents are evenly distributed throughout the flour, resulting in a consistent rise.
Step 3: In a large mixing bowl, begin creaming together the butter and sugar. Ensure that the 1/2 cup of unsalted butter is softened to room temperature before adding it to the bowl. This will make it easier to cream with the 1/2 cup of granulated sugar. Use an electric mixer on medium speed to beat the butter and sugar together until the mixture is light and fluffy. This process usually takes about 3-5 minutes. The mixture should lighten in color and increase in volume, indicating that air has been incorporated. This step is crucial for creating a tender and airy cake.
Step 4: With the butter and sugar creamed, add the 1 cup of condensed milk to the bowl. Continue to beat the mixture with the electric mixer until it is well combined and smooth. The condensed milk will add a rich, creamy sweetness to the batter. Mix in the vanilla extract at this stage.
Step 5: Crack the 2 large eggs into the mixing bowl, adding them one at a time. Beat each egg into the mixture thoroughly before adding the next. This ensures that each egg is fully incorporated, creating a smooth and emulsified batter. Beat for about 1 minute after adding the final egg to ensure everything is well combined.
Step 6: Gradually add the dry ingredients to the wet mixture, alternating with the 1/2 cup of milk. Begin by adding about one-third of the dry ingredients to the bowl and mix on low speed until just combined. Then, add half of the milk and mix until incorporated. Repeat this process, adding another third of the dry ingredients, followed by the remaining milk, and finishing with the last of the dry ingredients. Mix until just combined; be careful not to overmix the batter. Overmixing can develop the gluten in the flour, resulting in a tough cake.
Step 7: Pour the batter into the prepared loaf pan, spreading it evenly with a spatula. Gently tap the pan on the counter a few times to release any trapped air bubbles.
Step 8: Place the loaf pan into the preheated oven and bake for 50-60 minutes, or until a toothpick inserted into the center comes out clean. Begin checking for doneness around the 50-minute mark by inserting a toothpick into the thickest part of the cake. If the toothpick comes out with moist crumbs attached, continue baking for a few more minutes and check again.
Step 9: Once the cake is baked, remove it from the oven and let it cool in the pan for 10 minutes. This allows the cake to firm up slightly, making it easier to transfer to a wire rack. After 10 minutes, carefully invert the cake onto a wire rack to cool completely.
COOKING Rating: 5/5
Serving Suggestions: This Condensed Milk Cake is incredibly versatile and can be served in a variety of ways:
- Enjoy it as is with a cup of tea or coffee for a simple yet satisfying treat.
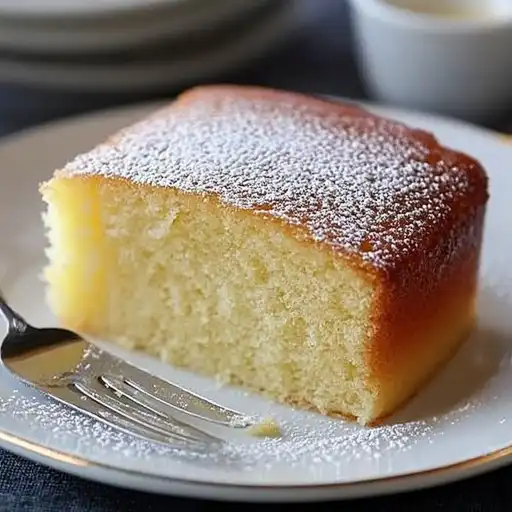
- Dust it with powdered sugar for an elegant touch.
- Serve slices with fresh berries and whipped cream for a more decadent dessert.
- Toast slices lightly and spread with butter or jam for a delightful breakfast option.
- Drizzle with a homemade glaze, such as a lemon or vanilla glaze, for added flavor and moisture.
Tips:
- Ensure all ingredients are at room temperature for optimal mixing and a smoother batter.
- Avoid overmixing the batter to prevent a tough cake. Mix until just combined.
- Check for doneness with a toothpick; the cake is ready when it comes out clean.
- Let the cake cool completely before slicing to maintain its shape.
- Store the cake in an airtight container at room temperature to maintain its moisture.
- Adding lemon zest to the batter enhances the flavor.
- Mix nuts to the batter for added texture.
Prep Time: 15 minutes Cook Time: 50-60 minutes Total Time: 1 hour 5 minutes – 1 hour 15 minutes
Nutritional Information: (Note: Nutritional information is approximate and can vary based on specific ingredients and serving size.) Calories: Approximately 250-300 per slice Protein: 4-5 grams per slice Sodium: 150-200mg per slice
Conclusion The Condensed Milk Cake is a testament to the fact that simple ingredients, when combined with care, can create extraordinary results. This cake is a perfect example of how a few basic steps can lead to a wonderfully moist, tender, and flavorful dessert. Whether you’re an experienced baker or a beginner, this recipe is easy to follow and yields a consistently delicious outcome. From its velvety texture to its subtle sweetness, every slice of this cake is a delightful experience. So, gather your ingredients, preheat your oven, and get ready to create a cake that will impress your family and friends. Enjoy the process and savor every bite of this homemade goodness!
5 Questions and Answers About This Recipe
Q1: Can I use a different type of milk other than regular milk? A1: Yes, you can substitute regular milk with other types of milk, such as almond milk, soy milk, or oat milk, depending on your dietary preferences or restrictions. Keep in mind that the flavor and texture of the cake may vary slightly.
Q2: Can I add any additional flavors to the cake? A2: Absolutely! This recipe is incredibly versatile, and you can easily add additional flavors to customize it to your liking. Some popular additions include lemon zest, orange zest, almond extract, or a pinch of cinnamon. Fold these ingredients into the batter before baking for a subtle yet delightful flavor enhancement.
Q3: How do I prevent the cake from sticking to the pan? A3: To ensure the cake releases cleanly from the pan, it’s important to grease and flour the pan thoroughly. Use butter or cooking spray to grease the pan, making sure to cover all surfaces. Then, dust the pan with flour, tapping out any excess. This creates a barrier between the batter and the pan, preventing the cake from sticking.
Q4: Can I make this cake ahead of time? A4: Yes, this cake can be made ahead of time. Once the cake has cooled completely, wrap it tightly in plastic wrap or store it in an airtight container. It can be stored at room temperature for up to 2-3 days. The flavors will meld together over time, making it even more delicious the next day.
Q5: What can I do if my cake is browning too quickly in the oven? A5: If you notice that the cake is browning too quickly on top, you can tent it with aluminum foil. Simply loosely cover the top of the cake with a sheet of aluminum foil to shield it from the direct heat. This will help to slow down the browning process and ensure that the cake bakes evenly throughout.