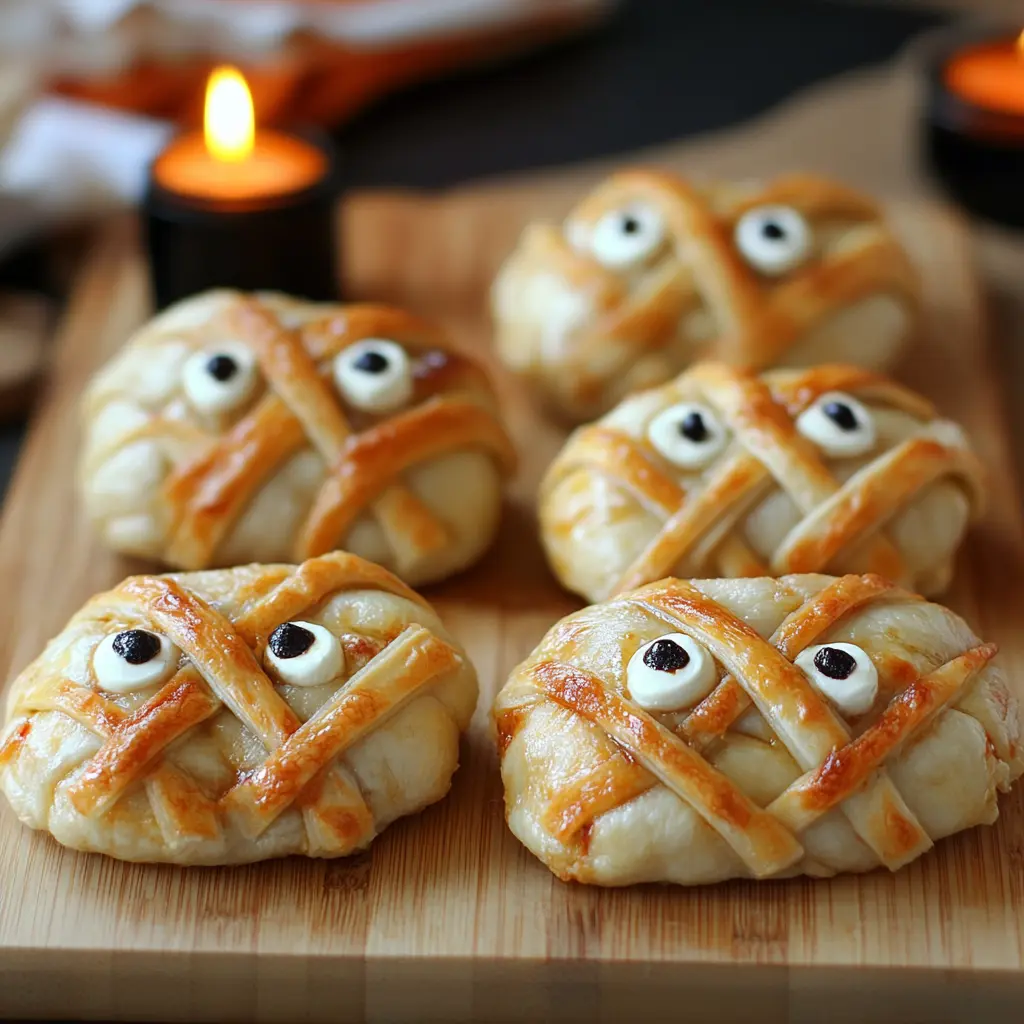
Baked Cheese Mummies are a whimsical and delightful treat that brings a touch of Halloween magic to your table. These bite-sized snacks, featuring creamy melted Babybel® cheese wrapped in golden, flaky puff pastry, are perfect for a spooky gathering or a fun family meal. With their charming “mummy” appearance and sweet honey drizzle, they will not only please the palate but also spark joy and creativity.
Why You Will Love This Recipe
This recipe is incredibly easy to make, making it a fabulous choice for both novice and experienced bakers. It combines the rich flavors of baby cheese and honey, harmoniously encased in light and airy puff pastry. Additionally, the adorable candy eyes bring a playful aesthetic that’s sure to entertain guests at any festive gathering. Whether you are planning a Halloween party or simply want to impress your family with a fun snack, these Baked Cheese Mummies tick all the boxes!
Introduction
When it comes to festive gatherings, creativity in presentation often steals the show. Halloween is no exception; it’s a time when the fun and spooky collide. Baked Cheese Mummies take the traditional cheese pastry to a whole new level. Not only do these mummies look fantastic, they also offer an irresistible combination of flavors that will keep you coming back for seconds.
Full of melted cheese goodness, these mummies are easy to customize according to your taste. You can switch up the jam or honey for savory dips or serve them alongside a fresh salad for a balanced meal. Today, let’s dive into the step-by-step process that will leave you with a plateful of these cheesy delights—perfectly themed for Halloween or any occasion that calls for a dash of creativity!
Ingredients:
- 2 sheets of thawed puff pastry
- 14 Mini Babybel® cheeses (wax removed)
- 1/3 cup honey or your favorite jam
- Egg wash: 1 egg beaten with 1 teaspoon water
- 28 candy eyes or mini chocolate chips
Preparation:
Step 1: Preheat your oven to 400°F (200°C). Prepare a baking sheet by lining it with parchment paper to prevent sticking.
Step 2: On a clean and floured surface, roll out the thawed puff pastry sheets into rough 11-inch squares. There’s no need to measure precisely; estimating works just fine. Using a sharp knife or pastry cutter, cut each sheet into 9 squares— saving 4 of these for the “bandages.”
Step 3: Drizzle honey (or your favorite jam) on top of each Babybel® cheese. Place the cheeses, with the honey side down, onto the center of the pastry squares. Use the knife or pastry cutter to trim around the edges, ensuring you make a circular shape around the cheese.
Step 4: Carefully fold the edges of the pastry over the Babybel® cheese, making little packages. Gently press the edges together to create a seal. Place the assembled mummies, seam side down, on the prepared parchment-lined baking sheet.
Step 5: From the reserved 4 squares of puff pastry, cut around 12 strips to be used as the mummy’s bandages. Wrap the strips around each cheese parcel, stretching them slightly as you go to create a visually appealing design.
Final Step: Brush the exterior of the mummies generously with the egg wash for a lovely golden color during baking. Place them in the preheated oven and bake for 15-20 minutes, or until the pastry is golden brown and the cheese is wonderfully melted. Once out of the oven, decorate with candy eyes or mini chocolate chips, and serve warm!
Cooking Notes:
These mummies can be assembled and kept refrigerated for up to a day before baking. Just remember to brush them with egg wash just before they’ve been placed in the oven.
Suggestions for Presentation:
For additional fun, serve your Baked Cheese Mummies on a platter garnished with fresh herbs or seasonal fruits that complement the sweet and savory profile. You might also consider laying them in a festive manner, perhaps on a spiderweb-themed tablecloth or adding small decorative pumpkins to complete the Halloween aesthetic.
Tips:
- Experiment with different cheese varieties for varied flavors—sharp cheddar can provide a nice twist.
- Pair with a dipping sauce like marinara or a spicy aioli for an elevated taste experience.
- To achieve maximum crispiness, avoid overcrowding the baking sheet while placing the mummies.
- If you’re feeling extra creative, use small strips of green bell peppers to add some green “grass” around the mummies for a fun look.
- Adjust the sweetness of the honey or jam according to your preference; some may prefer a less sweet bite.
Preparation Time: 15 minutes
Cooking Time: 20 minutes
Total Time: 35 minutes
Nutritional Information (per serving):
- Calories: 135
- Protein: 5g
- Sodium: 220mg
Conclusion
Baked Cheese Mummies are a surefire way to bring excitement and flavor to your next gathering. Not only do these delightful treats look impressive, but they are also surprisingly simple to prepare, making them the perfect choice for both casual snacking and festive occasions. Enjoy the laughter and joy they bring, along with the delicious taste of gooey cheese.
Questions and Answers:
- Can I use different types of cheese for this recipe?
Absolutely! Cheddar, gouda, or mozzarella are all wonderful alternatives for this recipe. - How can I make these mummies spicier?
Adding a bit of jalapeño jelly or spicy mustard along with the cheese can provide a nice kick. - Can these be made ahead of time?
Yes, you can assemble the mummies a day in advance and keep them refrigerated until you’re ready to bake. - What can I serve with these mummies?
They pair beautifully with marinara sauce, creamy ranch, or even a light salad for dipping. - How can I store leftovers?
Store any leftover mummies in an airtight container in the refrigerator for up to two days. Reheat in the oven for a few minutes to restore crispiness.
Enjoy creating your own spooky masterpiece!

