Description of this recipe
This American 17th Century Gingerbread recipe is a delightful journey back in time, offering a taste of what life was like in early colonial America. It’s a dense, moist cake, richly spiced and sweetened with molasses, reminiscent of the simple, hearty fare enjoyed by settlers of the 1600s. Unlike modern gingerbread cookies, this version is a soft, cake-like creation, perfect for enjoying with a cup of tea or coffee on a crisp autumn day. It’s a historical treat that brings warmth and a touch of nostalgia to your kitchen.
Why you will love this recipe
This gingerbread is more than just a dessert; it’s a piece of history on a plate. You’ll love its deep, complex flavors derived from molasses and a blend of warm spices like ginger, cinnamon, allspice, and nutmeg. The texture is wonderfully moist and dense, making it a satisfying treat. It’s incredibly easy to make with straightforward steps, and the aroma that fills your home while baking is simply divine. Plus, it’s a unique conversation starter, perfect for impressing guests with your culinary knowledge and baking prowess. It offers a wonderful alternative to more common desserts, providing a distinct, old-fashioned taste that is both comforting and intriguing. It’s a great way to connect with culinary traditions of the past and bring a bit of historical charm to your table.
Ingredients:
- 1 tsp baking soda
- 1 cup whole milk
- 1 cup molasses (can also use honey or treacle)
- 2 eggs
- ½ cup (1 stick) butter, room temperature
- ½ cup sugar
- 2 cups flour
- 1 ½ tsp ground ginger
- 1 tsp ground cinnamon
- ⅛ tsp ground allspice
- ⅛ tsp ground nutmeg
Preparation:
Step 1: Preheat the oven to 375°F (190°C). This initial step is crucial for ensuring that the gingerbread bakes evenly and rises properly. A preheated oven provides a consistent temperature environment, essential for the chemical reactions that cause the cake to expand and set. If the oven isn’t hot enough initially, the gingerbread might not rise adequately and could result in a dense, undercooked center. Therefore, always make sure your oven reaches the specified temperature before placing the baking pan inside.
Step 2: Grease an 8 or 9 inch square baking pan with soft butter and set aside. This is a simple yet vital step to prevent the gingerbread from sticking to the pan. Butter not only provides a non-stick surface but also adds a subtle richness to the edges of the cake, creating a slightly caramelized crust. Ensure that you evenly coat the entire surface and corners of the pan to make removing the gingerbread after baking as easy as possible.
Step 3: In a small saucepan, warm the milk until almost boiling. Warming the milk helps to activate the baking soda more effectively, which in turn contributes to the gingerbread’s light and airy texture. The heat assists in dissolving the baking soda fully, enabling it to react with the molasses and create air bubbles within the batter. Be careful not to boil the milk, as scalding can alter its flavor and potentially impact the final taste of the gingerbread.
Step 4: Pour the warm milk into a cup and add the baking soda. Stir and set aside. This reaction is a key element of the recipe. The warm milk activates the baking soda, causing it to fizz and release carbon dioxide. This process introduces air into the batter, contributing to the cake’s overall lightness and rise. The mixture will bubble up, so make sure to use a large enough cup to prevent it from overflowing. Setting it aside allows the reaction to fully develop before incorporating it into the rest of the ingredients.
Step 5: In a large bowl, whisk the molasses and eggs together. This step is about combining the wet ingredients to create a smooth base for the batter. Molasses adds a deep, rich flavor and a characteristic moistness to the gingerbread, while the eggs provide structure and help bind the ingredients together. Whisking them together ensures that the molasses is evenly distributed and that the eggs are fully incorporated, resulting in a uniform batter consistency.
Step 6: Add in the butter (you want super soft butter – not quite melted but almost). It will be lumpy, that’s ok. Soft butter is essential for creating a tender crumb in the gingerbread. It allows the butter to cream properly with the sugar, incorporating air into the batter and contributing to its light texture. The mixture might appear slightly lumpy at this stage, but that’s perfectly normal and won’t affect the final outcome.
Step 7: Whisk in the sugar, the flour, and the spices and whisk until smooth and thick. This is where the dry and wet ingredients come together to form the gingerbread batter. The sugar adds sweetness and helps to tenderize the cake, while the flour provides structure and substance. The spices – ginger, cinnamon, allspice, and nutmeg – are what give this gingerbread its signature warm, aromatic flavor. Whisking until smooth ensures that all the ingredients are evenly distributed and that there are no lumps of flour remaining, resulting in a consistent batter texture.
Step 8: Carefully pour in the warm milk and stir until combined. Adding the warm milk mixture to the batter is the final step in creating the gingerbread batter. The warm milk helps to relax the gluten in the flour, resulting in a more tender cake. Stir gently until just combined to avoid overmixing, which can lead to a tough texture. The batter should be smooth and slightly runny at this point.
Step 9: Pour into the baking pan and bake for 30-35 minutes, or until a toothpick inserted comes out clean. This is the most crucial step in the baking process. The baking time may vary depending on your oven, so it’s important to keep a close eye on the gingerbread. The toothpick test is the best way to determine when the gingerbread is done. If the toothpick comes out clean with just a few moist crumbs attached, the gingerbread is ready. If it comes out wet with batter, continue baking for a few more minutes and test again.
Step 10: Allow to cool on a wire rack in the pan for 20 minutes. Cooling the gingerbread in the pan allows it to firm up and makes it easier to cut and serve. Placing the pan on a wire rack allows air to circulate around the gingerbread, preventing the bottom from becoming soggy. Waiting for 20 minutes before cutting ensures that the gingerbread holds its shape and doesn’t crumble.
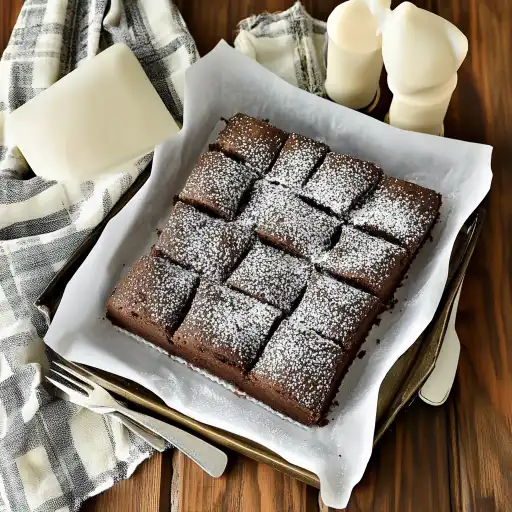
Step 11: Cut into pieces and enjoy! Finally, the moment you’ve been waiting for – it’s time to enjoy your homemade American 17th Century Gingerbread. Cut it into squares or rectangles, and serve it warm or at room temperature. This gingerbread is delicious on its own, but it can also be served with a dollop of whipped cream, a scoop of vanilla ice cream, or a drizzle of maple syrup for an extra touch of indulgence.
COOKING Rating:
Easy
Serving Suggestions:
- Serve warm with a dollop of whipped cream or vanilla ice cream.
- Enjoy with a cup of hot tea or coffee.
- Drizzle with maple syrup or honey for added sweetness.
- Dust with powdered sugar for an elegant presentation.
- Pair with a scoop of spiced applesauce for a complementary flavor.
Tips:
- Use high-quality molasses for the best flavor.
- Make sure your butter is softened to room temperature for easy mixing.
- Don’t overmix the batter, as this can result in a tough gingerbread.
- Keep a close eye on the gingerbread while baking to prevent it from burning.
- Store leftover gingerbread in an airtight container at room temperature for up to 3 days.
Prep Time:
15 minutes
Cook Time:
30-35 minutes
Total Time:
45-50 minutes
Nutritional Information:
(Note: Nutritional information is approximate and may vary based on specific ingredients and serving size.)
Calories:
Approximately 250-300 per serving
Protein:
Approximately 3-4 grams per serving
Sodium:
Approximately 150-200mg per serving
Conclusion
This American 17th Century Gingerbread recipe is a delightful way to experience a taste of history. Its rich, spiced flavor and moist, dense texture make it a comforting and satisfying treat, perfect for any occasion. Whether you’re a seasoned baker or a novice in the kitchen, this recipe is easy to follow and yields delicious results. So, gather your ingredients, preheat your oven, and get ready to transport yourself back in time with this classic American dessert. Enjoy the warmth, the aroma, and the historical charm of this delightful gingerbread.
5 Questions and Answers about this recipe
Q1: Can I substitute honey or treacle for molasses in this recipe?
A: Yes, you can! Molasses provides a distinctive flavor and moisture to the gingerbread, but honey or treacle can be used as substitutes. Honey will impart a slightly floral sweetness, while treacle offers a darker, more robust flavor similar to molasses. Keep in mind that the color and overall taste of the gingerbread will be slightly different depending on the substitute you choose, but it will still be delicious.
Q2: How can I prevent my gingerbread from becoming dry?
A: To ensure your gingerbread remains moist, avoid overbaking it. Use the toothpick test – insert a toothpick into the center of the gingerbread, and if it comes out clean with just a few moist crumbs attached, it’s ready. Overbaking can dry out the cake, so it’s best to err on the side of slightly underbaked rather than overbaked. Additionally, make sure to store any leftover gingerbread in an airtight container to prevent it from drying out.
Q3: Can I add other spices to this gingerbread recipe?
A: Absolutely! Feel free to customize the spice blend to your liking. You can add a pinch of ground cloves, cardamom, or even a dash of black pepper for an extra kick. Experiment with different combinations to create your own signature gingerbread flavor. Just remember to adjust the quantities to ensure that the flavors are balanced and don’t overpower the other ingredients.
Q4: Is it possible to make this recipe gluten-free?
A: Yes, you can adapt this recipe to be gluten-free by using a gluten-free flour blend. Look for a blend that is designed for baking and contains a mix of flours like rice flour, tapioca starch, and potato starch. Keep in mind that gluten-free flours can sometimes result in a slightly different texture, so you may need to experiment with the amount of liquid to achieve the desired consistency. Also, be sure to check that all your other ingredients, such as baking soda and spices, are certified gluten-free.
Q5: How long does this gingerbread last, and how should I store it?
A: This gingerbread will stay fresh for up to 3 days when stored properly. To store it, wrap it tightly in plastic wrap or place it in an airtight container at room temperature. Avoid storing it in the refrigerator, as this can dry it out. If you want to extend its shelf life, you can freeze the gingerbread. Wrap it tightly in plastic wrap and then place it in a freezer bag. It can be frozen for up to 2-3 months. Thaw it overnight in the refrigerator before serving.