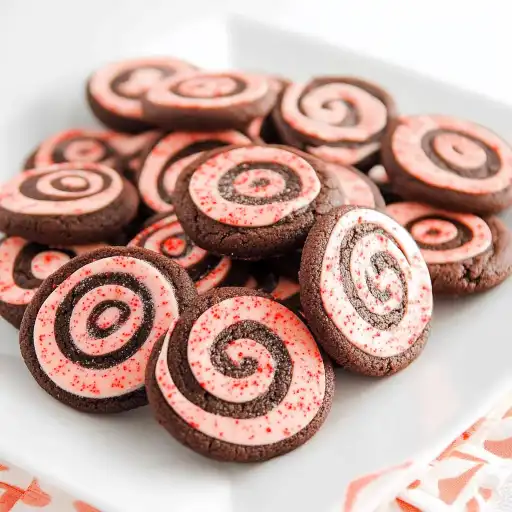
Description of this recipe: These Chocolate Peppermint Swirl Cookies are a festive and delicious treat perfect for the holiday season. The combination of rich chocolate and refreshing peppermint creates a delightful flavor experience. The swirl design adds a touch of elegance and visual appeal, making these cookies a standout addition to any cookie platter.
Why you will love this recipe: These cookies offer the perfect balance of flavors and textures. The slightly crisp edges give way to a soft, chewy center. The chocolate dough is deep and decadent, while the peppermint dough provides a bright and invigorating contrast. The swirling pattern is not only beautiful but also ensures that each bite contains a harmonious blend of both flavors. They’re easy to make and even easier to devour! Plus, the recipe is versatile, allowing you to experiment with different colors and extracts to create your own unique variations.
Ingredients:
For the Chocolate Dough:
- 270 g (2 cups + 2 Tablespoons) all-purpose flour
- 45 g cocoa powder
- ½ teaspoon baking powder
- ¼ teaspoon kosher salt
- 140 g (1 ¼ sticks) butter, room temperature
- 150 g (¾ cup) granulated sugar
- 1 large egg
- 30 g (2 tablespoons) milk
For the Peppermint Dough:
- 270 g (2 cups + 2 Tablespoons) all-purpose flour
- ¼ teaspoon salt
- 226 g (2 sticks) butter, room temperature
- 100 g (½ cup) granulated sugar
- 1 large egg yolk
- 1 ½ teaspoons peppermint extract
- 10 drops red food coloring
Preparation:
Step 1: Make the Chocolate Dough:
In a medium bowl, whisk together the all-purpose flour, cocoa powder, baking powder, and kosher salt. This ensures that all the dry ingredients are evenly distributed, which is crucial for consistent baking. Set the bowl aside.
Step 2:
In the bowl of a stand mixer fitted with the paddle attachment, cream together the butter and sugar until light and fluffy. This process usually takes about 3-5 minutes on medium speed. The mixture should become noticeably lighter in color and texture as the sugar incorporates air into the butter. Scrape down the sides of the bowl as needed to ensure even mixing.
Step 3:
Add the egg to the creamed butter and sugar mixture and beat until well combined. Make sure the egg is fully incorporated to prevent any separation in the dough.
Step 4:
Gradually add the dry ingredients to the wet ingredients on low speed, alternating with the milk. Begin and end with the flour mixture. Add the flour in three additions, and the milk in two. This method prevents the dough from becoming overworked, which can lead to tough cookies. Mix only until the dough just comes together. Be careful not to overmix.
Step 5:
Divide the chocolate dough into two equal portions. Flatten each portion slightly into a disc shape. Wrap each disc tightly in plastic wrap. This prevents the dough from drying out and makes it easier to roll later. Chill the wrapped dough in the refrigerator while you prepare the peppermint dough. At this point, the dough can be refrigerated for up to 4 days or frozen for up to 2 months. If freezing, wrap the dough tightly in a double layer of plastic wrap and then in a freezer-safe bag.
Make the Peppermint Dough:
Step 1:
In a medium bowl, whisk together the all-purpose flour and salt. Set aside.
Step 2:
In the bowl of a stand mixer fitted with the paddle attachment, cream together the butter and sugar until light and fluffy. This process typically takes about 3-5 minutes on medium speed. The mixture should be noticeably lighter in color and texture.
Step 3:
Add the egg yolk to the creamed butter and sugar mixture and beat until well combined. The egg yolk adds richness and tenderness to the peppermint dough.
Step 4:
Add the peppermint extract and red food coloring to the mixture. Mix until the color is evenly distributed. You can adjust the amount of food coloring to achieve your desired shade of red.
Step 5:
Reduce the mixer speed to low and gradually add the flour mixture, one large spoonful at a time. Add the next spoonful when the first is almost incorporated. This prevents the dough from becoming overworked. Mix only until combined.
Step 6:
Divide the peppermint dough into two equal portions. Flatten each portion slightly into a disc shape. Wrap each disc tightly in plastic wrap. Chill the wrapped dough in the refrigerator while you roll out the chocolate dough. At this point, the dough can be refrigerated for up to 4 days or frozen for up to 2 months.
Assembly and Baking:
Step 1:
On a lightly floured surface, roll out each portion of the chocolate dough into a rectangle approximately 1/8 inch thick. The thinner the dough, the more defined the swirl will be. Transfer the rolled-out dough to a parchment-lined baking sheet and chill in the refrigerator for at least 1 hour or overnight. Chilling the dough prevents it from spreading too much during baking.
Step 2:
Repeat the rolling process with each portion of the peppermint dough, rolling it out to the same thickness as the chocolate dough. Transfer the rolled-out dough to a parchment-lined baking sheet and chill in the refrigerator for at least 1 hour or overnight.
Step 3: To make a Swirl:
Trim the dough into two rectangles of similar size. Save the scraps for making marble cookies. Temper the dough for about 10 minutes at room temperature or until it is flexible. Orient the chocolate dough so the long side is closest to you and the edge of the counter. Place the peppermint dough on top of the chocolate dough, leaving about 1/8 inch overhang of the chocolate dough at the bottom edge.
Step 4:
Begin to roll the chocolate dough over the peppermint dough, rolling away from you. Use the parchment paper to guide the dough and prevent cracking. Roll the dough tightly to create a compact swirl.
Step 5:
Once you have rolled the dough into a log, close the roll tightly and refrigerate overnight. This allows the flavors to meld and the dough to firm up, making it easier to slice.
Step 6: To make a Marble:
Combine all the scraps from the swirls and gently knead them together until they are marbled. Roll the marbled dough into a log in parchment paper. Refrigerate overnight.
Step 7:
Preheat your oven to 350°F (175°C).
Step 8:
Slice the logs into ¼ inch thick slices using a sharp knife. Place the slices 1 inch apart on parchment-lined baking sheets.
Step 9:
Bake in the preheated oven for 5-7 minutes, or until the edges of the cookies begin to brown and the centers are matte. Be careful not to overbake, as this can make the cookies dry.
Step 10:
Remove the baking sheets from the oven and let the cookies cool on the sheets for a few minutes before transferring them to a wire rack to cool completely.
COOKING Rating: 4/5 (Intermediate)
Serving Suggestions: These cookies are perfect on their own with a glass of milk or a cup of hot cocoa. They also make a beautiful addition to a holiday cookie platter. You can also crumble them over ice cream or use them as a topping for cheesecakes.
Tips:
- Make sure your butter is at room temperature for easy creaming.
- Chill the dough thoroughly before rolling and baking to prevent spreading.
- Don’t overmix the dough; mix only until the ingredients are combined.
- For a more intense peppermint flavor, add a few drops of peppermint oil to the peppermint dough.
- If you don’t have red food coloring, you can use beet juice for a natural alternative.
- Store the baked cookies in an airtight container at room temperature for up to 5 days.
Prep Time: 45 minutes (plus chilling time) Cook Time: 7 minutes Total Time: 52 minutes (plus chilling time)
Nutritional Information (per cookie): (Note: Nutritional information is approximate and may vary based on specific ingredients and portion sizes.)
- Calories: 150
- Protein: 2g
- Sodium: 50mg
Conclusion:
These Chocolate Peppermint Swirl Cookies are a delightful treat that captures the essence of the holiday season. The combination of rich chocolate and refreshing peppermint is a match made in heaven. The swirling design adds a touch of elegance, making these cookies a perfect addition to any festive gathering. Whether you’re baking for a holiday party, a family gathering, or simply to enjoy a delicious homemade treat, these cookies are sure to impress. So gather your ingredients, put on your favorite holiday music, and get ready to create some delicious and beautiful cookies that will bring joy to everyone who tastes them. Enjoy the process, and happy baking!
Questions and Answers about this Recipe:
Q1: Can I use a different type of flour?
A: While all-purpose flour is recommended for its consistent results, you can experiment with other types of flour. Pastry flour will result in a more tender cookie, while bread flour will give the cookies a slightly chewier texture. Keep in mind that different flours may absorb liquid differently, so you may need to adjust the amount of liquid in the recipe.
Q2: Can I make these cookies without food coloring?
A: Absolutely! The red food coloring is primarily for aesthetic purposes. If you prefer not to use it, you can omit it altogether, and the peppermint dough will be a pale, creamy color. You can also use natural food coloring alternatives, such as beet juice or pomegranate juice, to achieve a reddish tint, although the color may not be as vibrant.
Q3: How do I prevent the cookies from spreading too much during baking?
A: There are several factors that can contribute to cookies spreading too much. Make sure your butter is cold and that you chill the dough thoroughly before rolling and baking. Overmixing the dough can also cause the cookies to spread, so be careful not to overmix. Baking the cookies on a parchment-lined baking sheet can also help prevent spreading.
Q4: Can I freeze the baked cookies?
A: Yes, you can freeze the baked cookies. Allow them to cool completely, then store them in an airtight container or freezer-safe bag. They can be frozen for up to 2 months. When you’re ready to serve them, thaw them at room temperature for a few hours.
Q5: What can I do with the leftover dough scraps?
A: The leftover dough scraps can be combined and rolled into a log to make marble cookies, as described in the recipe. You can also use them to make mini cookies or simply bake them as is for a rustic, homemade treat. Get creative and have fun with it! You can even add chocolate chips or nuts to the scraps for extra flavor and texture.