Description of this recipe
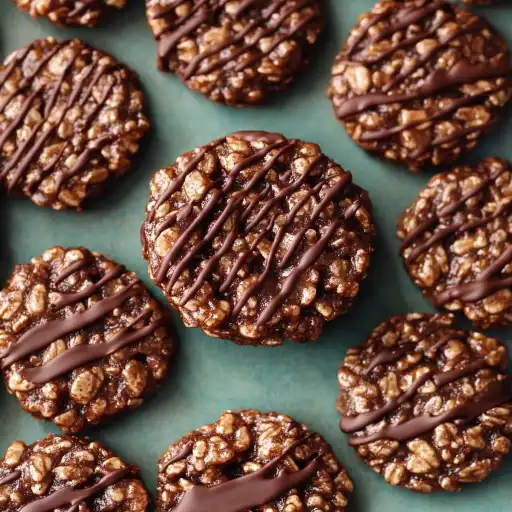
These Chocolate No-Bake Rice Krispie Cookies are a delightful treat that requires no baking, making them perfect for a quick dessert, a fun activity with kids, or when you simply don’t want to turn on the oven. These cookies combine the satisfying crunch of Rice Krispies with the rich flavors of chocolate and peanut butter, all sweetened with maple syrup and enhanced with a hint of vanilla. They are incredibly easy to make and customize, ensuring a delightful experience for everyone involved.
Why you will love this recipe
You will absolutely fall in love with these no-bake cookies for several reasons. First and foremost, the simplicity of the recipe is a huge win. You don’t need any special baking skills or equipment, just a few basic ingredients and a stovetop or microwave. The no-bake aspect makes it an ideal recipe for hot summer days when you want a sweet treat without heating up your kitchen.
The combination of flavors is also incredibly appealing. The chocolate and peanut butter create a classic, irresistible pairing, while the maple syrup adds a unique sweetness that complements the other ingredients beautifully. The Rice Krispies provide a satisfying crunch that keeps you coming back for more.
These cookies are also highly customizable. You can easily add other ingredients like mini marshmallows or white chocolate chips to tailor the recipe to your personal preferences. They are perfect for satisfying your sweet tooth, sharing with friends and family, or bringing to a potluck or gathering. Kids love making and eating them, making it a great family activity.
Ingredients:
- 4 cups crispy rice cereal (100g)
- 1 ½ cups chocolate chips (262g)
- 1 cup peanut butter (240g)
- ¼ cup unsalted butter, softened or melted (56g)
- ½ cup maple syrup (120g)
- 1 teaspoon vanilla extract
- Dash of salt
- Optional: 1 cup mini marshmallows or ½ cup white chocolate chips
Preparation:
Step 1: Start by preparing your workspace. Line a baking sheet with parchment or wax paper. This will prevent the cookies from sticking and make cleanup a breeze. Set the baking sheet aside, keeping it within easy reach.
Step 2: Next, melt the chocolate. You can use a double boiler or a microwave for this step. If using a double boiler, fill a saucepan with a few inches of water and bring it to a gentle simmer. Place a heatproof bowl over the saucepan, ensuring that the bottom of the bowl does not touch the water. Add the chocolate chips to the bowl and stir constantly until they are melted and smooth. If using a microwave, place the chocolate chips in a microwave-safe bowl and heat in 30-second intervals, stirring in between, until melted and smooth.
Step 3: Once the chocolate is melted, add the peanut butter to the melted chocolate and mix until smooth. Ensure that the peanut butter is fully incorporated into the chocolate, creating a homogenous mixture. This combination forms the base of the cookie’s rich flavor profile.
Step 4: Incorporate the remaining wet ingredients. Add the butter, maple syrup, vanilla extract, and a dash of salt to the chocolate-peanut butter mixture. Mix all the ingredients until well combined. The butter adds richness, the maple syrup provides sweetness, the vanilla extract enhances the flavor, and the salt balances the sweetness.
Step 5: Combine the wet and dry ingredients. In a large mixing bowl, pour the chocolate mixture over the Rice Krispies cereal. Gently fold the cereal into the chocolate mixture until it is fully coated. Be careful not to crush the cereal, as you want to maintain its crispy texture. If you’re adding any optional mix-ins like mini marshmallows or white chocolate chips, fold them in at this point as well.
Step 6: Shape the cookies. Use a spoon or a medium-sized cookie scoop to drop portions of the mixture onto the prepared baking sheet. Press each portion down with your hand or the back of a spoon to form cookie-shaped disks, smoothing out the edges as needed. Aim for uniform size and shape for a neat appearance.
Step 7: Optional Chocolate Drizzle: If you desire an extra touch of chocolate, melt an additional half cup of chocolate chips in a glass bowl in the microwave. Heat in 30-second intervals, stirring between each interval, until the chocolate is smooth and melted. Transfer the melted chocolate to a squeeze bottle or use a spoon to drizzle it over the cookies.
Step 8: Let the cookies set. Allow the cookies to sit at room temperature until they are firm, which should take about 30 minutes to an hour. If you want to speed up the process, you can place the baking sheet in the refrigerator for about 15-20 minutes.
Step 9: Once the cookies are firm, they are ready to enjoy. Store them in an airtight container at room temperature for up to three days or in the refrigerator for up to a week.
COOKING Rating:
Easy
Serving Suggestions:
These Chocolate No-Bake Rice Krispie Cookies are incredibly versatile and can be enjoyed in numerous ways. Here are a few serving suggestions:
- As a Snack: Perfect for a quick and satisfying snack any time of day.
- Dessert: Serve them as a simple yet delightful dessert after a meal.
- Party Treat: Ideal for parties, potlucks, and gatherings.
- Lunchbox Treat: Pack them in lunchboxes for a special treat.
- With a Beverage: Enjoy them with a glass of milk, a cup of coffee, or a scoop of ice cream.
- Gift Giving: Package them in decorative boxes or bags for a homemade gift.
Tips:
- Use Fresh Ingredients: Ensure your ingredients are fresh for the best flavor and texture.
- Melt Chocolate Carefully: Be careful not to burn the chocolate when melting it. Use low heat and stir frequently.
- Customize with Mix-Ins: Get creative with mix-ins like chopped nuts, dried fruits, or different types of chocolate chips.
- Store Properly: Store the cookies in an airtight container to maintain their freshness and prevent them from becoming sticky.
- Adjust Sweetness: Adjust the amount of maple syrup to suit your sweetness preference.
- Peanut Butter Substitute: If you have peanut allergies, you can use other nut butters or sunflower seed butter as a substitute.
- Even Coating: Ensure the Rice Krispies are evenly coated with the chocolate mixture for consistent flavor.
- Cooling Time: Allow the cookies to cool completely before storing them to prevent them from sticking together.
- Prevent Sticking: Ensure the parchment or wax paper is properly placed on the baking sheet to prevent the cookies from sticking.
- Uniform Size: Use a cookie scoop to ensure the cookies are uniform in size for even setting and presentation.
Prep Time:
15 minutes
Cook Time:
5 minutes (for melting chocolate)
Total Time:
20 minutes (plus 30-60 minutes setting time)
Nutritional Information:
(Note: Nutritional information is an estimate and can vary based on specific ingredients and portion sizes.)
Calories:
Approximately 200-250 per cookie
Protein:
Approximately 3-4 grams per cookie
Sodium:
Approximately 50-75mg per cookie
Conclusion
These Chocolate No-Bake Rice Krispie Cookies are a winning recipe for anyone looking for a quick, easy, and delicious treat. The combination of crunchy Rice Krispies, rich chocolate, creamy peanut butter, and sweet maple syrup creates an irresistible flavor profile that appeals to all ages. With minimal prep and cooking time, these cookies are perfect for satisfying sweet cravings, making with kids, or bringing to any gathering. Feel free to customize the recipe with your favorite mix-ins to create your own unique version. Whether you’re an experienced baker or a novice in the kitchen, this recipe is sure to become a staple in your repertoire. Enjoy the delightful simplicity and scrumptious taste of these no-bake wonders!
Questions and Answers about this Recipe
Q1: Can I use a different type of sweetener instead of maple syrup?
A: Yes, you can substitute maple syrup with other sweeteners like honey, agave nectar, or even corn syrup. Keep in mind that each sweetener has a slightly different flavor profile, so the taste of the cookies will vary accordingly. If using honey or agave, start with a smaller amount and adjust to taste, as they can be sweeter than maple syrup. Corn syrup will provide a similar sweetness but lacks the distinctive flavor of maple syrup.
Q2: What can I use instead of peanut butter if I have a peanut allergy?
A: If you have a peanut allergy, you can substitute peanut butter with other nut butters like almond butter, cashew butter, or sunflower seed butter (also known as sunbutter). Sunflower seed butter is a great option for those with tree nut allergies as well. Make sure to choose a nut butter that is smooth and creamy for the best texture in the cookies.
Q3: How do I prevent the chocolate from seizing when melting it?
A: To prevent the chocolate from seizing, it’s important to avoid getting any water or steam into the melting chocolate. When using a double boiler, ensure that the bottom of the bowl does not touch the water. If using a microwave, heat the chocolate in short intervals (30 seconds at a time) and stir well in between each interval. Overheating the chocolate can also cause it to seize, so be patient and heat it gently.
Q4: Can I add other mix-ins to these cookies?
A: Absolutely! These cookies are highly customizable, and you can add a variety of mix-ins to suit your taste. Some popular options include mini marshmallows, white chocolate chips, chopped nuts (like walnuts or pecans), dried fruits (like cranberries or raisins), sprinkles, or even crushed pretzels for a salty-sweet combination. Feel free to get creative and experiment with your favorite ingredients.
Q5: How long do these cookies last, and how should I store them?
A: These cookies can last up to three days at room temperature or up to a week in the refrigerator. To store them, place the cookies in an airtight container to prevent them from drying out or becoming sticky. If storing them in the refrigerator, you may want to let them sit at room temperature for a few minutes before serving to soften them slightly.