Description of this recipe
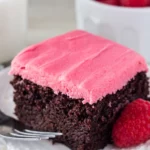
These small-batch brownies are the perfect solution when you’re craving a deeply satisfying chocolate treat but don’t want a whole pan tempting you. This recipe yields just the right amount for one or two people, delivering intense chocolate flavor and a fudgy texture in every bite. They’re quick, easy, and require only a handful of pantry staples, making them ideal for a spontaneous baking session. Whether you need a comforting pick-me-up after a long day or a simple dessert to share with a loved one, these small-batch brownies are sure to hit the spot.
Why you will love this recipe
This recipe is a game-changer for several reasons. First and foremost, it eliminates the temptation of a full batch of brownies, allowing you to indulge without the guilt. Secondly, it’s incredibly quick to prepare, perfect for those moments when you need a sweet treat fast. The recipe is also highly adaptable; you can easily customize it with your favorite mix-ins, such as chocolate chips, nuts, or even a swirl of peanut butter. Furthermore, the small size ensures that each brownie is perfectly baked, with a fudgy center and slightly chewy edges. Finally, the satisfaction of making a homemade treat from scratch in under 30 minutes is simply unbeatable!
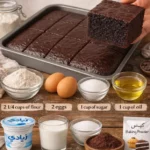
Ingredients:
- 1/4 cup unsalted butter, melted
- 1/2 cup white sugar
- 1 large egg
- 1/2 teaspoon vanilla extract
- 1/4 cup cocoa powder
- 1/4 cup all-purpose flour, AKA plain flour
- pinch of salt
- 1/4 cup chocolate chips, or chopped walnuts – optional
Preparation:
Step 1: Preheat your oven to 350°F (180°C). Line an 8×4 inch (20×10 cm) loaf pan with parchment paper, leaving an overhang around the sides. This overhang will make it easy to lift the brownies out of the pan later. Alternatively, you can line the pan with aluminum foil, leaving an overhang, and lightly grease the foil to prevent sticking. The choice between parchment paper and aluminum foil is largely a matter of personal preference. Parchment paper offers a slightly cleaner release, while aluminum foil is often more readily available.
Step 2: In a medium-sized bowl, whisk together the melted butter and sugar. I often use a fork for this step, as it effectively incorporates the ingredients and breaks up any lumps in the sugar. Ensure that the butter is fully melted but not too hot, as this could affect the texture of the brownies. Whisk until the mixture is smooth and well combined. This step is crucial for achieving a consistent texture in the final product.
Step 3: Whisk in the egg and vanilla extract. It’s important to ensure that the melted butter isn’t too hot at this stage, as the heat could scramble the egg. Whisk vigorously until the egg and vanilla are fully incorporated into the butter and sugar mixture. The egg adds richness and moisture to the brownies, while the vanilla extract enhances the overall flavor profile.
Step 4: Stir in the cocoa powder, flour, and salt. If the cocoa powder is very lumpy, sift it through a metal sieve first to ensure a smooth batter. This step prevents clumps of cocoa powder from remaining in the finished brownies. Gently stir the dry ingredients into the wet ingredients until just combined. Be careful not to overmix the batter, as this can result in tough brownies.
Step 5: Optionally, stir in the chocolate chips or chopped walnuts. This is where you can customize the recipe to your liking. Chocolate chips add extra chocolatey goodness, while chopped walnuts provide a pleasant crunch and nutty flavor. Feel free to experiment with other mix-ins, such as pecans, almonds, or even dried cranberries.
Step 6: Spoon the batter into the lined loaf pan and smooth the top with a spatula or spoon. Ensure that the batter is evenly distributed in the pan for uniform baking. This step is important for achieving consistent results.
Step 7: Bake in the preheated oven for 18-20 minutes, or until the top looks set and an inserted toothpick comes out clean or with a few damp crumbs. The baking time may vary depending on your oven, so it’s important to keep a close eye on the brownies. A toothpick inserted into the center of the brownies should come out clean or with a few damp crumbs, indicating that they are done.
Step 8: If you can, let the brownies cool fully in the pan before slicing. This allows the brownies to firm up and develop their fudgy texture. However, if you’re impatient, you can slice them while they’re still warm, but be aware that they will be more delicate.
Step 9: Lift the brownies out of the pan using the overhang of the parchment paper or aluminum foil. Place them on a cutting board and slice into desired portions. Serve and enjoy!
COOKING Rating:
Easy
Serving Suggestions:
These small-batch brownies are delicious on their own, but they can also be served with a scoop of vanilla ice cream, a dollop of whipped cream, or a drizzle of chocolate sauce. They pair perfectly with a glass of cold milk or a hot cup of coffee. For a more decadent treat, try topping them with a sprinkle of sea salt or a dusting of cocoa powder.
Tips:
- For an extra fudgy texture, underbake the brownies slightly.
- If you don’t have an 8×4 inch loaf pan, you can use a similar-sized baking dish.
- Store leftover brownies in an airtight container at room temperature for up to 3 days.
- For a richer flavor, use dark cocoa powder instead of regular cocoa powder.
- To prevent the brownies from sticking to the pan, make sure to line it properly with parchment paper or aluminum foil and grease it well.
Prep Time: 5 minutes
Cook Time: 18-20 minutes
Total Time: 23-25 minutes
Nutritional Information: (Note: Nutritional information is an estimate and may vary based on specific ingredients used.)
Calories: Approximately 250-300 per brownie
Protein: Approximately 3-4 grams per brownie
Sodium: Approximately 50-75 mg per brownie
Conclusion
These small-batch brownies are a testament to the fact that you don’t need a lot of time or ingredients to create something truly delicious. They’re perfect for satisfying your sweet tooth without the guilt of a full batch, and they’re incredibly easy to customize to your liking. So, the next time you’re craving a chocolatey treat, give this recipe a try. You won’t be disappointed! The simplicity and convenience of this recipe make it a staple for any home baker, ensuring that a perfect brownie is always within reach. From the quick preparation to the intensely satisfying flavor, these small-batch brownies are a delightful indulgence that you can feel good about enjoying. Whether you’re baking for yourself or sharing with a loved one, these brownies are sure to bring a smile to your face.
Questions and Answers:
Q1: Can I use a different type of flour for this recipe?
A: While all-purpose flour is recommended for the best texture, you can substitute it with a gluten-free all-purpose flour blend. Keep in mind that the texture may be slightly different, and you might need to adjust the baking time accordingly. Almond flour is not recommended as a direct substitute, as it will result in a denser, more crumbly brownie.
Q2: Can I add nuts other than walnuts?
A: Absolutely! Feel free to substitute walnuts with your favorite nuts, such as pecans, almonds, or even macadamia nuts. Just make sure to chop them into small pieces before adding them to the batter. The type of nut you choose will add a unique flavor and texture to the brownies.
Q3: How do I prevent the brownies from sticking to the pan?
A: The best way to prevent the brownies from sticking is to line the loaf pan with parchment paper or aluminum foil, leaving an overhang around the sides. This will allow you to easily lift the brownies out of the pan after baking. You can also lightly grease the parchment paper or aluminum foil with cooking spray for added insurance.
Q4: Can I double the recipe to make a larger batch?
A: Yes, you can easily double or even triple the recipe to make a larger batch. If you’re doubling the recipe, use an 8×8 inch baking pan. If you’re tripling the recipe, use a 9×13 inch baking pan. Keep in mind that the baking time may need to be adjusted accordingly.
Q5: How do I store leftover brownies?
A: Leftover brownies can be stored in an airtight container at room temperature for up to 3 days. To keep them fresh, you can also store them in the refrigerator for up to a week. If you want to store them for longer, you can freeze them for up to 2 months. Just make sure to wrap them tightly in plastic wrap before freezing.