Description of This Recipe
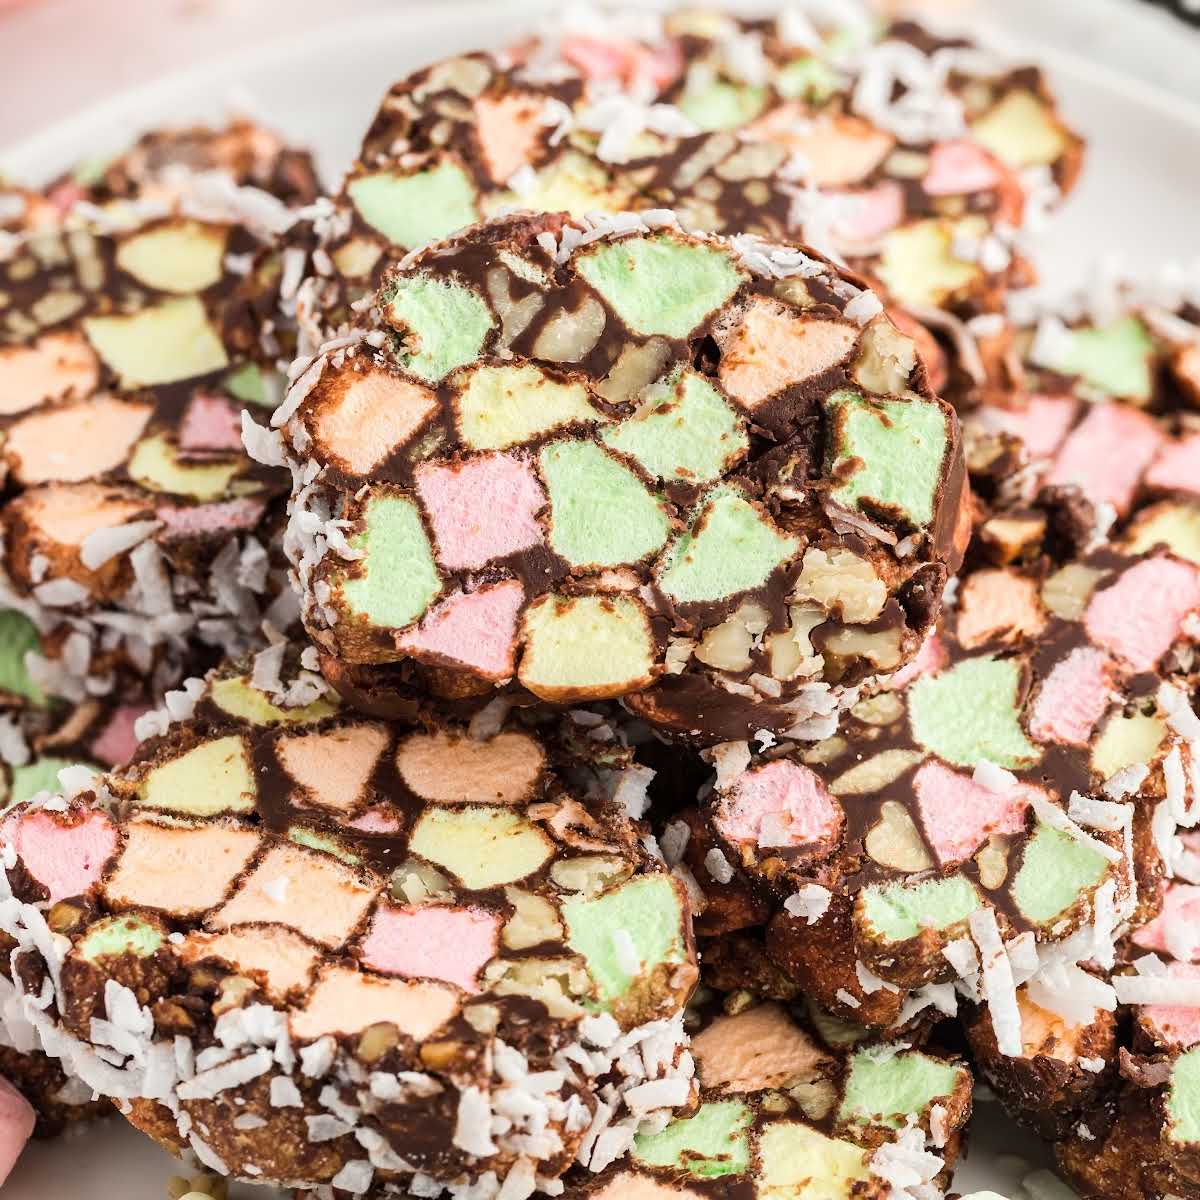
Church Window Cookies, also known as stained glass cookies, are a delightful no-bake treat that’s as fun to make as they are to eat. These colorful cookies get their name from their resemblance to the vibrant stained glass windows found in churches, thanks to the combination of melted chocolate, marshmallows, nuts, and coconut. This recipe offers a modern twist on the classic, with detailed instructions and tips to ensure perfect results every time. It’s a great recipe for involving kids in the kitchen and is perfect for holidays, parties, or just a sweet snack.
Why You Will Love This Recipe
- No-Bake Convenience: No oven required! These cookies are a breeze to make, perfect for those hot summer days or when you need a quick and easy dessert.
- Visually Stunning: The colorful marshmallows encased in rich chocolate make these cookies a feast for the eyes.
- Customizable: Easily adapt the recipe to your liking by using different types of nuts, extracts, or even adding a touch of spice.
- Kid-Friendly: Making these cookies is a fun and engaging activity for kids, allowing them to get creative with colors and shapes.
- Perfect for Gifting: These cookies make a beautiful and thoughtful homemade gift for friends, family, or neighbors.
- Classic Flavor Combination: The balance of chocolate, coconut, marshmallows, and nuts is a time-tested favorite.
- Make-Ahead Friendly: You can prepare the logs ahead of time and slice the cookies just before serving.
Ingredients:
- 1 ½ cups sweetened shredded coconut (divided into ½ cup, ½ cup, ¼ cup, and ¼ cup)
- 12 ounces semi-sweet chocolate chips (or 2 cups)
- ½ cup salted sweet cream butter, softened
- 1 teaspoon pure vanilla extract
- 10 ounces mini fruit marshmallows
- 1 cup toasted walnuts, finely chopped
Preparation:
Step 1: Prepare the Baking Sheets
Line two baking sheets with wax paper. Leaving a 1-inch gap, sprinkle ½ cup of the shredded coconut in a strip measuring 3 inches x 10 inches on each sheet. The coconut will help prevent the cookies from sticking and adds a lovely texture to the outside. Set the baking sheets aside.
Step 2: Melt the Chocolate
In a 3 to 4-quart heavy-bottomed saucepan over medium heat, combine the chocolate chips and softened butter. Stir frequently with a wooden spoon or silicone spatula until the chocolate chips are completely melted and the mixture is smooth. Be patient and avoid overheating the chocolate, as this can cause it to seize up.
Step 3: Add Vanilla Extract
Once the chocolate is melted and smooth, remove the saucepan from the heat. Stir in the vanilla extract. This adds a subtle depth of flavor that complements the richness of the chocolate. Allow the chocolate to cool slightly before proceeding to the next step. This will prevent the marshmallows from melting too much when they are added.
Step 4: Combine Marshmallows and Nuts
In an extra-large mixing bowl, combine the mini fruit marshmallows and finely chopped toasted walnuts. Ensure the nuts are finely chopped to provide a consistent texture throughout the cookies.
Step 5: Coat with Chocolate
Pour the slightly cooled melted chocolate over the marshmallows and walnuts in the mixing bowl. Using a wooden spoon or silicone spatula, gently stir until all the marshmallows and nuts are completely and evenly coated with the chocolate. Be careful not to overmix, as this can cause the marshmallows to become sticky and lose their shape.
Step 6: Form the Logs
Scoop half of the marshmallow mixture on top of the coconut strip on one of the prepared baking sheets. Evenly sprinkle ¼ cup of the shredded coconut on top of the marshmallow mixture. This coconut layer will add a delightful texture and visual appeal to the finished cookies.
Step 7: Roll the Logs
Using the 1-inch lip of the wax paper, begin tightly rolling the marshmallow mixture into a log. Tuck in the ends of the paper as you roll to create a compact and even log. Repeat the steps for the remaining marshmallow mixture on the second prepared baking sheet.
Step 8: Chill
Wrap the wax paper-covered logs tightly with plastic wrap or aluminum foil. This will help maintain their shape and prevent them from drying out. Chill the logs in the refrigerator for 1 to 2 hours, or until they are firm enough to slice. Chilling is crucial for achieving clean, even slices.
Step 9: Slice and Serve
Once the logs are thoroughly chilled, remove them from the refrigerator. Unwrap the logs and, using a sharp knife, slice the cookies into ½-inch thick rounds. Arrange the cookies on a serving platter and serve immediately.
COOKING Rating:
Easy
Serving Suggestions:
- Serve as a dessert at parties, holidays, or gatherings.
- Pair with a glass of milk or hot cocoa for a comforting treat.
- Include in a cookie assortment for a festive presentation.
- Package in cellophane bags and tie with ribbon for a homemade gift.
- Enjoy as a simple and satisfying snack any time of day.
Tips:
- Use high-quality chocolate for the best flavor.
- Toast the walnuts for a deeper, richer taste.
- Ensure the butter is softened for easy melting.
- Don’t overheat the chocolate, as it can seize up.
- Chill the logs thoroughly for easy slicing.
- Use a sharp knife for clean, even slices.
- Store leftovers in an airtight container in the refrigerator.
- For a festive twist, use colored marshmallows.
- Add a pinch of sea salt to the chocolate for a more complex flavor.
- Experiment with different extracts, such as peppermint or almond.
Prep Time:
20 minutes
Cook Time:
10 minutes
Total Time:
30 minutes + 1-2 hours chilling
Nutritional Information (per cookie):
(Note: Nutritional information is approximate and may vary based on specific ingredients used.)
Calories: Approximately 150-200
Protein: 1-2 grams
Sodium: 20-30 mg
Conclusion
Church Window Cookies are a delightful and visually appealing treat that’s perfect for any occasion. With their easy no-bake preparation, customizable ingredients, and nostalgic charm, these cookies are sure to become a family favorite. Whether you’re making them for a holiday gathering, a kid’s party, or just a sweet snack, these stained glass delights are guaranteed to bring a smile to everyone’s face. So, gather your ingredients, roll up your sleeves, and get ready to create a batch of these colorful and delicious Church Window Cookies.
Questions and Answers about this Recipe
Q1: Can I use different types of chocolate?
A: Absolutely! While this recipe calls for semi-sweet chocolate chips, you can easily substitute milk chocolate, dark chocolate, or even white chocolate chips. Each type of chocolate will impart a different flavor profile to the cookies, so feel free to experiment and find your favorite combination.
Q2: Can I use different types of nuts?
A: Yes, you can! If you’re not a fan of walnuts, or if you have a nut allergy, you can substitute other types of nuts, such as pecans, almonds, or macadamia nuts. Just be sure to chop the nuts finely so that they are evenly distributed throughout the cookies. You can also omit the nuts altogether if you prefer.
Q3: How long can I store these cookies?
A: Church Window Cookies can be stored in an airtight container in the refrigerator for up to a week. The cold temperature will help to maintain their shape and prevent them from becoming too soft. However, it’s best to consume them within a few days for optimal freshness and flavor.
Q4: Can I freeze these cookies?
A: Yes, you can freeze Church Window Cookies for longer storage. Wrap the logs tightly in plastic wrap and then in aluminum foil, or place the sliced cookies in an airtight container with layers of wax paper between them. They can be frozen for up to 2-3 months. Thaw them in the refrigerator before serving.
Q5: Can I add other ingredients to these cookies?
A: Of course! One of the great things about this recipe is that it’s highly customizable. You can add a variety of other ingredients to suit your taste, such as dried cranberries, raisins, toffee bits, sprinkles, or even a pinch of spice like cinnamon or nutmeg. Get creative and have fun experimenting with different flavors and textures.