Why You Will Love This Recipe
What makes these butter cookies irresistible is their simplicity and the use of just a few high-quality ingredients. The combination of butter, powdered sugar, and cornstarch creates a cookie that is incredibly light and tender. Plus, they are quick to prepare and can be made ahead of time, making them an ideal choice for busy bakers. The optional granulated sugar coating adds a delightful sweetness and crunch, elevating them to a whole new level.
Introduction
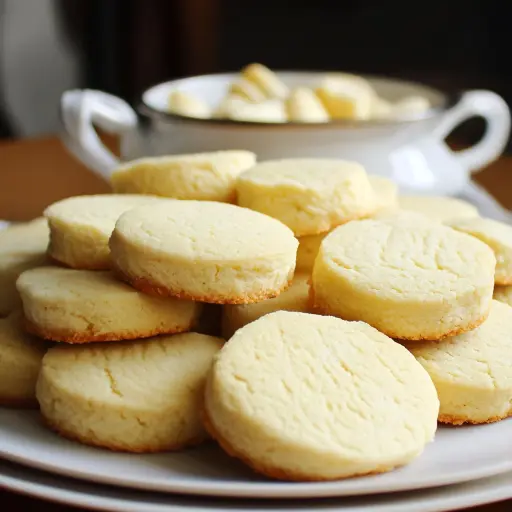
Butter cookies are a classic treat that many people hold dear. Their rich flavor and delicate texture make them a favorite among cookie lovers. This particular recipe for melt-in-your-mouth butter cookies is not only easy to follow but also yields cookies that are sure to impress. Whether you’re an experienced baker or a novice in the kitchen, you’ll find that these cookies come together effortlessly. In this post, I will guide you through each step of the process, share some tips for success, and provide serving suggestions to make your cookie experience even more enjoyable.
Ingredients:
- 1 cup (226g) unsalted butter, softened
- ½ cup (100g) powdered sugar
- 1 teaspoon vanilla extract
- 1 ¾ cups (220g) all-purpose flour
- ¼ cup (30g) cornstarch
- ¼ teaspoon salt
- Optional: Granulated sugar for coating
Preparation:
Step 1: Prepare the Dough
In a large mixing bowl, beat the softened unsalted butter and powdered sugar together using an electric mixer. Mix on medium speed until the mixture becomes light and fluffy, which should take about 3-5 minutes. This step is crucial as it incorporates air into the dough, giving the cookies their melt-in-the-mouth quality. Once fluffy, add the vanilla extract and mix until well combined.
Step 2: Mix Dry Ingredients
In a separate bowl, sift together the all-purpose flour, cornstarch, and salt. Sifting helps to aerate the flour and ensures that there are no lumps. Gradually add the dry mixture to the butter mixture, mixing on low speed until a soft dough forms. Be careful not to overmix; you want to combine the ingredients just until they come together.
Step 3: Chill the Dough
Once the dough is ready, shape it into a log about 2 inches in diameter. Wrap the log tightly in plastic wrap and chill it in the refrigerator for at least 30 minutes. Chilling the dough is essential as it firms up the butter, making it easier to slice into rounds and helping the cookies maintain their shape while baking.
Step 4: Slice & Bake
Preheat your oven to 325°F (160°C) and line a baking sheet with parchment paper. Once the dough has chilled, remove it from the refrigerator and unwrap it. Using a sharp knife, slice the log into ½-inch rounds. Place the slices on the prepared baking sheet, leaving some space between each cookie. If desired, sprinkle a little granulated sugar on top of each cookie for added sweetness and texture.
Step 5: Bake
Bake the cookies in the preheated oven for 12–15 minutes, or until the edges are slightly golden. Keep an eye on them as baking times may vary depending on your oven. Once baked, remove from the oven and allow the cookies to cool on the baking sheet for a few minutes before transferring them to a wire rack to cool completely.
COOKING Rating:
★★★★★ (5/5) – This recipe is simple and yields perfect cookies every time!
Serving Suggestions:
These melt-in-your-mouth butter cookies can be enjoyed on their own or paired with a variety of accompaniments. Consider serving them with a cup of freshly brewed tea or coffee for a delightful afternoon treat. They also make a lovely addition to holiday cookie platters or can be packaged in decorative boxes as gifts for friends and family. For a fun twist, try sandwiching two cookies together with a layer of your favorite jam or frosting.
Tips:
- Use High-Quality Butter: Since butter is the star ingredient, using high-quality unsalted butter will significantly enhance the flavor of your cookies.
- Don’t Skip Chilling: Chilling the dough is crucial for the texture and shape of the cookies. If you’re short on time, you can chill the dough in the freezer for about 15 minutes instead of the refrigerator.
- Experiment with Flavors: Feel free to add lemon zest, almond extract, or even chocolate chips to the dough for a different flavor profile.
- Storage: Store the cookies in an airtight container at room temperature for up to a week. They can also be frozen for longer storage—just make sure to layer them with parchment paper to prevent sticking.
Prep Time: 10 minutes
Chill Time: 30 minutes
Bake Time: 15 minutes
Total Time: 55 minutes
Yield: 24 cookies
Nutritional Information:
Calories: 100 per cookie
Protein: 1g
Sodium: 50mg
Conclusion
In conclusion, these melt-in-your-mouth butter cookies are a delightful treat that everyone will love. Their tender texture and buttery flavor make them a classic favorite, while the simplicity of the recipe ensures that you can whip them up any time you need a sweet indulgence. Whether you’re baking for a special occasion or just treating yourself, these cookies are sure to satisfy your cravings. So gather your ingredients, follow the steps, and enjoy the deliciousness that is melt-in-your-mouth butter cookies!
Questions and Answers about this Recipe
Q1: Can I use salted butter instead of unsalted butter?
A1: Yes, you can use salted butter, but be sure to reduce the added salt in the recipe to avoid overly salty cookies.
Q2: How should I store the cookies?
A2: Store the cookies in an airtight container at room temperature for up to a week. You can also freeze them for longer storage.
Q3: Can I add chocolate chips to the dough?
A3: Absolutely! You can fold in chocolate chips or other mix-ins like nuts or dried fruit for added flavor and texture.
Q4: What can I do if the dough is too soft to slice?
A4: If the dough feels too soft after chilling, you can chill it for an additional 10-15 minutes. Alternatively, you can shape the dough into balls instead of slicing.
Q5: Can I make the dough ahead of time?
A5: Yes, you can prepare the dough and keep it wrapped in plastic wrap in the refrigerator for up to 3 days before baking. You can also freeze the dough for up to 3 months. Just thaw in the refrigerator before slicing and baking.