Description of this recipe
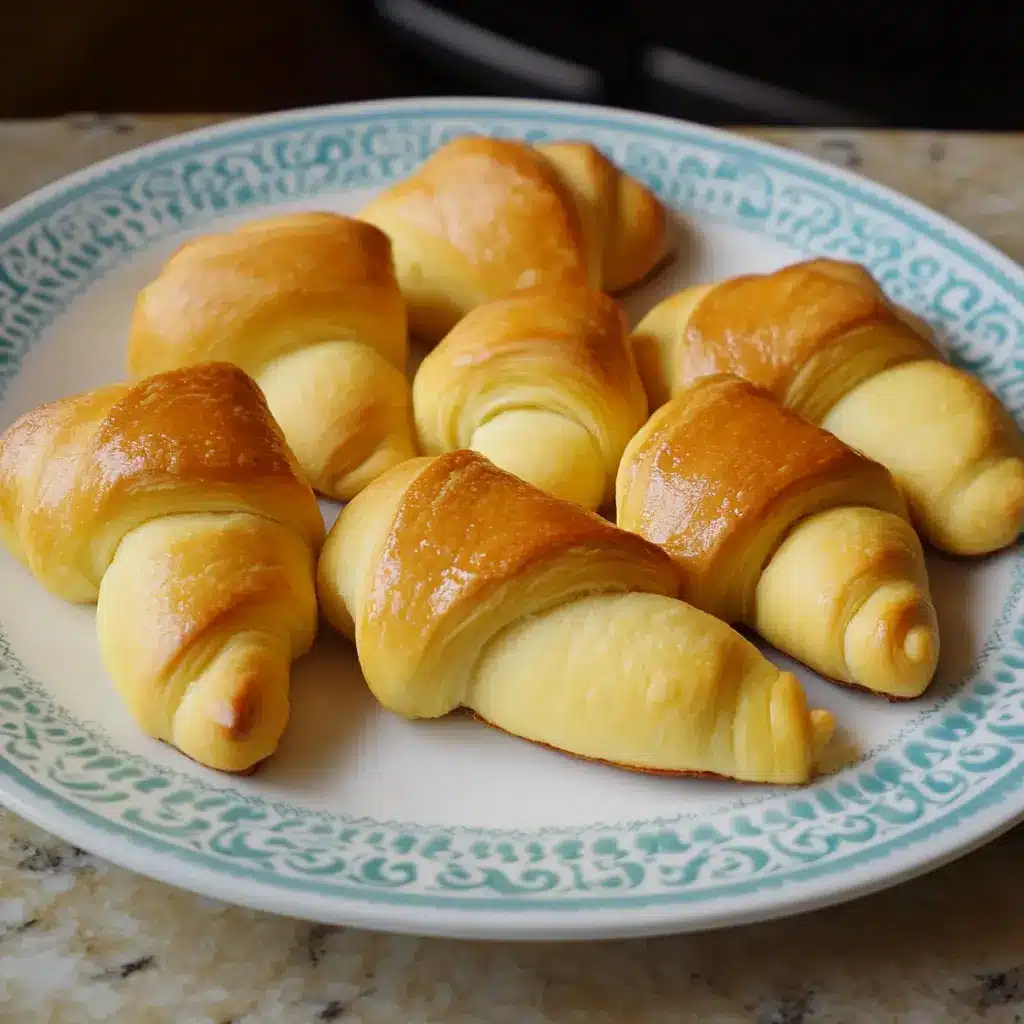
These homemade crescent rolls are soft, buttery, and simply irresistible. They’re the perfect addition to any meal, from a simple weeknight dinner to a festive holiday feast. This recipe yields tender, golden-brown rolls with that signature flaky texture that everyone loves.
Why you will love this recipe
- Unmatched Flavor: The homemade touch makes all the difference. These rolls boast a rich, buttery flavor that surpasses any store-bought version.
- Soft and Flaky: The careful kneading and proofing process creates a light and airy texture that melts in your mouth.
- Versatile: Enjoy them plain, brushed with garlic butter, or filled with your favorite savory or sweet fillings.
- Comfort Food: The aroma of baking bread filling your kitchen is an experience in itself, creating a sense of warmth and comfort.
- Impress Your Guests: These homemade crescent rolls are sure to impress your family and friends, showcasing your baking skills.
Introduction
Baking bread at home can seem daunting, but these crescent rolls are surprisingly easy to make. This recipe guides you through each step, from activating the yeast to shaping the rolls, ensuring a delightful baking experience and a delicious final product. The key to success lies in patience and attention to detail. Don’t rush the proofing process, and use quality ingredients for the best results. The aroma alone will transport you to a cozy bakery, and the taste will keep you coming back for more. These crescent rolls are more than just a side dish; they are a memory in the making. Gather your ingredients, clear your schedule, and prepare to create something truly special.
Ingredients:
- 1 tablespoon active dry yeast
- 1 teaspoon plus 1/3 cup granulated sugar
- 1/2 cup warm water (110° to 115°F) – Temperature is critical for activating the yeast.
- 1/2 cup unsalted butter, softened to room temperature – This ensures the butter incorporates smoothly into the dough.
- 1/2 cup warm 2% milk (110° to 115°F) – Similar to the water, warm milk helps activate the yeast and adds richness.
- 1 large egg, room temperature – Room temperature eggs emulsify better and create a smoother dough.
- 3/4 teaspoon salt
- 4 cups all-purpose flour, plus more for dusting – Measure flour accurately; too much will result in dense rolls.
Preparation:
Step 1: Activate the Yeast
In a large bowl, combine the warm water (110° to 115°F), active dry yeast, and 1 teaspoon of sugar. The sugar feeds the yeast, helping it to activate. Stir gently to combine and let it sit for 5-10 minutes. The mixture should become foamy or bubbly, indicating that the yeast is alive and active. If the mixture doesn’t bubble, the yeast may be old or the water temperature may have been incorrect, and you’ll need to start again with fresh yeast.
Step 2: Combine Wet and Dry Ingredients
Once the yeast mixture is foamy, add the softened butter, warm milk, room temperature egg, salt, and the remaining 1/3 cup of sugar to the bowl. Mix well until the butter is fully incorporated and the mixture is smooth. The softened butter and room temperature egg will ensure that the dough is tender and evenly textured.
Step 3: Form the Dough
Gradually add 2 cups of all-purpose flour to the wet ingredients. Beat the mixture with a wooden spoon or a dough whisk until smooth. Then, gradually add the remaining flour, 1/2 cup at a time, until the dough begins to pull away from the sides of the bowl. You may not need to use all 4 cups of flour, as the exact amount can vary depending on humidity and other factors. The goal is to achieve a soft, slightly sticky dough.
Step 4: Knead the Dough
Turn the dough out onto a lightly floured surface. Knead the dough for 6-8 minutes, adding more flour as needed to prevent sticking. Kneading develops the gluten in the flour, which gives the rolls their structure and elasticity. The dough should become smooth and elastic, and it should spring back slightly when pressed. If you’re using a stand mixer, knead the dough with the dough hook attachment for about 5-7 minutes on medium speed.
Step 5: First Rise
Place the kneaded dough in a lightly greased bowl, turning it once to coat the top with oil. This prevents the dough from drying out during the rise. Cover the bowl with plastic wrap or a clean kitchen towel. Place the bowl in a warm place, such as a preheated (then turned off) oven or a sunny spot, and let the dough rise until doubled in size, about 1 hour. The rising time may vary depending on the temperature of your environment.
Step 6: Shape the Crescent Rolls
After the dough has doubled, gently punch it down to release the air. Turn the dough out onto a lightly floured surface and divide it in half. Roll each portion into a 12-inch circle. Use a pizza cutter or a sharp knife to cut each circle into 12 wedges.
Step 7: Roll and Arrange
Starting at the wide end of each wedge, roll the dough tightly towards the point. Place the rolled crescents point-side down on greased baking sheets, leaving about 2 inches between each roll. Gently curve the ends of the rolls to form the classic crescent shape.
Step 8: Second Rise
Cover the baking sheets with plastic wrap or a clean kitchen towel and let the rolls rise in a warm place for about 30 minutes, or until they have doubled in size. This second rise is crucial for achieving a light and airy texture.
Step 9: Bake the Crescent Rolls
Preheat your oven to 350°F (175°C). Once the rolls have risen, bake them for 10-12 minutes, or until they are golden brown. Keep a close eye on them to prevent burning. The baking time may vary slightly depending on your oven.
Step 10: Cool and Serve
Remove the baking sheets from the oven and transfer the crescent rolls to wire racks to cool slightly. Serve warm and enjoy!
COOKING Rating:
Easy to Medium – While it requires some patience with kneading and rising, the steps are straightforward and the results are well worth the effort.
Serving Suggestions:
- Classic Side: Serve warm with butter, jam, or honey.
- Dinner Companion: Perfect alongside soups, salads, or main courses like roasted chicken or pot roast.
- Holiday Feast: A delightful addition to Thanksgiving or Christmas dinner.
- Sandwich Rolls: Use them to make mini sandwiches with deli meats, cheese, or your favorite fillings.
- Dessert Rolls: Fill them with Nutella, fruit preserves, or cream cheese frosting for a sweet treat.
Tips:
- Yeast Activity: Always check the expiration date on your yeast. To ensure it’s active, proof it with warm water and sugar as described in Step 1.
- Dough Temperature: Maintain a consistent temperature for the dough during the rising process. This will ensure even and efficient rising.
- Don’t Overwork the Dough: Over-kneading can result in tough rolls. Knead until the dough is smooth and elastic, but not overly firm.
- Grease Your Baking Sheets: This prevents the rolls from sticking and ensures they release easily.
- Egg Wash: For a glossy finish, brush the tops of the rolls with an egg wash (1 egg beaten with 1 tablespoon of water) before baking.
- Herbed Butter: Brush the baked rolls with melted butter mixed with fresh herbs like rosemary, thyme, or parsley for added flavor.
- Freezing Instructions: Baked crescent rolls can be frozen for up to 2 months. Wrap them tightly in plastic wrap and then in foil. To reheat, thaw overnight and bake at 300°F (150°C) for 5-10 minutes, or until warmed through.
- Dough Consistency: If the dough is too sticky to handle, add a tablespoon of flour at a time until it becomes manageable. If it’s too dry, add a teaspoon of water at a time.
Prep Time:
30 minutes
Cook Time:
10-12 minutes
Total Time:
Approximately 2 hours 10 minutes (including rising time)
Nutritional Information:
(Note: Nutritional information is approximate and may vary based on specific ingredients and serving size.)
Calories: Approximately 150-200 per roll
Protein: 3-4 grams
Sodium: 150-200 mg
Conclusion
These homemade crescent rolls are a labor of love, but the result is undeniably worth the effort. The aroma of freshly baked bread filling your home, the soft and buttery texture, and the delighted smiles of your loved ones are all rewards for your dedication. This recipe provides a foundation for countless variations. Experiment with different fillings, toppings, and flavorings to create your own signature crescent rolls. Embrace the process, enjoy the experience, and savor the delicious outcome.
Questions and Answers:
Q1: My yeast didn’t foam. What happened?
A: Several factors could have caused this. The yeast might be old and inactive. Check the expiration date. The water temperature might have been too hot or too cold. It should be between 110°F and 115°F. Also, make sure you used the sugar, as that feeds the yeast and helps it activate. Try again with fresh yeast and check the water temperature carefully.
Q2: My dough isn’t rising. What am I doing wrong?
A: Dough not rising can be frustrating. Make sure your yeast is active (as described above). The room temperature might be too cold. Yeast thrives in a warm environment. Try placing the dough in a preheated (then turned off) oven or a warm, sunny spot. Also, ensure the bowl is covered to prevent the dough from drying out. Time also plays a factor; be patient and give it the full hour (or longer if needed).
Q3: My crescent rolls are dense and not fluffy. Why?
A: This could be due to several factors. You may have added too much flour, which can make the dough heavy. Be careful to measure accurately and add flour gradually until the dough just comes together. Also, make sure you’re not over-kneading the dough, as this can also make it tough. Insufficient rising time can also lead to dense rolls. Give the dough the full rising time specified in the recipe.
Q4: Can I make the dough ahead of time?
A: Yes, you can make the dough ahead of time. After the first rise, punch down the dough, wrap it tightly in plastic wrap, and refrigerate it for up to 24 hours. When you’re ready to bake, remove the dough from the refrigerator and let it come to room temperature for about 30 minutes before shaping the rolls.
Q5: Can I freeze the unbaked crescent rolls?
A: Yes, you can freeze the unbaked crescent rolls. After shaping them, place them on a baking sheet lined with parchment paper and freeze them for about 2 hours, or until they are solid. Then, transfer the frozen rolls to a freezer bag. When you’re ready to bake, remove the rolls from the freezer and let them thaw overnight in the refrigerator. Then, let them rise for about 30 minutes before baking as directed in the recipe.