Description of this recipe
These Air-Fryer Ice Cream Cookie Sandwiches offer a delightful twist on the classic dessert. Imagine warm, chewy chocolate chip cookies hugging a scoop of creamy vanilla ice cream – all made effortlessly in your air fryer. This recipe provides a simple and accessible way to create a satisfying and indulgent treat without the fuss of traditional baking. Perfect for a quick dessert on a weeknight or a fun project with the kids, these cookie sandwiches are sure to become a new family favorite.
Why you will love this recipe
There are countless reasons to fall in love with these Air-Fryer Ice Cream Cookie Sandwiches. First and foremost, the air fryer significantly cuts down on cooking time compared to baking in a conventional oven, making it ideal for those moments when you crave a sweet fix but are short on time. The air fryer also creates a unique texture: the cookies achieve a wonderfully crisp exterior while remaining soft and chewy inside. This contrast is simply irresistible. Beyond the ease and texture, the recipe itself is incredibly versatile. You can easily customize it to suit your preferences, experimenting with different types of chocolate chips, extracts, or even adding nuts or dried fruit to the cookie dough. The ice cream filling can also be swapped out for other flavors to create endless combinations. Ultimately, these Air-Fryer Ice Cream Cookie Sandwiches are a delicious, convenient, and customizable dessert that is guaranteed to bring joy to anyone who tries them. It’s a modern twist on a classic that’s accessible for everyone, regardless of their baking experience.
Introduction
The humble ice cream sandwich has been a beloved treat for generations, evoking memories of summer days and childhood joys. But what if we could elevate this classic dessert with a modern twist, making it even easier and more delicious than before? Enter the Air-Fryer Ice Cream Cookie Sandwich. This recipe combines the convenience of air frying with the irresistible combination of warm, chewy cookies and cold, creamy ice cream.
Air fryers have revolutionized the way we cook, offering a quicker, healthier, and more energy-efficient alternative to traditional ovens. By harnessing the power of circulating hot air, these countertop appliances can create perfectly cooked and crispy results with minimal oil. This recipe takes advantage of the air fryer’s capabilities to bake perfectly golden-brown cookies in a fraction of the time, making it easier than ever to whip up a batch of homemade ice cream sandwiches.
This recipe is perfect for busy weeknights, spontaneous gatherings, or simply satisfying your sweet tooth. The ingredients are readily available, the steps are straightforward, and the results are undeniably delicious. So, grab your air fryer, gather your ingredients, and get ready to experience the magic of Air-Fryer Ice Cream Cookie Sandwiches.
Ingredients:
- 75g (5.3 tablespoons) butter, softened
- 40g (3.2 tablespoons) light brown soft sugar
- 40g (3.2 tablespoons) caster sugar
- 1 tsp vanilla extract
- 1 egg
- 150g (1 1/4 cups) plain flour
- ¼ tsp bicarbonate of soda
- 100g (3.5 ounces or about 1 cup) plain chocolate chips
- 4 scoops vanilla ice cream (or your favorite flavor)
Preparation:
Step 1: Preheat your air fryer to 160°C (320°F). This is a crucial step to ensure even cooking and prevent the cookies from burning. Allow the air fryer to preheat for at least 5 minutes to reach the desired temperature. While the air fryer is preheating, prepare your cookie dough.
Step 2: In a medium-sized bowl, cream together the softened butter, light brown sugar, and caster sugar using an electric mixer or a wooden spoon. Continue mixing until the mixture is light, fluffy, and pale in color. This process incorporates air into the butter and sugar, which contributes to the cookies’ soft and chewy texture. Be sure to scrape down the sides of the bowl occasionally to ensure that all the ingredients are evenly combined.
Step 3: Add the vanilla extract and egg to the creamed butter and sugar mixture. Beat until well combined, ensuring that the egg is fully incorporated into the batter. The vanilla extract enhances the flavor of the cookies, while the egg acts as a binder, holding the ingredients together and adding moisture.
Step 4: In a separate bowl, whisk together the plain flour and bicarbonate of soda. This ensures that the bicarbonate of soda is evenly distributed throughout the flour, which helps the cookies rise properly. Gradually add the dry ingredients to the wet ingredients, folding them in gently with a spatula until just combined. Be careful not to overmix the dough, as this can result in tough cookies.
Step 5: Gently fold in the chocolate chips. Ensure they are evenly distributed throughout the cookie dough. Using plain chocolate chips provides a classic flavor, but feel free to experiment with other varieties, such as milk chocolate, dark chocolate, or even white chocolate chips. Nuts or dried fruit can be folded in as well if preferred.
Step 6: Prepare your air fryer basket. You have two options here. Option 1: Line the air fryer basket with foil or parchment paper. This will prevent the cookies from sticking to the basket and make cleanup easier. It also helps to ensure even cooking by reflecting heat back onto the bottom of the cookies. Option 2: Use a baking tin that fits inside your air fryer basket. This is a great option if you want to ensure that the cookies maintain a uniform shape.
Step 7: Divide the cookie dough into 8 equal-sized balls. This can be done using a spoon or an ice cream scoop. Arrange the dough balls in the prepared air fryer basket or baking tin, spacing them apart to allow for even cooking and prevent them from sticking together. You may need to cook the cookies in batches, depending on the size of your air fryer basket.
Step 8: Bake the cookies in the preheated air fryer for 12-15 minutes, or until they are golden brown and the edges are set. Check the underside of the cookies to ensure that they are crisp and cooked through. The cooking time may vary depending on the model of your air fryer, so keep a close eye on the cookies and adjust the cooking time as needed.
Step 9: Once the cookies are cooked, remove them from the air fryer and transfer them to a wire rack to cool completely. Allow the cookies to cool completely before assembling the ice cream sandwiches, as the heat from the cookies will melt the ice cream.
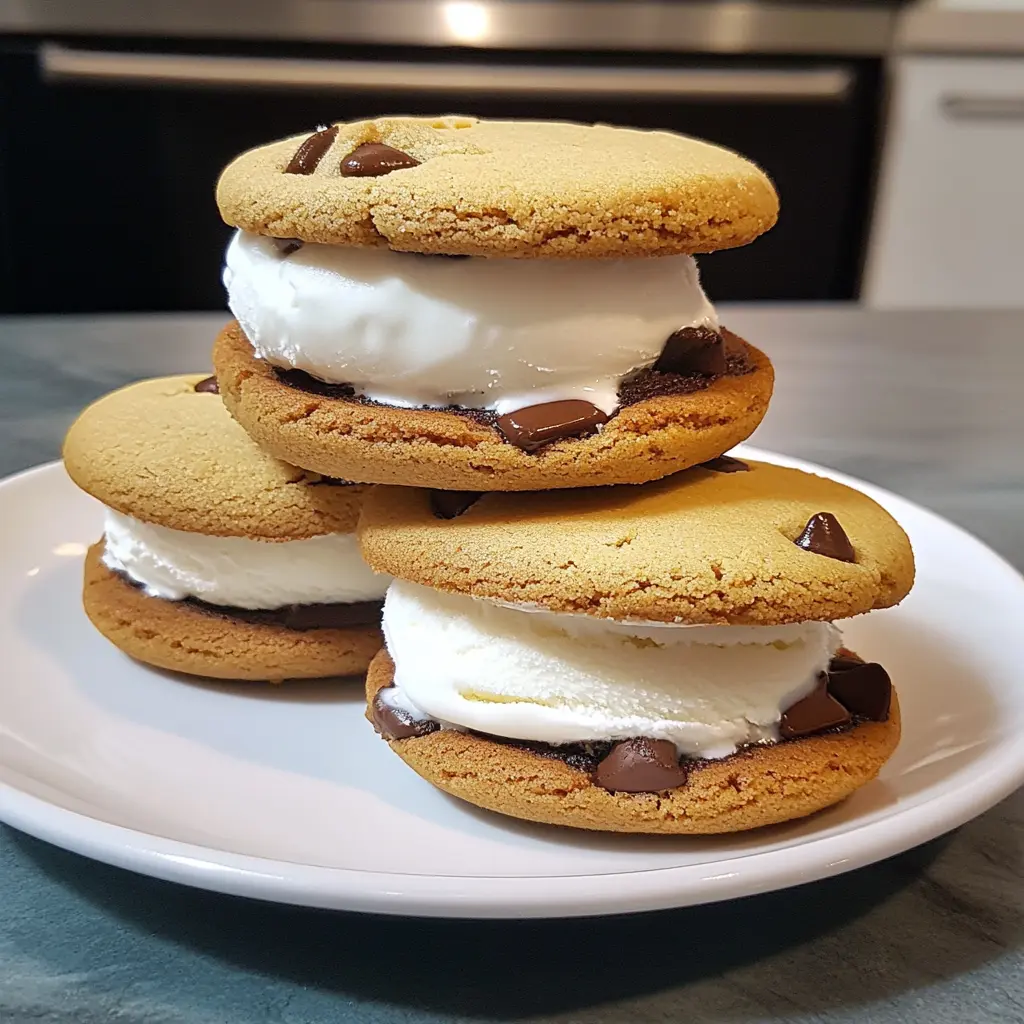
Step 10: Once the cookies have cooled, it’s time to assemble the ice cream sandwiches. Take two cookies and place a scoop of vanilla ice cream (or your favorite flavor) between them. Gently press the cookies together to create a sandwich. Repeat with the remaining cookies and ice cream.
Step 11: Serve immediately and enjoy. Store the extra cookies (without ice cream) in an airtight container for up to three days.
COOKING Rating:
Easy
Serving Suggestions:
- Serve these ice cream cookie sandwiches as a delightful dessert after a meal.
- Offer them as a fun treat at parties or gatherings.
- Enjoy them as a refreshing snack on a warm day.
- Get creative with toppings! Roll the edges of the sandwiches in sprinkles, chopped nuts, or mini chocolate chips for an extra touch.
- Pair them with a glass of cold milk or a scoop of extra ice cream for the ultimate indulgence.
Tips:
- Make sure your butter is softened to room temperature for easy creaming.
- Don’t overmix the dough, as this can lead to tough cookies.
- Adjust the cooking time based on your air fryer model.
- Use a baking tin or foil lining to prevent sticking.
- For best results, let the cookies cool completely before assembling the sandwiches.
- Work quickly when assembling the sandwiches to prevent the ice cream from melting.
- If you are not serving immediately, wrap the sandwiches individually in plastic wrap and freeze for later enjoyment. This will help to prevent freezer burn and maintain the ice cream’s texture.
- For a different flavor profile, try adding a pinch of sea salt to the cookie dough to enhance the sweetness and add a savory element.
- Get creative with fillings other than ice cream! Consider using frozen yogurt, sorbet, or even a layer of peanut butter for a unique twist.
Prep Time:
15 minutes
Cook Time:
12-15 minutes
Total Time:
Approximately 30 minutes (including cooling time)
Nutritional Information: (Estimates only, will vary based on ingredients)
Disclaimer: Nutritional information is an estimate and may vary based on specific ingredients and portion sizes.
Calories: Approximately 300-350 per sandwich
Protein: 4-5g
Sodium: 100-150mg
Conclusion
These Air-Fryer Ice Cream Cookie Sandwiches offer a quick, easy, and delicious way to enjoy a classic treat with a modern twist. The air fryer ensures perfectly cooked cookies in a fraction of the time, while the customizable ingredients allow you to create a dessert that suits your preferences perfectly. Whether you’re looking for a simple weeknight dessert or a fun activity for the whole family, these cookie sandwiches are sure to impress. So, embrace the convenience of air frying and elevate your ice cream sandwich game to a whole new level. These are a testament to how easy it is to create delicious home-baked desserts and I really hope you enjoy creating them and eating them.
Questions and Answers:
Q1: Can I use a different type of flour for this recipe?
A: While plain flour is recommended for its gluten content, which contributes to the cookies’ chewy texture, you can experiment with other types of flour. If you’re using gluten-free flour, be sure to add a binding agent like xanthan gum to help hold the cookies together. Remember, the texture may vary slightly depending on the type of flour you use. Be sure to choose a flour with a finer consistency and that blends well in baking to receive great results.
Q2: Can I make the cookie dough ahead of time and store it in the refrigerator?
A: Absolutely! You can prepare the cookie dough up to 24 hours in advance and store it in the refrigerator. Be sure to wrap it tightly in plastic wrap or place it in an airtight container to prevent it from drying out. When you’re ready to bake the cookies, simply remove the dough from the refrigerator and let it sit at room temperature for a few minutes to soften slightly before scooping and baking. Be warned that the bicarbonate may make the cookie taste less optimal if it sits out for too long.
Q3: What if I don’t have an air fryer? Can I bake these cookies in a conventional oven?
A: Yes, you can definitely bake these cookies in a conventional oven. Preheat your oven to 180°C (350°F) and bake the cookies for 10-12 minutes, or until they are golden brown and the edges are set. Keep a close eye on them, as the baking time may vary depending on your oven.
Q4: Can I use a different flavor of ice cream for the sandwiches?
A: Of course! Feel free to experiment with your favorite ice cream flavors. Chocolate, strawberry, mint chocolate chip, or cookies and cream would all be delicious choices. You can even create a themed ice cream sandwich, such as using peanut butter ice cream with chocolate chip cookies.
Q5: How can I prevent the ice cream from melting too quickly when assembling the sandwiches?
A: To prevent the ice cream from melting too quickly, make sure the cookies are completely cool before assembling the sandwiches. You can also place the ice cream in the freezer for a few minutes before scooping it to ensure it’s extra firm. Work quickly when assembling the sandwiches and consider wrapping them individually in plastic wrap and freezing them for a few minutes before serving to allow the ice cream to firm up even further.