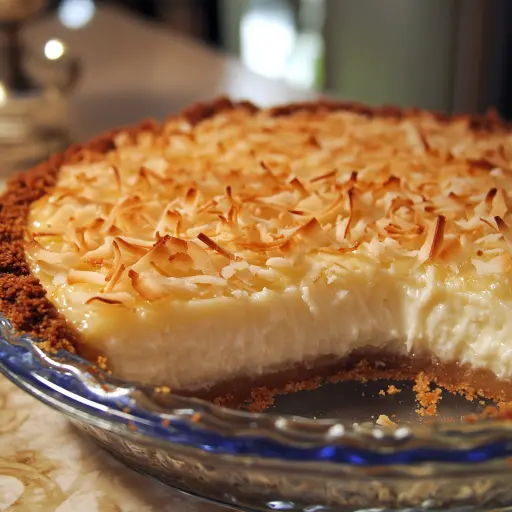
Description: This Crustless Coconut Pie offers a delightfully simple and intensely coconutty experience without the hassle of making or buying a crust. It’s a naturally gluten-free dessert, perfect for those seeking a comforting and easy-to-make treat with a tropical twist. This pie boasts a tender, custardy interior studded with sweet coconut, making it a guaranteed crowd-pleaser for any occasion. It is also very family-friendly, easy to make with kids involved, and the simplicity of the recipe allows even beginning bakers to create a bakery-quality dessert.
Ingredients:
- 1 cup shredded coconut (sweetened or unsweetened, depending on your preference)
- 1/2 cup granulated sugar (adjust to taste based on the sweetness of your coconut)
- 1/2 cup all-purpose flour (or a gluten-free blend for a gluten-free version)
- 1/2 teaspoon baking powder
- 1/4 teaspoon salt
- 4 large eggs
- 1 cup whole milk (or a non-dairy alternative like almond or coconut milk)
- 1 teaspoon vanilla extract
- 1/4 cup butter, melted and cooled (or coconut oil for a dairy-free option)
- Optional toppings: whipped cream, toasted coconut flakes, fresh berries, or a dusting of powdered sugar for garnish
Preparation:
Step 1: Preheating and Preparing the Baking Dish: Begin by preheating your oven to 350°F (175°C). This is crucial for even baking. While the oven is preheating, prepare your 9-inch pie dish. Thoroughly grease the dish with butter or cooking spray to prevent the pie from sticking. Alternatively, you can line the bottom of the dish with parchment paper, leaving some overhang to easily lift the pie out after baking. A well-greased dish or parchment lining will make the cleanup much easier and ensure the pie releases cleanly, preserving its shape.
Step 2: Combining Dry Ingredients: In a large mixing bowl, combine the dry ingredients: the shredded coconut, granulated sugar, all-purpose flour (or gluten-free flour blend), baking powder, and salt. Ensure all the ingredients are evenly distributed. Whisking them together is the best method to prevent any clumps and ensures a consistent texture in the final pie. The baking powder helps the pie rise slightly, creating a light and airy texture, while the salt enhances the sweetness and balances the flavors.
Step 3: Whisking Wet Ingredients: In a separate bowl, whisk together the wet ingredients: the large eggs, whole milk (or your preferred non-dairy alternative), vanilla extract, and melted and cooled butter (or coconut oil). The eggs provide structure and richness to the pie, while the milk adds moisture and helps create a creamy texture. The vanilla extract enhances the overall flavor profile, adding a warm and comforting note. Make sure the melted butter is cooled to avoid cooking the eggs when combined.
Step 4: Combining Wet and Dry Ingredients: Gradually pour the wet ingredients into the bowl with the dry ingredients. Stir gently until everything is just combined. Be careful not to overmix the batter. Overmixing can develop the gluten in the flour, resulting in a tougher pie. The goal is to create a smooth batter where the dry ingredients are fully incorporated, but the mixture remains light and airy. Ensure no pockets of dry flour remain at the bottom of the bowl.
Step 5: Pouring and Baking: Pour the prepared batter into the greased or lined pie dish, spreading it evenly. This ensures the pie bakes uniformly. Place the dish in the preheated oven and bake for approximately 45-50 minutes. The pie is done when it’s set and lightly golden brown on top. To test for doneness, insert a toothpick into the center of the pie; if it comes out clean or with only a few moist crumbs attached, the pie is ready. If the top of the pie is browning too quickly, you can tent it with aluminum foil to prevent burning.
Step 6: Cooling and Serving: Once the pie is baked, remove it from the oven and let it cool for about 10-15 minutes before slicing and serving. This allows the pie to set further and prevents it from falling apart when cut. Cooling also enhances the flavors. Serve the pie warm or at room temperature. For an extra touch, top it with whipped cream, toasted coconut flakes, fresh berries, or a dusting of powdered sugar.
Why You Will Love This Recipe:
This Crustless Coconut Pie is a revelation for anyone who loves coconut flavor. Its simplicity is deceptive; the resulting pie is surprisingly rich, moist, and deeply satisfying. The absence of a crust makes it a quicker and easier dessert to prepare, perfect for busy weeknights or last-minute gatherings. The naturally gluten-free nature of the recipe (when using gluten-free flour) makes it an excellent option for those with dietary restrictions. The recipe is easily adaptable; you can adjust the sweetness by choosing sweetened or unsweetened coconut, or customize the flavor with different extracts like almond or rum. The custardy texture and intense coconut flavor are a winning combination that will leave everyone wanting more. Beyond its delicious taste, this pie is a comforting and nostalgic dessert that evokes memories of home-baked goodness.
Serving Suggestions:
- Warm with a dollop of whipped cream: A classic pairing that complements the coconut flavor perfectly.
- Toasted coconut flakes: Sprinkling toasted coconut flakes on top adds a delightful crunch and enhances the coconut flavor.
- Fresh berries: Add a burst of freshness and color with raspberries, blueberries, or strawberries.
- A dusting of powdered sugar: For a simple yet elegant presentation.
- Coconut ice cream: Serve a slice of warm pie with a scoop of coconut ice cream for an extra-indulgent treat.
- A drizzle of caramel sauce: Adds a rich and decadent flavor dimension.
- Accompanied by a cup of coffee or tea: A perfect ending to a meal.
Tips:
- Coconut Choice: Use sweetened coconut if you prefer a sweeter pie, and unsweetened if you want to control the sugar content. If using sweetened coconut, you may want to reduce the amount of granulated sugar slightly.
- Flour Alternatives: For a gluten-free version, use a gluten-free all-purpose flour blend. Ensure it’s a blend designed for baking, as some blends can result in a gritty texture.
- Milk Substitutions: Feel free to use almond milk, coconut milk, or any other non-dairy milk alternative. Coconut milk will enhance the coconut flavor even further.
- Preventing Burning: If the top of the pie starts to brown too quickly, cover it loosely with aluminum foil during the last 15-20 minutes of baking.
- Doneness Test: The toothpick test is the best way to determine if the pie is done. The center should be set, not jiggly.
- Cooling Time: Allow the pie to cool completely before slicing to prevent it from falling apart.
- Storage: Store leftover pie in the refrigerator, covered, for up to 3 days.
Prep Time: 10 minutes Cook Time: 45-50 minutes Total Time: 55-60 minutes
Nutritional Information:
- Calories: Approximately 300-350 per serving (depending on ingredients and serving size)
- Protein: Approximately 5-7 grams per serving
- Sodium: Approximately 150-200 mg per serving
Disclaimer: Nutritional information is an estimate and can vary based on specific ingredients and serving sizes.
Conclusion:
The Crustless Coconut Pie is a testament to how simple ingredients can combine to create a truly remarkable dessert. Its ease of preparation, combined with its intense coconut flavor and custardy texture, makes it a winner for any occasion. Whether you’re looking for a quick and easy weeknight dessert or a show-stopping centerpiece for a gathering, this pie is sure to impress. The absence of a crust not only simplifies the recipe but also allows the coconut flavor to shine through, making it a must-try for coconut lovers everywhere. So, gather your ingredients, preheat your oven, and prepare to be amazed by the simplicity and deliciousness of this Crustless Coconut Pie.
Questions and Answers About This Recipe:
Q1: Can I make this pie ahead of time?
A: Absolutely! In fact, making the pie a day ahead of time can actually enhance the flavors and allow the pie to set more completely. Just make sure to store it covered in the refrigerator. Let it sit at room temperature for about 30 minutes before serving to bring out the flavors.
Q2: Can I use a different type of coconut?
A: While shredded coconut is the most commonly used in this recipe, you could experiment with other forms of coconut, such as coconut flakes. Keep in mind that coconut flakes may require a slightly longer baking time, and the texture will be different. Avoid using coconut cream or coconut milk directly in the batter, as these ingredients will alter the pie’s consistency.
Q3: Is it possible to make this recipe vegan?
A: Yes, it is! To make this pie vegan, you’ll need to replace the eggs, milk, and butter. Use a vegan egg replacer like applesauce or a commercial egg replacer. For the milk, opt for coconut milk, almond milk, or soy milk. Instead of butter, use melted coconut oil or a vegan butter substitute. Keep in mind that the texture and flavor may be slightly different, but the result will still be a delicious vegan coconut pie.
Q4: My pie is browning too quickly on top. What should I do?
A: If you notice that the top of the pie is browning too quickly, you can tent it with aluminum foil during the last 15-20 minutes of baking. This will help to prevent the top from burning while allowing the center to cook through.
Q5: Can I add other ingredients to this pie?
A: Absolutely! This recipe is very versatile and can be easily customized to your liking. You can add chocolate chips, chopped nuts (like macadamia or pecans), or even a swirl of caramel sauce before baking. Just be mindful of adding too many extra ingredients, as this can affect the overall texture and baking time of the pie. Experiment and have fun creating your own unique version!