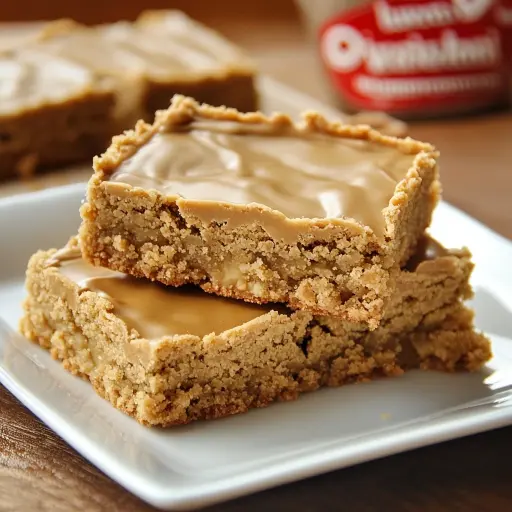
Description: A nostalgic and utterly irresistible treat that evokes memories of school cafeterias and happy childhood days. These Peanut Butter Lunch Lady Cookie Bars are thick, chewy, peanut-buttery squares topped with a rich, decadent frosting that perfectly complements the nutty flavor. This recipe makes a large batch, perfect for sharing with friends, family, or bringing to potlucks. It’s a simple yet satisfying dessert that’s sure to become a family favorite.
Ingredients:
- 2 cups all-purpose flour
- 2 cups granulated sugar
- 1 ½ cups creamy peanut butter
- 3 sticks (1 ½ cups) unsalted butter, softened
- 1 teaspoon baking soda
- 1 teaspoon pure vanilla extract
- 1 teaspoon salt
- 4 cups powdered sugar, sifted
- 2 large eggs
- ½ cup milk
Preparation:
Step 1: Preheat your oven to 400°F (200°C). Thoroughly grease a large cookie sheet or baking pan (approximately 12×17 inches). Proper greasing prevents the bars from sticking and ensures easy removal after baking. Lining the pan with parchment paper, with an overhang, adds an extra layer of protection and makes removing the bars even simpler.
Step 2: In a large mixing bowl, whisk together the all-purpose flour, granulated sugar, baking soda, and salt. Ensure these dry ingredients are well combined. This even distribution of baking soda is crucial for the bars to rise properly and have a light, chewy texture. Sifting the flour beforehand helps to remove any lumps, leading to a smoother batter.
Step 3: In a separate bowl, whisk together the milk, vanilla extract, and eggs. Whisking thoroughly ensures that the eggs are fully incorporated, preventing any streaks of yolk in the final batter. The vanilla extract adds a touch of warmth and enhances the overall flavor profile of the bars. Use high-quality vanilla for the best results.
Step 4: In a microwave-safe bowl or a saucepan over low heat, melt the softened butter and peanut butter together until completely smooth and combined. Be careful not to overheat the mixture, as this can cause the peanut butter to become oily. If using the microwave, heat in 30-second intervals, stirring in between, until melted. Once melted, add the peanut butter mixture to the dry ingredients and mix until just combined. Be careful not to overmix the batter; overmixing can develop the gluten in the flour, resulting in tough bars. Gently fold in the egg mixture until everything is evenly incorporated.
Step 5: Spread the batter evenly onto the prepared cookie sheet or baking pan. Use an offset spatula or the back of a spoon to ensure the batter is spread to the edges. The evenness of the batter ensures that the bars bake uniformly. Bake in the preheated oven for approximately 20 minutes, or until the edges are golden brown and a toothpick inserted into the center comes out with just a few moist crumbs.
Step 6: Remove the cookie sheet from the oven and let the bars cool completely on a wire rack before frosting. This is crucial for the frosting to adhere properly and not melt. Allowing the bars to cool completely also prevents them from becoming soggy.
Step 7: While the bars are cooling, prepare the frosting. In a microwave-safe bowl or a saucepan over low heat, melt the remaining stick of butter and peanut butter together until smooth and combined. Again, be cautious not to overheat the mixture.
Step 8: Remove from heat and gradually add the sifted powdered sugar, alternating with the milk, until the frosting reaches a smooth, spreadable consistency. Sifting the powdered sugar is essential to prevent lumps in the frosting. Adjust the amount of milk to achieve the desired consistency; add more milk for a thinner frosting or more powdered sugar for a thicker frosting.
Step 9: Once the bars are completely cool, spread the frosting evenly over the top.
Step 10: Let the frosting set completely before cutting the bars into squares and serving. This usually takes about 30 minutes to an hour at room temperature, or you can speed up the process by placing the bars in the refrigerator for a shorter period.
Why You Will Love This Recipe:
These Peanut Butter Lunch Lady Cookie Bars are more than just a dessert; they’re a nostalgic trip back to simpler times. The combination of peanut butter and vanilla creates a flavor profile that is comforting and familiar. The bars are incredibly easy to make, requiring only simple ingredients and minimal effort. They’re perfect for satisfying a sweet tooth, bringing to parties, or enjoying as an after-school treat. The soft, chewy texture and the rich, decadent frosting make these bars an instant crowd-pleaser. Plus, this recipe makes a large batch, so there’s plenty to share (or not!).
COOKING Rating: Easy
Serving Suggestions:
- Serve these bars with a glass of cold milk or a scoop of vanilla ice cream for an extra indulgent treat.
- Cut the bars into smaller squares for a bite-sized snack.
- Sprinkle the frosting with chopped peanuts or chocolate shavings for added texture and flavor.
- These bars are perfect for packing in lunchboxes or taking on picnics.
Tips:
- Ensure the butter is softened before melting for a smoother mixture.
- Do not overmix the batter to prevent tough bars.
- Cool the bars completely before frosting to prevent the frosting from melting.
- Store leftover bars in an airtight container at room temperature for up to three days.
- For a richer flavor, use natural peanut butter.
- If you want to elevate the recipe add mini chocolate chips, Reeces pieces
- Parchment paper will help with easy cleanup
- You can freeze them up to 3 months.
- You can add brown sugar for a more “brown” taste
Prep Time: 20 minutes Cook Time: 20 minutes Total Time: 40 minutes (plus cooling time)
Nutritional Information: (Per serving, approximate) Values are based on estimations and may vary.
- Calories: 350-400
- Protein: 5-7g
- Sodium: 150-200mg
Conclusion:
Peanut Butter Lunch Lady Cookie Bars are a timeless classic that’s sure to bring a smile to anyone’s face. Their simple ingredients, easy preparation, and irresistible flavor make them a perfect treat for any occasion. Whether you’re looking for a comforting dessert, a crowd-pleasing snack, or a nostalgic trip down memory lane, these bars are guaranteed to deliver. So, gather your ingredients, preheat your oven, and get ready to bake a batch of pure happiness!
Questions and Answers about this Recipe:
Q1: Can I use a different type of peanut butter for this recipe?
A1: Absolutely! While creamy peanut butter is recommended for the smoothest texture, you can certainly use chunky peanut butter for added texture. You can also experiment with different types of peanut butter, such as natural peanut butter or even flavored peanut butter, to customize the flavor to your liking. Keep in mind that natural peanut butter may require a bit more mixing to incorporate fully, and you might need to adjust the amount of liquid in the frosting if it’s too thick.
Q2: What can I do if my frosting is too thick or too thin?
A2: If your frosting is too thick, simply add a small amount of milk, a tablespoon at a time, until it reaches a smooth, spreadable consistency. If the frosting is too thin, add more sifted powdered sugar, a tablespoon at a time, until it thickens to your desired consistency. It’s always best to add liquids and solids gradually to avoid overdoing it.
Q3: Can I freeze these cookie bars for later?
A3: Yes, these cookie bars freeze very well! To freeze, cut the cooled and frosted bars into squares and arrange them in a single layer on a baking sheet lined with parchment paper. Place the baking sheet in the freezer for about 1-2 hours, or until the bars are frozen solid. Then, transfer the frozen bars to an airtight container or freezer bag. This will prevent the bars from sticking together and maintain their shape during freezing. They can be stored in the freezer for up to 2-3 months. When ready to serve, thaw the bars in the refrigerator overnight or at room temperature for a few hours.
Q4: How do I prevent the bars from sticking to the baking pan?
A4: To prevent the bars from sticking to the baking pan, make sure to grease the pan thoroughly with butter, shortening, or cooking spray. For extra insurance, you can also line the pan with parchment paper, leaving an overhang on the sides. This makes it easy to lift the bars out of the pan after they’ve cooled.
Q5: Can I make this recipe without peanut butter due to allergies?
A5: While this recipe is specifically for Peanut Butter Lunch Lady Cookie Bars, you could potentially substitute the peanut butter with an alternative nut butter, such as almond butter or cashew butter. However, be aware that this will alter the flavor profile of the bars. For those with nut allergies, you could try using sunflower seed butter (sunbutter) or tahini (sesame seed paste). Again, the flavor will be different, but these are good allergy-friendly alternatives.