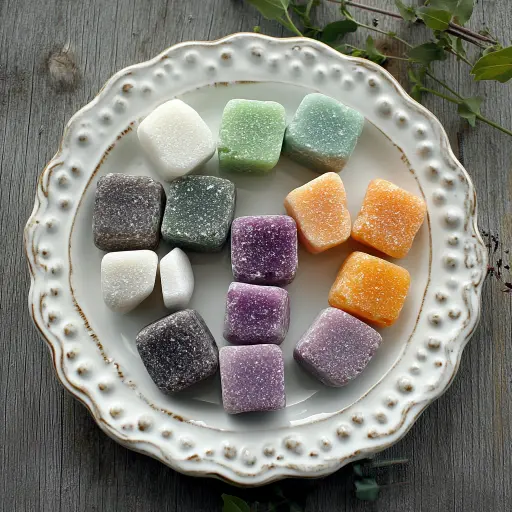
Description: Create your own customized aromatherapy stones with just a few simple ingredients! These delightful stones release a subtle fragrance, naturally freshening your space and uplifting your mood. Perfect for placing in bathrooms, bedrooms, closets, or anywhere you desire a gentle, soothing aroma.
Ingredients:
- 2 cups Baking Soda (Sodium Bicarbonate): This is the foundation of our stones, providing the structure and a neutral base for the scent. Ensure it’s fresh baking soda for the best results.
- 1 cup Cornstarch (Corn Flour): Cornstarch helps bind the ingredients together, creating a smoother texture and assisting in the hardening process. It also contributes to a less crumbly final product.
- 1 1/4 cups Water (Distilled or Filtered): Water activates the baking soda and cornstarch, allowing them to form a paste that can be molded and shaped. Use distilled or filtered water for a cleaner and more predictable outcome.
- Food Coloring (Gel or Liquid): This is where you can get creative! Choose your favorite colors or select hues that complement your home décor. Gel food coloring is more concentrated, so use it sparingly. Liquid food coloring requires a bit more for the same effect. Consider natural food colorings from fruit or vegetable extracts for a more eco-friendly and skin-friendly option.
- Essential Oils (10-15 drops per batch, adjust to preference): The heart of these stones lies in the essential oils. Select oils based on their aromatherapy benefits and your personal preferences. Lavender for relaxation, eucalyptus for decongestion, lemon for energizing, peppermint for focus – the possibilities are endless! High-quality, pure essential oils are recommended for a potent and long-lasting fragrance.
Preparation:
step 1: Combine Dry Ingredients: In a large mixing bowl, meticulously combine the baking soda and cornstarch. Use a whisk to ensure that the two ingredients are fully integrated and free of any lumps. This step is crucial for a smooth and consistent final product.
Step 2: Add Water Gradually: Slowly and deliberately add the water to the dry ingredients, stirring continuously with a spatula or spoon. The key here is to add the water gradually, allowing it to fully absorb into the baking soda and cornstarch mixture. This will prevent clumps from forming and ensure a uniform paste. Aim for a thick paste consistency, similar to that of wet sand. It should be pliable enough to mold but not too wet or runny.
Step 3: Divide and Color (Optional): If you plan to create aromatherapy stones in multiple colors, carefully divide the mixture into separate bowls. Add a few drops of food coloring to each portion, and stir thoroughly until the color is evenly distributed. Remember that the color will lighten slightly as the stones dry, so you may want to add a bit more food coloring than you initially think is necessary.
Step 4: Incorporate Essential Oils: This is where the magic happens! Add 10-15 drops of your chosen essential oil(s) to the mixture (or each colored portion if you’ve divided it). Stir thoroughly to ensure the essential oil is fully incorporated into the paste. The amount of essential oil can be adjusted to your preference, but be mindful of the potential for skin sensitivity with higher concentrations. Always use high-quality, pure essential oils for the best aromatherapy benefits. Experiment with blending different essential oils to create your own signature scents!
Step 5: Shape the Stones: Now, it’s time to get creative! Take small portions of the paste and shape them into stones by hand, or press them into silicone molds for more defined and consistent shapes. You can make smooth, rounded stones, or create more intricate designs with molds. Consider using sea shells or other natural objects to imprint patterns onto the stones.
Step 6: Dry the Stones: Place the formed stones on wax paper or a drying rack to allow them to dry completely. This process can take anywhere from 24 to 48 hours, depending on the size of the stones and the humidity in your environment. Be patient and resist the urge to touch or move the stones while they are drying, as this can disrupt the process and cause them to crack or crumble. To speed up the drying process, you can place the stones in a well-ventilated area or use a fan.
Step 7: Enjoy the Aroma: Once the stones are fully hardened, they are ready to be placed around your home and enjoyed. Place them in bathrooms, bedrooms, closets, drawers, or any other space where you want to add a touch of fragrance and aromatherapy benefits. As the essential oils evaporate, the stones will release a subtle and pleasant aroma. Replace stones as aroma dissipates, this will take 30-60 days depending on the oil.
Why You Will Love This Recipe:
This recipe is a delightful combination of creativity, simplicity, and aromatherapy benefits. It’s incredibly easy to make, requiring only a few readily available ingredients and minimal equipment. The customization options are endless – you can experiment with different colors, shapes, and essential oil blends to create aromatherapy stones that perfectly suit your personal style and needs. Beyond their aesthetic appeal, these stones offer a natural and effective way to freshen your home and uplift your mood. They are a sustainable and eco-friendly alternative to commercially produced air fresheners, and they make a thoughtful and personalized gift for friends and family.
COOKING Rating: Easy
Serving Suggestions:
- Place a few stones in a small decorative bowl or tray and display them in your bathroom or bedroom.
- Tuck a stone or two into your linen closet to keep your towels and sheets smelling fresh.
- Place a stone in your car for a natural and subtle air freshener.
- Add a stone to a drawer to keep your clothes smelling pleasant.
- Create a set of stones as a thoughtful and personalized gift for a friend or loved one.
Tips:
- Use high-quality, pure essential oils for the best aromatherapy benefits and a long-lasting fragrance.
- Experiment with blending different essential oils to create your own signature scents.
- For a more vibrant color, use gel food coloring.
- To speed up the drying process, place the stones in a well-ventilated area or use a fan.
- If the stones crack or crumble, add a bit more water to the mixture and try again.
- Store the stones in an airtight container to prevent them from absorbing moisture and losing their fragrance.
- Refresh the scent by adding a few drops of essential oil directly to the stones.
- Consider adding dried herbs or flowers to the mixture for added texture and visual appeal.
Prep Time: 15 minutes Cook Time: 24-48 hours (drying time) Total Time: 24 hours 15 minutes – 48 hours 15 minutes
Nutritional Information: (While these are not edible, here’s an estimated breakdown based on the ingredients)
- Calories: Negligible
- Protein: Negligible
- Sodium: Varies depending on the baking soda.
Conclusion:
These Aromatic Aromatherapy Stones are a fantastic way to personalize your living space and enjoy the benefits of essential oils. The simplicity of the recipe combined with the endless customization possibilities makes it a fun and rewarding project. Not only will your home smell wonderful, but you’ll also have the satisfaction of knowing you created something beautiful and beneficial with your own hands. So gather your ingredients, unleash your creativity, and start crafting your own fragrant aromatherapy stones today!
Questions and Answers About This Recipe:
Q1: How long will the scent last in the aromatherapy stones?
A1: The longevity of the scent depends on several factors, including the type and quality of the essential oils used, the size of the stones, and the ambient temperature and humidity. Generally, you can expect the scent to last for several weeks to a month. You can refresh the scent by adding a few drops of essential oil directly to the stones as needed.
Q2: Can I use different types of essential oils in this recipe?
A2: Absolutely! The beauty of this recipe lies in its versatility. You can use any essential oil or blend of essential oils that you enjoy. Consider the aromatherapy benefits of each oil when making your selection. For example, lavender is known for its calming properties, while eucalyptus is often used to relieve congestion.
Q3: Are these aromatherapy stones safe to use around pets and children?
A3: While the ingredients themselves are generally considered safe, it’s important to exercise caution when using essential oils around pets and children. Some essential oils can be toxic to animals, so it’s best to research the safety of specific oils before using them. It’s also important to keep the stones out of reach of young children to prevent accidental ingestion.
Q4: Can I use these aromatherapy stones in a diffuser?
A4: No, these stones are not designed for use in a diffuser. Diffusers typically use water or heat to disperse essential oils into the air. These aromatherapy stones release their scent naturally through evaporation.
Q5: What can I do if my aromatherapy stones crack or crumble?
A5: If your aromatherapy stones crack or crumble, it’s likely due to a lack of moisture or improper drying. Try adding a bit more water to the mixture next time to create a smoother paste. Also, ensure that the stones are allowed to dry completely before handling them. If the cracks are minor, you can try gently pressing them back together while the stones are still slightly damp.