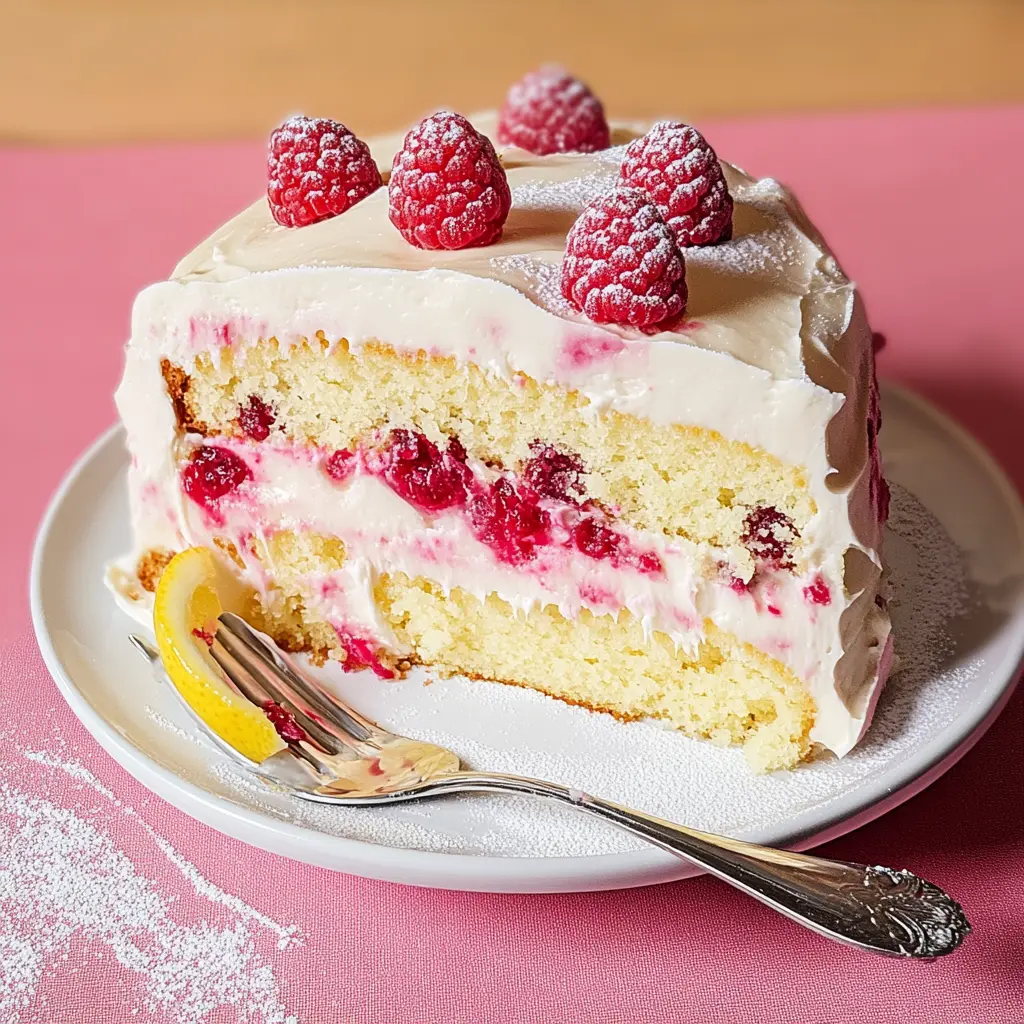
Description: This Raspberry Lemon Cake is a bright and flavorful dessert perfect for any occasion. It features a moist and tender cake infused with the zesty aroma of lemon and studded with juicy, tart raspberries. The cake is then generously frosted with a creamy, tangy lemon buttercream that perfectly complements the sweet and fruity notes. This cake is a showstopper that’s sure to impress your friends and family.
Why you will love this recipe:
- Bursting with Flavor: The combination of fresh raspberries and lemon creates a delightful balance of sweet and tart flavors.
- Moist and Tender Crumb: The addition of Greek yogurt ensures a wonderfully moist and tender cake.
- Homemade Goodness: This cake is made from scratch, using fresh, high-quality ingredients for the best possible flavor and texture.
- Beautiful Presentation: The vibrant colors of the raspberries and the smooth lemon buttercream make this cake a visually stunning dessert.
- Versatile: This cake is perfect for birthdays, holidays, potlucks, or simply as a delicious treat for yourself.
Introduction
This Raspberry Lemon Cake is more than just a dessert; it’s an experience. It’s the kind of cake that evokes memories of sunshine, warm breezes, and the simple pleasures of life. The bright, citrusy notes of lemon mingle beautifully with the sweet-tartness of fresh raspberries, creating a symphony of flavors that will tantalize your taste buds.
The secret to this cake’s success lies in the quality of the ingredients and the care taken in its preparation. Using fresh, ripe raspberries and high-quality butter is essential for achieving the best possible flavor. The addition of Greek yogurt not only adds moisture but also contributes to the cake’s incredibly tender crumb.
The lemon buttercream is the perfect finishing touch, adding a creamy, tangy sweetness that complements the cake’s fruity notes. The optional drop of yellow gel food coloring enhances the frosting’s visual appeal, making it even more irresistible.
Whether you’re a seasoned baker or just starting out, this recipe is surprisingly easy to follow. With a little patience and attention to detail, you’ll be able to create a stunning and delicious Raspberry Lemon Cake that will impress everyone who tries it. So, gather your ingredients, preheat your oven, and let’s embark on this baking adventure together!
Ingredients:
Cake:
- 9 Tbsp (113g) unsalted butter, at room temperature
- 1 cup (200g) granulated sugar
- Zest of 1 lemon
- 3 large eggs, separated
- 1 tsp vanilla extract
- 2 cups (250g) all-purpose flour
- 2 tsp baking powder
- 1 tsp salt
- 1/2 tsp baking soda
- 1 cup (245g) plain Greek yogurt
- 1 1/2 cups (180g) raspberries, fresh or frozen (if frozen, do not thaw)
Lemon Buttercream:
- 1 cup (227g) unsalted butter, at room temperature
- 5 cups (600g) confectioner’s sugar, sifted
- 4 Tbsp fresh lemon juice
- Optional: 1 drop yellow gel food coloring
Preparation:
Step 1: Preheat the oven to 350°F (175°C). This is a crucial step as baking at the right temperature ensures even cooking and a perfectly textured cake. Prepare your cake pans by buttering them thoroughly and then dusting them with flour. This will prevent the cake from sticking to the pan. You can also line the bottoms with parchment paper rounds for added insurance.
Step 2: In a large mixing bowl, cream together the butter, granulated sugar, and lemon zest until light and fluffy. Use an electric mixer (stand mixer or hand mixer) for this step. Creaming the butter and sugar properly is essential for creating a light and airy cake. The mixture should become pale in color and significantly increase in volume. The lemon zest adds a bright, aromatic flavor that infuses the entire cake.
Step 3: Beat in the egg yolks one at a time, then add the vanilla extract. Make sure each egg yolk is fully incorporated before adding the next. The egg yolks add richness and color to the cake. The vanilla extract enhances the overall flavor profile, adding a touch of warmth and sweetness.
Step 4: In a separate bowl, whip the egg whites to soft peaks. Use a clean bowl and whisk attachment for this step. Make sure there is no trace of egg yolk in the egg whites, as this will prevent them from whipping properly. Beat the egg whites until they form soft peaks, which means they hold their shape but still droop slightly at the tips. This step adds lightness and airiness to the cake.
Step 5: Whisk together the all-purpose flour, baking powder, salt, and baking soda in a separate bowl. Whisking these dry ingredients together ensures that they are evenly distributed, which is important for consistent baking. Baking powder and baking soda are leavening agents that help the cake rise. Salt enhances the flavor of the cake.
Step 6: Add the dry ingredients to the butter mixture in three parts, alternating with the Greek yogurt. Begin and end with the flour mixture. This technique is crucial for preventing the gluten in the flour from developing too much, which would result in a tough cake. Alternating the dry and wet ingredients ensures that the batter stays smooth and well-combined. The Greek yogurt adds moisture and richness to the cake.
Step 7: Gently fold the whipped egg whites into the batter until no white streaks remain. Use a rubber spatula for this step and be careful not to overmix. Overmixing will deflate the egg whites and result in a dense cake. Fold the egg whites in gently, working from the bottom of the bowl upwards, until they are just incorporated.
Step 8: Carefully fold in the raspberries. Again, be gentle to avoid crushing the raspberries and bleeding their color into the batter. The raspberries add a burst of fresh, fruity flavor to the cake. If using frozen raspberries, add them while still frozen to prevent them from bleeding.
Step 9: Divide the batter evenly between the prepared cake pans and smooth the tops. Use a kitchen scale to ensure that the batter is divided evenly between the pans. This will help the cakes bake evenly.
Step 10: Bake in the preheated oven for about 30 minutes, or until a toothpick inserted into the center comes out clean. The baking time may vary depending on your oven, so check the cakes frequently. A toothpick inserted into the center should come out clean or with a few moist crumbs attached.
Step 11: Cool the cakes in the pans for 10 minutes, then transfer to a wire rack to cool completely. Cooling the cakes in the pans slightly allows them to set before being turned out. Make sure the cakes are completely cool before frosting.
Step 12: For the lemon buttercream, beat the butter until creamy. Use an electric mixer for this step. The butter should be at room temperature for easy creaming.
Step 13: Gradually add the sifted confectioner’s sugar, mixing well after each addition. Sifting the confectioner’s sugar prevents lumps and ensures a smooth frosting. Add the sugar gradually to prevent a cloud of dust from forming.
Step 14: Add the fresh lemon juice and continue to beat until the frosting is smooth and fluffy. The lemon juice adds a tangy flavor that complements the sweetness of the frosting.
Step 15: If desired, add a drop of yellow gel food coloring. This is optional and is simply for aesthetic purposes.
Step 16: Assemble the cake by placing one layer on a serving plate, spreading a thick layer of lemon buttercream on top. Place the second cake layer on top and frost the entire cake with the remaining buttercream. Decorate as desired.
COOKING Rating:
Medium
Serving Suggestions:
- Serve chilled or at room temperature.
- Pair with a scoop of vanilla ice cream or a dollop of whipped cream.
- Garnish with fresh raspberries, lemon slices, or a dusting of confectioner’s sugar.
- Enjoy with a cup of tea or coffee.
Tips:
- Use room temperature ingredients for best results.
- Don’t overmix the batter, as this will result in a tough cake.
- Use a kitchen scale to ensure that the batter is divided evenly between the cake pans.
- Let the cakes cool completely before frosting.
- If the buttercream is too thick, add a little more lemon juice. If it’s too thin, add a little more confectioner’s sugar.
- For a more intense lemon flavor, add additional lemon zest to the cake batter or buttercream.
- Store leftover cake in an airtight container at room temperature for up to 3 days or in the refrigerator for up to 5 days.
Prep Time:
30 minutes
Cook Time:
30 minutes
Total Time:
1 hour
Nutritional Information: (Approximate, per serving)
Calories: 450
Protein: 5g
Sodium: 250mg
Conclusion
This Raspberry Lemon Cake is a delightful treat that’s perfect for any occasion. Its bright, fruity flavors and moist, tender crumb will surely impress everyone who tries it. While it requires a bit of effort, the end result is well worth it. So, go ahead and bake this cake and experience the joy of creating something truly special! Enjoy!
Q&A:
Q1: Can I use frozen raspberries instead of fresh?
A1: Yes, you can absolutely use frozen raspberries. In fact, some bakers prefer using frozen raspberries because they tend to hold their shape better during baking. However, it’s important to add them to the batter while they are still frozen to prevent them from bleeding and discoloring the batter. Do not thaw them before adding.
Q2: What can I substitute for Greek yogurt if I don’t have any on hand?
A2: If you don’t have Greek yogurt, you can substitute it with sour cream or plain yogurt. Sour cream will add a slightly richer flavor, while plain yogurt will provide a similar texture and moisture content. Make sure to use a full-fat version of either substitute for the best results. You could also use creme fraiche.
Q3: Can I make this cake ahead of time?
A3: Yes, you can definitely make this cake ahead of time. The cake layers can be baked and stored in the refrigerator for up to 2 days before frosting. Wrap them tightly in plastic wrap to prevent them from drying out. You can also make the lemon buttercream ahead of time and store it in an airtight container in the refrigerator for up to 3 days. Allow the buttercream to come to room temperature before frosting the cake.
Q4: How do I prevent the cake from sticking to the pan?
A4: To prevent the cake from sticking to the pan, it’s essential to grease and flour the pans thoroughly. Use a generous amount of butter or shortening to grease the pans, making sure to reach all the nooks and crannies. Then, dust the pans with flour, tapping out any excess. You can also line the bottoms of the pans with parchment paper rounds for added insurance.
Q5: Can I make this cake gluten-free?
A5: Yes, you can adapt this recipe to be gluten-free. Substitute the all-purpose flour with a high-quality gluten-free all-purpose flour blend. Make sure the blend contains xanthan gum, as this will help bind the ingredients together and provide structure to the cake. Baking times may vary slightly, so keep a close eye on the cake while it’s baking.