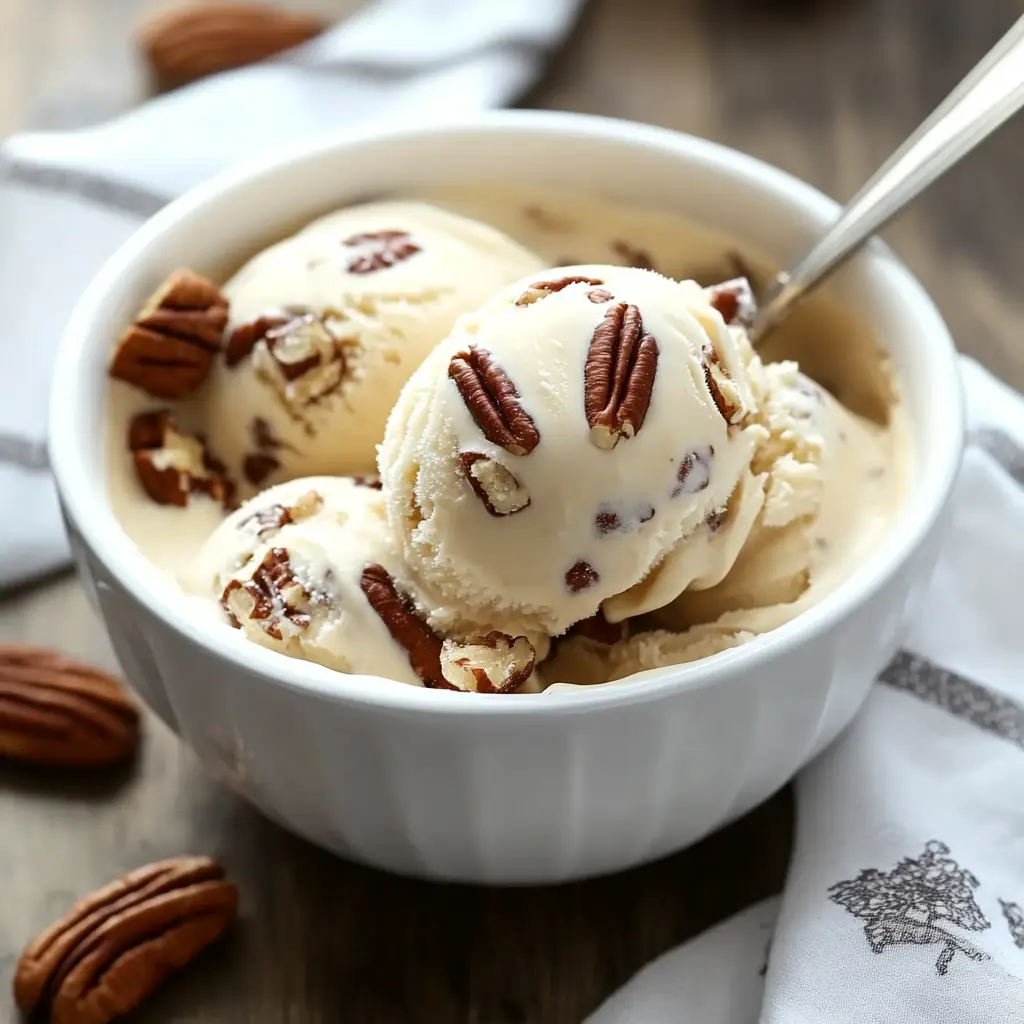
Description of this recipe: This recipe delivers the ultimate creamy, dreamy, and intensely flavorful homemade Butter Pecan Ice Cream. We’re talking about the kind of ice cream that melts in your mouth with a rich, buttery, and nutty goodness in every single bite. This isn’t your average store-bought ice cream; this is a deeply satisfying, made-from-scratch experience that will redefine your ice cream standards. It’s the perfect dessert for a warm summer day, a special occasion, or anytime you crave a truly exceptional treat.
Why you will love this recipe:
- Unmatched Flavor: The combination of toasted pecans, browned butter, and a perfectly balanced custard base creates an unparalleled flavor profile. The toasted pecans provide a deep, nutty richness that complements the creamy sweetness of the ice cream.
- Creamy Texture: This recipe uses a classic custard base made with egg yolks, which results in an incredibly smooth and decadent ice cream texture. It’s not icy or grainy; it’s pure creamy bliss.
- Homemade Pride: There’s something incredibly rewarding about making ice cream from scratch. Knowing that you created this deliciousness from simple ingredients makes it all the more enjoyable.
- Customizable: While this recipe is fantastic as is, it’s also a great base for experimentation. You can adjust the sweetness, add a hint of spice, or incorporate other nuts or flavors to create your own signature Butter Pecan Ice Cream.
- Special Occasion Dessert: This ice cream elevates any gathering. It’s not just a dessert; it’s an experience, perfect for sharing with loved ones or enjoying as a personal indulgence.
Introduction
Butter Pecan Ice Cream holds a special place in the hearts of many ice cream aficionados. Its unique blend of creamy richness, buttery notes, and the satisfying crunch of toasted pecans makes it a truly irresistible treat. While you can certainly find commercially produced versions, nothing compares to the flavor and texture of homemade Butter Pecan Ice Cream. This recipe takes you through each step of the process, ensuring that you create a batch that is far superior to anything you can buy in a store.
The key to exceptional Butter Pecan Ice Cream lies in the quality of the ingredients and the meticulous execution of the custard base. We’ll use fresh, high-quality ingredients like heavy cream, whole milk, and brown sugar to create a rich and flavorful foundation. Toasting the pecans to a golden brown brings out their natural sweetness and adds a delightful crunch. The custard base is carefully cooked to achieve a perfect thickness, ensuring that the ice cream is smooth and creamy.
But don’t be intimidated by the custard-making process! With a few simple techniques and a little patience, you’ll be creating ice cream like a pro in no time. This recipe is designed to be accessible to home cooks of all skill levels. We’ll provide clear instructions and helpful tips to guide you through each step.
So, gather your ingredients, put on your apron, and get ready to embark on a delicious ice cream-making adventure. Your taste buds will thank you!
Ingredients:
- 1 1/2 cups pecans, chopped
- 2 cups heavy cream
- 1 cup whole milk
- 3/4 cup brown sugar, packed
- 1 teaspoon vanilla extract
- 1/2 teaspoon salt
- 5 large egg yolks
- 1 tablespoon unsalted butter
Preparation:
Step 1: Toast the Pecans: Preheat your oven to 350°F (175°C). Spread the chopped pecans evenly on a baking sheet in a single layer. Toast them in the preheated oven for 8-10 minutes, stirring occasionally. The pecans are ready when they are golden brown and fragrant. Be careful not to burn them, as burnt pecans will have a bitter taste. Remove the pecans from the oven and let them cool completely. Toasting the pecans is crucial because it intensifies their flavor and adds a pleasant crunch to the ice cream. It also releases the natural oils in the nuts, creating a richer, more complex flavor profile.
Step 2: Infuse the Cream with Flavor: In a medium saucepan, combine the heavy cream, whole milk, brown sugar, and salt. Place the saucepan over medium heat. Stir the mixture constantly until the brown sugar dissolves completely. Be careful not to let the mixture boil; you only want it to be warm enough to dissolve the sugar. Heating the cream mixture together infuses the cream with the molasses notes from the brown sugar. The salt enhances the sweetness and helps to balance the flavors. The heavy cream provides the richness, while the whole milk contributes to the overall creaminess of the ice cream.
Step 3: Temper the Egg Yolks: In a separate bowl, whisk the egg yolks vigorously until they are smooth and slightly pale. This step is essential to prevent the egg yolks from scrambling when you add them to the hot cream mixture. Slowly pour about 1/2 cup of the hot cream mixture into the egg yolks, whisking constantly. This process is called tempering. Tempering gradually raises the temperature of the egg yolks, preventing them from curdling when you add them to the rest of the hot cream. If you add the cold egg yolks directly to the hot cream, they will cook too quickly and result in a lumpy custard.
Step 4: Create the Custard: Slowly pour the tempered egg yolk mixture back into the saucepan with the remaining cream mixture. Place the saucepan back over medium heat. Cook the mixture, stirring constantly with a spatula or wooden spoon, until the custard thickens and coats the back of the spoon. This usually takes about 5-8 minutes. The custard is ready when you can run your finger across the back of the spoon and the line holds its shape without the custard running back together. It’s essential to stir constantly to prevent the custard from sticking to the bottom of the saucepan and burning. Use a thermometer to check the temperature; the custard should reach 170°F (77°C). Do not let the custard boil, as this will cause it to curdle.
Step 5: Flavor and Chill: Remove the custard from the heat. Stir in the unsalted butter and vanilla extract. The butter adds richness and a velvety texture to the custard, while the vanilla extract enhances the overall flavor. Let the custard cool to room temperature. To speed up the cooling process, you can place the saucepan in an ice bath, stirring occasionally. Once the custard has cooled to room temperature, cover it tightly with plastic wrap, pressing the plastic wrap directly onto the surface of the custard to prevent a skin from forming. Chill the custard in the refrigerator for at least 4 hours or, preferably, overnight. Chilling the custard allows the flavors to meld together and the custard to thicken further, resulting in a smoother and creamier ice cream.
Step 6: Churn the Ice Cream: Pour the chilled custard into your ice cream maker. Churn according to the manufacturer’s instructions. Most ice cream makers take about 20-30 minutes to churn the ice cream to a soft-serve consistency. When the ice cream is nearly done churning, add the toasted pecans. This ensures that the pecans are evenly distributed throughout the ice cream and remain crunchy.
Step 7: Freeze to Perfection: Transfer the churned ice cream to an airtight container. Freeze for at least 4 hours, or preferably overnight, until fully set. This final freezing step allows the ice cream to harden completely and develop its final texture.
COOKING Rating:
- Difficulty: Medium
- Prep Time: 30 minutes
- Cook Time: 20 minutes
- Total Time: 8 hours (includes chilling and freezing)
Serving Suggestions:
- Serve the ice cream in a bowl or cone.
- Top with additional toasted pecans, whipped cream, or a drizzle of caramel sauce.
- Serve alongside a slice of pie or cake.
- Make ice cream sandwiches with your favorite cookies.
- Enjoy it on its own as a refreshing and satisfying dessert.
Tips:
- Use high-quality ingredients for the best flavor.
- Toast the pecans carefully to avoid burning.
- Temper the egg yolks slowly to prevent curdling.
- Stir the custard constantly while cooking to prevent sticking and burning.
- Chill the custard thoroughly before churning for the creamiest results.
- Don’t over-churn the ice cream, as this can result in a grainy texture.
- Freeze the ice cream completely before serving for the best consistency.
- If you don’t have an ice cream maker, you can still make this recipe using a no-churn method. Simply pour the chilled custard into a freezer-safe container and freeze for 2-3 hours. Then, remove the container from the freezer and whisk the ice cream vigorously to break up any ice crystals. Repeat this process every 30 minutes for a few hours until the ice cream is smooth and creamy.
- For a boozy twist, add a tablespoon of bourbon or rum to the custard along with the vanilla extract.
Prep Time: 30 minutes
Cook Time: 20 minutes
Total Time: 8 hours (includes chilling and freezing)
Nutritional Information: (Approximate values per serving)
- Calories: 350
- Protein: 5g
- Sodium: 80mg
Conclusion
Congratulations! You’ve just made a batch of incredible homemade Butter Pecan Ice Cream. This recipe is a testament to the fact that the best desserts are often the ones made with love and care from scratch. The combination of creamy texture, buttery flavor, and crunchy pecans creates an unforgettable taste experience. Enjoy your homemade ice cream with friends, family, or simply as a personal indulgence.
Questions and Answers:
Q1: Can I use a different type of nut instead of pecans?
A: Absolutely! While pecans are traditional for Butter Pecan Ice Cream, you can definitely experiment with other nuts. Walnuts, almonds, or even hazelnuts would work well. Just be sure to toast them properly to bring out their flavor and add a pleasant crunch. Adjust the toasting time as needed, depending on the type of nut you use. Remember that different nuts have different oil contents and may require slightly different handling. For instance, macadamia nuts have a high-fat content, which can make them prone to burning if not watched closely.
Q2: What can I do if my custard curdles while I’m cooking it?
A: Curdling can be frustrating, but don’t despair! If your custard curdles, remove it from the heat immediately. Use an immersion blender or a regular blender to blend the custard until it is smooth again. This will break up the curdled bits and create a smoother texture. However, be aware that the texture might not be quite as perfect as if it hadn’t curdled, but it will still be delicious. The key to avoiding curdling is to cook the custard over low heat and stir constantly. Tempering the egg yolks properly is also crucial.
Q3: Can I make this recipe without an ice cream maker?
A: Yes, you can definitely make this recipe without an ice cream maker. This is often referred to as the “no-churn” method. To do this, follow the recipe as instructed until you have the chilled custard. Then, pour the custard into a freezer-safe container. Every 30 minutes for the next 2-3 hours, take the container out of the freezer and whisk the custard vigorously with a fork or whisk to break up any ice crystals that are forming. This process helps to create a smoother texture. After a few hours of whisking and freezing, the ice cream should be firm enough to scoop. While the texture might not be exactly the same as ice cream made with an ice cream maker, it will still be delicious.
Q4: How long will this homemade ice cream last in the freezer?
A: Homemade ice cream typically lasts for about 1-2 weeks in the freezer, provided it is stored in an airtight container. After that, it may start to develop ice crystals and lose some of its creamy texture. To maximize its shelf life, make sure the container is tightly sealed, and try to avoid temperature fluctuations in your freezer. It is also a good idea to place a piece of plastic wrap directly on the surface of the ice cream before sealing the container to help prevent ice crystals from forming.
Q5: Can I adjust the sweetness of the ice cream?
A: Absolutely! The amount of sugar in this recipe is a guideline, and you can adjust it to suit your personal preferences. If you prefer a less sweet ice cream, start by reducing the amount of brown sugar by about 1/4 cup. If you want it sweeter, you can add a tablespoon or two of additional brown sugar. Just be mindful that sugar also affects the texture of the ice cream, so making drastic changes may alter the final result. If you are using a sugar substitute, make sure it is one that is suitable for frozen desserts. Some sugar substitutes can become gritty or icy when frozen, so do some research before using them in your ice cream.