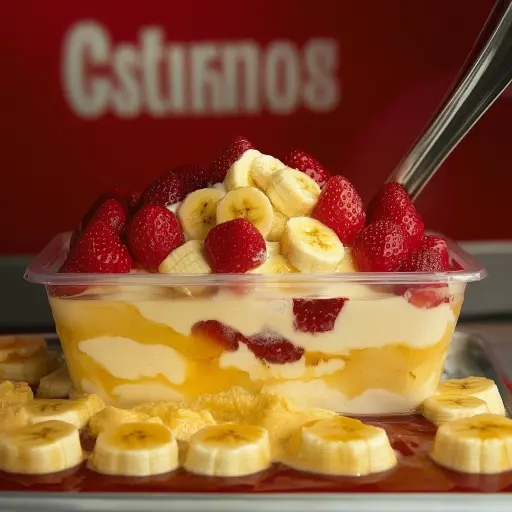
Description: A delightful and easy no-bake dessert that combines the creamy goodness of vanilla pudding with the fresh flavors of strawberries and bananas, all layered between crunchy Nilla wafers. This recipe is perfect for potlucks, barbecues, or a simple weeknight treat. It’s kid-friendly, customizable, and guaranteed to be a crowd-pleaser.
Ingredients:
- 1 (3.4 oz) box vanilla instant pudding mix (Jell-O or similar)
- 2 cups cold milk (whole milk recommended for richness, but 2% or skim will also work)
- 1 (8 oz) container frozen whipped topping, thawed (such as Cool Whip)
- 1 (11 oz) box Nilla wafers (or other vanilla wafers)
- 2 medium bananas, sliced (ripe but firm for best texture)
- 1 cup strawberry pie filling (store-bought or homemade) or 1 cup chopped fresh strawberries (hulled and diced)
Preparation:
Step 1: Prepare the Pudding: In a medium-sized mixing bowl, whisk together the vanilla instant pudding mix and cold milk. Continue whisking vigorously for about 1-2 minutes, or until the pudding mixture begins to thicken. It should have a smooth and creamy consistency. If you notice any lumps, continue whisking until they are completely dissolved. Let the pudding mixture sit for 5 minutes to fully set. This step is crucial to ensure the pudding thickens properly, providing a stable base for the layers.
Step 2: Incorporate the Whipped Topping: Once the pudding has thickened, gently fold in the thawed whipped topping. Use a rubber spatula to incorporate the whipped topping, being careful not to overmix. You want to maintain the light and airy texture of the whipped topping. Fold until the whipped topping is evenly distributed throughout the pudding mixture, creating a light and fluffy pudding base. This step adds a delightful creaminess to the dessert, enhancing its overall texture.
Step 3: Prepare the Bananas and Strawberries: Peel and slice the bananas into approximately ¼-inch thick rounds. If using fresh strawberries, hull them and chop them into small, bite-sized pieces. Arrange the banana slices and chopped strawberries (or prepare to use the strawberry pie filling) close to your layering station. This will allow for efficient and even distribution throughout the dessert. Ensure the banana slices are not overly ripe, as they may become mushy and detract from the texture of the dessert.
Step 4: Layer the Dessert: Choose a serving dish or individual serving cups for assembling the dessert. A trifle bowl, a large glass bowl, or individual parfait glasses work well. Begin with a layer of Nilla wafers at the bottom of the dish. Break some wafers if necessary to fit the bottom of the dish. Next, add a layer of sliced bananas, followed by a layer of the pudding mixture. Spoon or spread the pudding evenly over the bananas. Top the pudding layer with a layer of strawberry pie filling or chopped strawberries. This creates the first complete layer of the dessert.
Step 5: Repeat the Layers: Repeat the layering process, starting with another layer of Nilla wafers, followed by banana slices, pudding mixture, and strawberry pie filling (or chopped strawberries). Continue layering until all ingredients are used, ending with a final layer of Nilla wafers on top. For a more decorative touch, you can arrange the final layer of Nilla wafers attractively, such as creating a circular pattern or overlapping them slightly. Alternatively, you can crumble a few wafers on top for a rustic look.
Step 6: Chill Before Serving: Cover the assembled dessert with plastic wrap and refrigerate for at least 2 hours, or preferably longer (up to overnight). This allows the flavors to meld together, and the Nilla wafers to soften slightly, creating a more cohesive and enjoyable dessert. Chilling the dessert also enhances its texture and makes it more refreshing.
Why You Will Love This Recipe:
This Strawberry Banana Pudding Dessert is a symphony of flavors and textures that will tantalize your taste buds. The creamy vanilla pudding provides a smooth and comforting base, while the fresh bananas add a natural sweetness and delightful chewiness. The strawberries, whether in the form of pie filling or fresh berries, contribute a burst of tangy sweetness that perfectly complements the other flavors. The Nilla wafers provide a satisfying crunch that contrasts beautifully with the soft pudding and fruit.
Beyond its delicious taste, this dessert is incredibly easy to make, requiring minimal effort and no baking. It’s a perfect option for those who are short on time or who are looking for a simple yet impressive dessert to share with family and friends. The recipe is also highly customizable; you can easily adjust the ingredients and layering to suit your preferences and dietary needs. For example, you can use gluten-free vanilla wafers, dairy-free pudding and whipped topping, or substitute other fruits like blueberries or raspberries.
Serving Suggestions:
- Serve chilled directly from the refrigerator.
- Garnish with additional sliced bananas, strawberries, or a dollop of whipped cream.
- Sprinkle with chopped nuts, such as pecans or walnuts, for added texture and flavor.
- Drizzle with a chocolate or caramel sauce for an extra indulgent treat.
- Serve in individual parfait glasses for an elegant presentation.
- Pair with a cup of coffee, tea, or a glass of milk.
Tips:
- For best results, use ripe but firm bananas. Overripe bananas may become mushy and detract from the texture of the dessert.
- If using fresh strawberries, be sure to hull them and chop them into small pieces.
- To prevent the bananas from browning, toss them with a little lemon juice before layering.
- The dessert can be assembled several hours in advance. In fact, it’s often better after it has chilled for a few hours, as this allows the flavors to meld together.
- If you don’t have Nilla wafers, you can substitute other vanilla wafers or even graham crackers.
- For a richer flavor, use whole milk instead of skim milk.
- Experiment with different flavors of pudding, such as banana cream or chocolate.
- Add a layer of crushed Oreos for a cookies and cream variation.
- Use clear glass bowls or glasses to showcase the beautiful layers of the dessert.
- For a healthier option, use a sugar-free pudding mix and light whipped topping.
Prep Time: 15 minutes
Cook Time: 0 minutes
Total Time: 2 hours 15 minutes (includes chilling time)
Nutritional Information: (Per serving, approximate)
- Calories: 350-400
- Protein: 5-7g
- Sodium: 250-300mg (may vary based on brand of pudding and wafers)
Conclusion:
The Strawberry Banana Pudding Dessert is a timeless classic that continues to delight dessert lovers of all ages. Its simplicity, deliciousness, and versatility make it a perfect choice for any occasion. Whether you’re looking for a quick and easy weeknight treat or a crowd-pleasing dessert for a party, this recipe is sure to be a hit. So gather your ingredients, follow the simple steps, and prepare to enjoy a taste of pure happiness!
Questions and Answers:
Q1: Can I make this dessert ahead of time?
A: Absolutely! In fact, this dessert is often better when made ahead of time. Chilling it for at least 2 hours, or even overnight, allows the flavors to meld together and the Nilla wafers to soften slightly, resulting in a more cohesive and delicious dessert. Just be sure to cover it tightly with plastic wrap to prevent it from drying out.
Q2: Can I use different fruits in this dessert?
A: Yes, you can definitely customize this dessert with other fruits to suit your preferences. Blueberries, raspberries, peaches, or mangoes would all be delicious additions or substitutes for the strawberries or bananas. Consider the flavor profiles and textures of the fruits you choose to ensure they complement the vanilla pudding and Nilla wafers.
Q3: Can I use a homemade pudding instead of instant pudding?
A: While instant pudding is convenient and works well in this recipe, you can certainly use a homemade vanilla pudding if you prefer. Just make sure the pudding is thick enough to hold its shape and not too runny. Allow the homemade pudding to cool completely before incorporating the whipped topping.
Q4: How can I make this dessert healthier?
A: There are several ways to make this dessert healthier. You can use a sugar-free pudding mix, light whipped topping, and reduced-fat Nilla wafers. You can also increase the amount of fresh fruit and reduce the amount of wafers. Consider using Greek yogurt as a substitute for some of the whipped topping for added protein and reduced fat.
Q5: Can I freeze this dessert?
A: While technically you can freeze this dessert, it’s not highly recommended. The texture of the pudding and whipped topping may change upon thawing, and the Nilla wafers may become soggy. If you do choose to freeze it, wrap it tightly in plastic wrap and thaw it in the refrigerator before serving. However, for the best texture and flavor, it’s best to enjoy this dessert fresh.