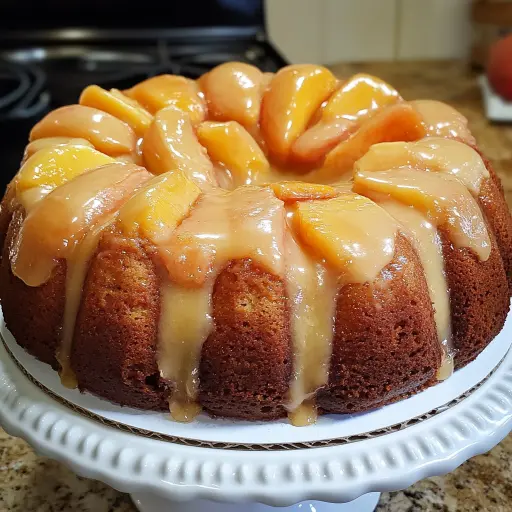
Description: These delightful treats combine the comforting flavors of peach cobbler with the convenience of a handheld Twinkie. A buttery, moist pound cake is filled with a sweet and tangy peach compote and drizzled with a luscious vanilla glaze. Perfect for a summer picnic, a sweet snack, or a unique dessert that’s sure to impress.
Ingredients:
For the Pound Cake:
- 1 ½ cups all-purpose flour
- 1 tsp baking powder
- ¼ tsp salt
- 1 cup granulated sugar
- ½ cup unsalted butter, softened
- 2 large eggs
- 1 tsp vanilla extract
- ½ cup whole milk
For the Peach Filling:
- 2 cups fresh peaches, peeled and diced (about 2 large peaches)
- ¼ cup granulated sugar
- 1 tbsp cornstarch
- 1 tbsp lemon juice
For the Glaze:
- 1 cup powdered sugar
- 2 tbsp heavy cream or milk (adjust to desired consistency)
- 1 tsp vanilla extract
Preparation:
This recipe is straightforward but rewarding. The key is to ensure each component is made with care and attention to detail, resulting in a symphony of flavors and textures in every bite. We are essentially building a miniature peach cobbler inside a pound cake vehicle!
Step 1: Prepare the Pound Cake Batter
Preheat your oven to 350°F (175°C). This ensures the pound cakes will rise evenly and have a tender crumb. Grease a Twinkie pan or mini loaf pan thoroughly. If you don’t have a Twinkie pan, a mini muffin tin will also work – the baking time will be slightly shorter. Consider using a baking spray with flour already included; this will prevent sticking and ensure easy removal. Alternatively, you can grease the pan with butter and then dust it with flour, tapping out any excess.
Step 2: Combine Dry Ingredients
In a medium-sized bowl, whisk together the all-purpose flour, baking powder, and salt. Whisking is crucial here to ensure the baking powder is evenly distributed throughout the flour, which will give the pound cakes a consistent rise. The salt balances the sweetness and enhances the other flavors.
Step 3: Cream Butter and Sugar
In a large bowl (or the bowl of a stand mixer), cream together the softened unsalted butter and granulated sugar until light and fluffy. This step is crucial for creating a tender, airy pound cake. The creaming process incorporates air into the mixture, which contributes to the cake’s light texture. Beat for at least 3-5 minutes, scraping down the sides of the bowl occasionally, until the mixture is noticeably lighter in color and has a soft, fluffy consistency.
Step 4: Add Eggs and Vanilla
Add the eggs one at a time, beating well after each addition. This ensures the eggs are fully incorporated and prevents the batter from curdling. The eggs provide structure and richness to the cake. Then, mix in the vanilla extract. Use a high-quality vanilla extract for the best flavor.
Step 5: Alternate Dry and Wet Ingredients
Gradually add the dry ingredients to the wet ingredients, alternating with the whole milk, beginning and ending with the dry ingredients. This method prevents overmixing, which can lead to a tough cake. Add about one-third of the dry ingredients to the wet ingredients and mix until just combined. Then, add half of the milk and mix until just combined. Repeat with another third of the dry ingredients, the remaining milk, and then the final third of the dry ingredients. Mix until just combined. It’s okay if there are a few streaks of flour remaining; they will disappear during baking. Overmixing develops the gluten in the flour, resulting in a dense, chewy cake.
Step 6: Fill the Pan and Bake
Pour the batter into the prepared Twinkie pan or mini loaf pan, filling each mold about ¾ full. This allows room for the cakes to rise without overflowing. If using a mini muffin tin, fill each cup about 2/3 full.
Step 7: Bake
Bake for 18–22 minutes, or until a toothpick inserted into the center comes out clean. The baking time will vary depending on your oven and the size of the pans you are using. Start checking for doneness around 18 minutes. If the tops of the cakes are browning too quickly, you can loosely tent them with foil.
Step 8: Cool the Cakes
Allow the cakes to cool completely in the pan before filling. This is essential to prevent them from crumbling. Once cooled, gently remove them from the pan. If they are sticking, you can use a thin knife or offset spatula to loosen the edges.
Step 9: Make the Peach Filling
In a medium saucepan over medium heat, combine the diced fresh peaches, granulated sugar, cornstarch, and lemon juice. The lemon juice brightens the flavors of the peaches and helps prevent them from browning.
Step 10: Cook the Filling
Cook, stirring frequently, until the peaches are soft and the mixture has thickened. This usually takes about 5-7 minutes. The cornstarch acts as a thickening agent, creating a luscious, jam-like consistency. Be sure to stir frequently to prevent the filling from sticking and burning. Let the peach filling cool completely before filling the cakes.
Step 11: Fill the Pound Cakes
Use a small knife or skewer to carefully hollow out the center of each cake, creating a space for the peach filling. Be careful not to go too close to the bottom of the cake. Spoon or pipe the cooled peach filling into the hollowed centers. A piping bag makes this step easier, but a spoon works just as well.
Step 12: Make the Glaze
In a small bowl, whisk together the powdered sugar, heavy cream or milk, and vanilla extract until smooth. Add the heavy cream or milk gradually until you reach your desired consistency. If the glaze is too thick, add a little more liquid. If it is too thin, add a little more powdered sugar.
Step 13: Drizzle the Glaze
Drizzle the glaze over the filled pound cakes. A fork or a small spoon works well for this.
Step 14: Serve
Allow the glaze to set for a few minutes before serving. This will prevent the glaze from being too sticky. Enjoy these handheld peach cobbler delights!
Why you will love this recipe:
- Portable Peach Cobbler: It delivers all the comforting flavors of peach cobbler in a convenient, handheld format.
- Unique and Impressive: It’s a guaranteed crowd-pleaser and a conversation starter.
- Customizable: You can easily adapt the recipe to use other fruits, such as berries or apples.
- Deliciously Moist: The pound cake is incredibly moist and buttery, perfectly complementing the sweet and tangy peach filling.
- Perfect for Summer: It’s a great way to use fresh, seasonal peaches.
Serving Suggestions:
- Serve chilled or at room temperature.
- Garnish with fresh mint leaves or a dusting of powdered sugar.
- Serve with a scoop of vanilla ice cream for an extra-indulgent treat.
- Pair with a glass of iced tea or lemonade.
- Make it a part of a dessert platter along with other summer favorites.
Tips:
- Use ripe, but firm peaches for the best flavor and texture.
- Don’t overmix the pound cake batter, as this will result in a tough cake.
- Make sure the butter is softened to room temperature for easy creaming.
- Cool the peach filling completely before filling the cakes to prevent them from becoming soggy.
- Adjust the amount of heavy cream or milk in the glaze to achieve your desired consistency.
- Store leftover cakes in an airtight container in the refrigerator for up to 3 days.
Prep Time: 30 minutes Cook Time: 25 minutes Total Time: 55 minutes
Nutritional Information:
Note: These values are approximate and will vary based on specific ingredients and portion sizes.
- Calories: Approximately 350 per Twinkie
- Protein: Approximately 4g
- Sodium: Approximately 150mg
Conclusion:
Peach Cobbler Pound Cake Twinkies are a truly special treat that combines the best of both worlds: the comforting nostalgia of a classic Twinkie with the summery goodness of peach cobbler. This recipe is sure to become a favorite for its unique flavor combination, ease of preparation, and impressive presentation. So, gather your ingredients, preheat your oven, and get ready to enjoy a taste of sunshine in every bite!
Questions and Answers about this recipe:
Q1: Can I use canned peaches instead of fresh peaches? A1: While fresh peaches are ideal for the best flavor and texture, you can definitely use canned peaches in a pinch. Make sure to drain them well and pat them dry before dicing and adding them to the peach filling. You may need to adjust the amount of sugar in the filling, as canned peaches are often packed in syrup. Reduce the sugar by about 1-2 tablespoons.
Q2: Can I make this recipe ahead of time? A2: Absolutely! The pound cakes can be made a day ahead of time and stored in an airtight container at room temperature. The peach filling can also be made a day in advance and stored in the refrigerator. Assemble the cakes and drizzle with glaze just before serving for the best results. The glazed cakes will keep in the refrigerator for a couple days, but they are definitely best eaten the same day!
Q3: What if I don’t have a Twinkie pan? A3: No problem! If you don’t have a Twinkie pan, you can use a mini loaf pan or even a mini muffin tin. Adjust the baking time accordingly. Mini loaf pans will require a similar baking time, while mini muffin tins will bake faster (around 12-15 minutes). Just keep an eye on them and check for doneness with a toothpick.
Q4: Can I use a different fruit for the filling? A4: Of course! This recipe is easily adaptable to other fruits. Berries, such as blueberries, raspberries, or strawberries, would be delicious. You could also use apples, pears, or plums. Simply substitute the peaches with your fruit of choice and adjust the amount of sugar as needed.
Q5: Can I make this recipe gluten-free? A5: Yes, you can make this recipe gluten-free by substituting the all-purpose flour with a gluten-free all-purpose flour blend. Be sure to choose a blend that contains xanthan gum, which helps to bind the ingredients and provide structure to the cake. You may also need to adjust the amount of liquid slightly, as gluten-free flours can sometimes absorb more moisture.