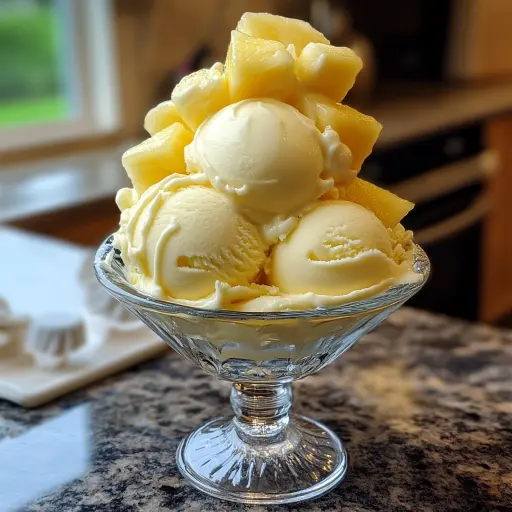
Description: A refreshingly simple and unbelievably delicious pineapple ice cream made with just three ingredients! This recipe is perfect for hot summer days or whenever you crave a taste of the tropics. It’s quick, easy, and requires no cooking – just blend, churn, and freeze! With its vibrant pineapple flavor and creamy texture, this homemade ice cream is sure to become a family favorite.
Ingredients:
- 1½ cups (360ml) pineapple juice, preferably unsweetened
- 1 (20 oz) can (567g) crushed pineapple, well-drained
- ½ cup (120ml) heavy whipping cream (optional, for added creaminess; can substitute with coconut cream for a dairy-free version)
Preparation:
Step 1: Prepare the Ice Cream Maker: Make sure the freezer bowl of your ice cream maker is completely frozen. This is crucial for achieving the right consistency. Typically, this requires at least 24 hours in the freezer. Before you begin, double-check that the bowl is frozen solid – if you hear liquid sloshing around, it’s not ready. A well-frozen bowl is the foundation for successful homemade ice cream. Consider keeping your freezer bowl in the freezer at all times if you frequently make ice cream. This way, you’re always prepared for a spontaneous ice cream-making session!
Step 2: Drain the Crushed Pineapple: Thoroughly drain the crushed pineapple to remove excess liquid. This step is essential for preventing the ice cream from becoming icy. Use a fine-mesh sieve or cheesecloth to press out as much liquid as possible. Discard the pineapple juice that is removed or save it for another use, such as a smoothie. The drier the pineapple, the smoother and creamier your ice cream will be.
Step 3: Blend the Pineapple Mixture: In a blender or food processor, combine the drained crushed pineapple and pineapple juice. Process until completely smooth, ensuring there are no large chunks of pineapple remaining. A smooth base is key to a creamy final product. Taste the mixture at this point. If your pineapple juice is particularly tart, you can add a tablespoon or two of honey or agave nectar to sweeten it to your liking. Remember that the freezing process can slightly dull the sweetness, so err on the side of slightly sweeter.
Step 4: Add the Cream (Optional): If using, gently stir in the heavy whipping cream until fully combined. The heavy cream adds richness and a luxurious texture to the ice cream. For a dairy-free version, substitute with chilled full-fat coconut cream. The coconut cream will also contribute a creamy texture and a subtle coconut flavor that complements the pineapple beautifully. If you’re omitting the cream altogether, the ice cream will still be delicious, but the texture will be slightly icier.
Step 5: Churn in the Ice Cream Maker: Pour the pineapple mixture into the prepared ice cream maker. Churn according to the manufacturer’s instructions, typically around 20-25 minutes, or until the mixture thickens to the consistency of soft-serve ice cream. Keep an eye on the churning process. If the mixture isn’t thickening after the recommended time, continue churning for a few more minutes. However, be careful not to over-churn, as this can result in a grainy texture.
Step 6: Freeze Until Firm: Transfer the churned ice cream to a freezer-safe container. A plastic container with a tight-fitting lid works well, or you can use a loaf pan lined with parchment paper for easy removal. Spread the ice cream evenly in the container and gently press a piece of plastic wrap directly onto the surface to prevent ice crystals from forming. Freeze for at least 2-3 hours, or until the ice cream is firm enough to scoop. For the best results, allow it to freeze overnight.
Step 7: Softening Tip (Before Serving): For optimal serving texture, remove the ice cream from the freezer about 10-15 minutes before scooping. Alternatively, you can microwave it in 20-second intervals until it’s slightly softened. Be careful not to melt it completely. This step allows the ice cream to soften slightly, making it easier to scoop and enjoy.
Why You Will Love This Recipe:
This 3-Ingredient Pineapple Ice Cream is a dream come true for anyone who loves simple, delicious desserts. Its appeal lies in its incredible ease and minimal ingredient list. You don’t need to be a seasoned chef to whip up a batch of this tropical treat. It’s perfect for busy weeknights, impromptu gatherings, or anytime you’re craving something sweet and refreshing.
The vibrant pineapple flavor is undeniably delightful. It’s like a burst of sunshine in every bite, transporting you to a tropical paradise. The creamy texture, enhanced by the optional heavy cream (or coconut cream), elevates the ice cream to a truly decadent experience.
Beyond its simplicity and flavor, this recipe is also incredibly versatile. You can easily customize it to suit your dietary preferences and taste buds. Whether you’re dairy-free, vegan, or simply looking for a healthier option, there are plenty of substitutions and variations you can try.
Moreover, making your own ice cream at home is a rewarding experience. It allows you to control the ingredients and avoid artificial additives and preservatives that are often found in store-bought ice cream. Plus, the satisfaction of enjoying a homemade treat is simply unmatched.
In short, this 3-Ingredient Pineapple Ice Cream is a winner because it’s:
- Easy to make
- Requires minimal ingredients
- Bursting with tropical flavor
- Creamy and delicious
- Versatile and customizable
- A fun and rewarding homemade treat
Serving Suggestions:
- Classic Scoops: Serve in a bowl or cone for a simple and satisfying treat.
- Tropical Sundae: Top with toasted coconut flakes, chopped macadamia nuts, a drizzle of honey, and a maraschino cherry.
- Pineapple Float: Combine with pineapple soda for a bubbly and refreshing float.
- Grilled Pineapple: Serve alongside grilled pineapple slices for a complementary flavor combination.
- Smoothie Booster: Add a scoop to your favorite smoothie for a creamy and tropical boost.
- Ice Cream Sandwich: Use between graham crackers or cookies for a homemade ice cream sandwich.
- Dessert Pizza Topping: Spread on a dessert pizza crust with other tropical fruits.
Tips:
- Use High-Quality Pineapple Juice: The quality of the pineapple juice will significantly impact the flavor of the ice cream. Opt for a 100% pineapple juice without added sugars or preservatives. Freshly squeezed pineapple juice is even better!
- Chill Everything: Make sure all ingredients, including the pineapple juice and heavy cream, are well-chilled before starting. This will help the ice cream maker work more efficiently.
- Don’t Overfill the Ice Cream Maker: Avoid overfilling the ice cream maker, as this can prevent the ice cream from churning properly. Follow the manufacturer’s instructions regarding the maximum capacity.
- Adjust Sweetness to Taste: Taste the pineapple mixture before churning and adjust the sweetness as needed. Add a tablespoon or two of honey, agave nectar, or your favorite sweetener if desired.
- Experiment with Flavors: Get creative and experiment with different flavors! Try adding a pinch of ginger, a squeeze of lime juice, or a splash of rum extract for a unique twist.
- Store Properly: Store leftover ice cream in an airtight container in the freezer for up to 2 weeks. To prevent ice crystals from forming, press a piece of plastic wrap directly onto the surface of the ice cream before sealing the container.
- For a richer flavor Try using pineapple cream of coconut instead of just pineapple juice.
Prep Time: 5 minutes Cook Time: 20-25 minutes churning time Total Time: 2 hours 25-30 minutes (includes freezing time)
Nutritional Information: (Estimates will vary based on specific ingredients and serving size) (Note: These values are approximate and can vary depending on the brand and type of ingredients used.)
Calories: Approximately 150-200 per serving Protein: Approximately 1-2 grams per serving Sodium: Approximately 10-20mg per serving
Conclusion:
This 3-Ingredient Pineapple Ice Cream is a testament to the fact that simple ingredients can create extraordinary results. It’s a delightful treat that’s perfect for any occasion, from a casual summer barbecue to a fancy dinner party. With its vibrant flavor, creamy texture, and easy preparation, this recipe is sure to become a staple in your dessert repertoire. So, gather your ingredients, fire up your ice cream maker, and get ready to indulge in a taste of tropical paradise! Enjoy!
Questions and Answers About This Recipe:
Q1: Can I make this ice cream without an ice cream maker?
A: While an ice cream maker is highly recommended for achieving the creamiest texture, you can try making this ice cream without one. The texture will be icier, but still enjoyable. To do so, combine the ingredients as directed and pour the mixture into a freezer-safe container. Freeze for about 30 minutes, then remove and whisk vigorously to break up any ice crystals. Repeat this process every 30 minutes for about 2-3 hours, or until the ice cream is firm enough to scoop. This method helps prevent large ice crystals from forming, resulting in a slightly smoother texture.
Q2: Can I use fresh pineapple instead of canned?
A: Absolutely! Using fresh pineapple will elevate the flavor of the ice cream even further. Simply peel, core, and chop about 2 cups of fresh pineapple. Blend it with the pineapple juice (you may need to add a little water if the pineapple is very dry) until smooth, then proceed with the recipe. Fresh pineapple will impart a brighter, more intense flavor.
Q3: What if I don’t have heavy whipping cream? Can I use something else?
A: If you don’t have heavy whipping cream on hand, you can use half-and-half or whole milk as a substitute, but the ice cream will be less creamy. For a dairy-free alternative, coconut cream works wonderfully. Make sure to chill the coconut cream in the refrigerator overnight, then scoop out the thick cream from the top of the can, leaving the watery liquid behind. This will provide a similar richness to heavy cream.
Q4: How can I prevent ice crystals from forming in the ice cream?
A: Several factors can contribute to ice crystal formation. First, ensure that the freezer bowl of your ice cream maker is thoroughly frozen before starting. Also, avoid overfilling the ice cream maker. After churning, transfer the ice cream to a freezer-safe container and press a piece of plastic wrap directly onto the surface to prevent air exposure. Storing the ice cream in the coldest part of your freezer can also help. Another helpful tip is to add a small amount of alcohol (such as rum or vodka) to the mixture before churning, as alcohol helps prevent ice crystal formation. However, use alcohol sparingly, as too much can prevent the ice cream from freezing properly.
Q5: Can I add other ingredients to this recipe?
A: Absolutely! This recipe is a great base for experimentation. You could add toasted coconut flakes, chopped macadamia nuts, a squeeze of lime juice, a pinch of ginger, or even a swirl of caramel or chocolate sauce. Get creative and tailor the recipe to your own taste preferences. Just be mindful of adding too many wet ingredients, as this can affect the texture of the ice cream.