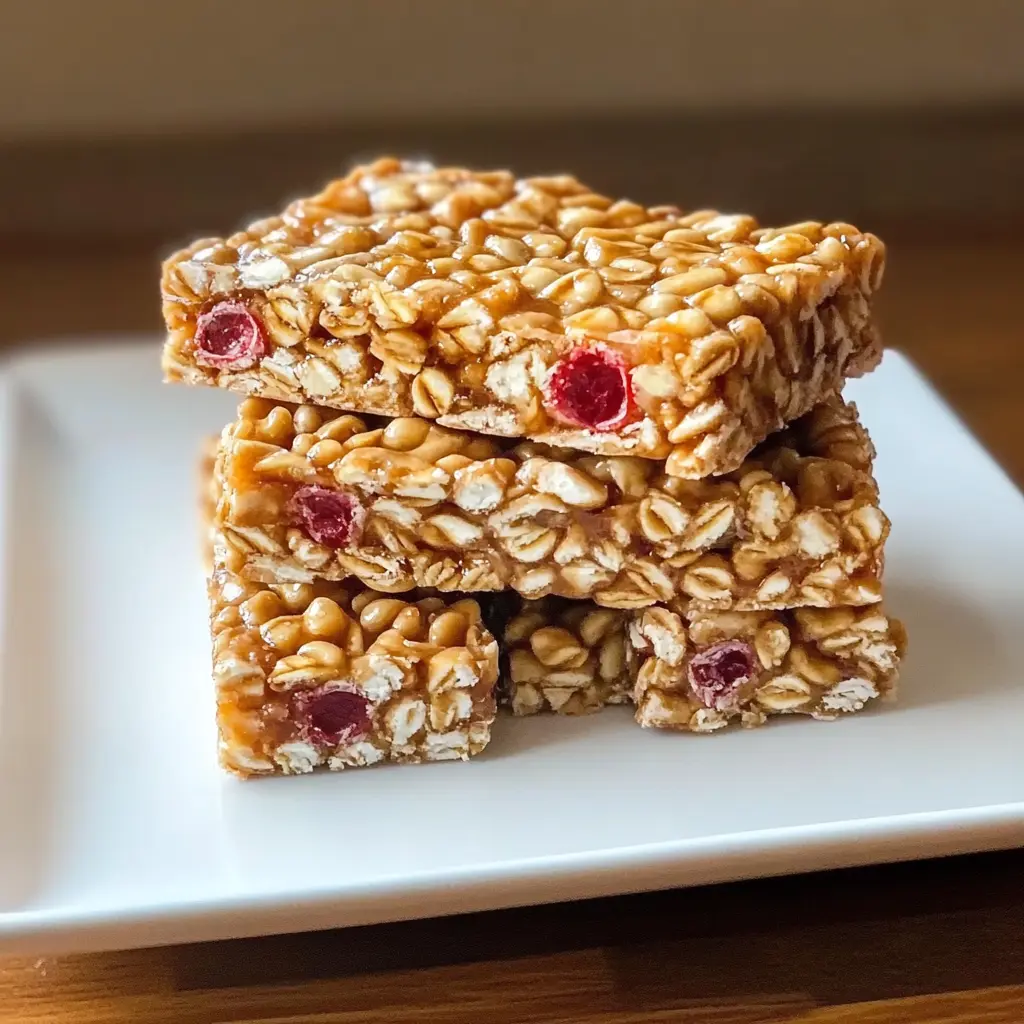
Description: Forget store-bought! These homemade cereal bars are a simple, customizable, and delicious alternative to processed snacks. Made with wholesome ingredients like crispy rice cereal, rolled oats, peanut butter (or your nut butter of choice), and honey (or maple syrup), these bars offer a satisfying crunch and a touch of sweetness, perfect for breakfast, a midday pick-me-up, or a healthy dessert.
Why You Will Love This Recipe:
- Easy & No-Bake: Requires minimal effort and no oven time, making it a fantastic option for busy individuals and families.
- Customizable: Easily adaptable to your taste preferences and dietary needs. Swap out the cereal, nut butter, or sweetener to create your own unique flavor combination.
- Wholesome Ingredients: Made with simple, recognizable ingredients you can feel good about feeding yourself and your loved ones.
- Portable & Convenient: Perfect for on-the-go snacking, lunchboxes, or road trips.
- Budget-Friendly: A much more economical option than purchasing pre-made cereal bars.
Introduction
In a world inundated with processed snacks and sugary treats, finding a healthy and satisfying option can feel like a constant battle. Enter homemade cereal bars: the ultimate customizable, no-bake solution to your snack cravings! This recipe is a testament to the fact that delicious and nutritious can indeed go hand-in-hand.
Gone are the days of deciphering lengthy ingredient lists filled with artificial flavors, preservatives, and questionable additives. With this recipe, you have complete control over what goes into your bars, ensuring a snack that aligns with your health goals and taste preferences. Whether you’re a seasoned baker or a kitchen novice, this recipe is designed to be foolproof and fun. It’s a great way to involve kids in the kitchen, teaching them about healthy eating habits while creating a delicious treat together.
The beauty of these cereal bars lies in their versatility. The base recipe is a blank canvas, ready to be transformed into your dream snack. Are you a chocolate lover? Add a generous handful of mini chocolate chips. Craving something fruity? Incorporate dried cranberries, raisins, or chopped apricots. Looking for extra crunch? Toss in some chopped nuts or seeds. The possibilities are truly endless!
These homemade cereal bars are more than just a snack; they’re a lifestyle choice. They’re a commitment to nourishing your body with wholesome ingredients and a rejection of the processed foods that often dominate our diets. They’re a reminder that healthy eating can be enjoyable, convenient, and incredibly delicious. So, ditch the store-bought bars and embrace the joy of creating your own homemade goodness. Your taste buds (and your body) will thank you!
Ingredients:
- 3 cups crispy rice cereal or mixed whole-grain cereal: Provides the base and crunch for the bars. Choose your favorite cereal or a blend of different types for a varied texture and flavor. Opt for lower-sugar options for a healthier snack.
- 1 cup rolled oats: Adds fiber, texture, and nutritional value. Rolled oats are preferable for their chewy texture, but quick oats can be used in a pinch.
- ½ cup honey or maple syrup: Acts as a natural sweetener and binder. Adjust the amount to your desired level of sweetness. Honey provides a rich flavor, while maple syrup offers a more subtle sweetness.
- ½ cup peanut butter or almond butter: Contributes healthy fats, protein, and a creamy texture. Choose your favorite nut butter or experiment with different varieties like cashew butter or sunflower seed butter.
- 1 teaspoon vanilla extract: Enhances the overall flavor and adds a touch of warmth.
- ¼ teaspoon salt: Balances the sweetness and enhances the other flavors.
- Optional: ¼ cup mini chocolate chips or dried fruit: Adds a touch of indulgence and flavor. Choose your favorite chocolate chips, dried fruit, nuts or seeds to make your creation unique.
Preparation:
Step 1: Prepare the Baking Dish
Line an 8×8-inch baking dish with parchment paper, leaving some extra paper over the edges for easy removal. This is a crucial step to prevent the bars from sticking to the dish and allows you to easily lift them out for cutting. The extra paper overhang acts as handles, making the removal process even smoother.
Step 2: Combine the Dry Ingredients
In a large bowl, mix the cereal and rolled oats. Ensure they are evenly distributed to create a consistent texture throughout the bars. Using a large bowl provides ample space for mixing without spilling.
Step 3: Melt the Wet Ingredients
In a small saucepan over low heat, stir together honey (or maple syrup) and peanut butter until smooth. This process gently melts the ingredients, allowing them to blend seamlessly and create a cohesive binder for the bars. Stir constantly to prevent burning or sticking to the bottom of the saucepan. Remove from heat and stir in vanilla extract and salt. Adding the vanilla and salt after melting helps preserve their flavors.
Step 4: Combine Wet and Dry Ingredients
Pour the peanut butter mixture over the cereal and oats, stirring until evenly combined. This is where the magic happens! Ensure that every piece of cereal and oat is coated with the peanut butter mixture to create a well-bound bar. Be gentle with the stirring to avoid crushing the cereal. If adding chocolate chips or dried fruit, fold them in gently. Adding them now ensures that they are evenly distributed throughout the bars.
Step 5: Press and Refrigerate
Press the mixture firmly into the prepared dish using the back of a spoon or spatula to create an even layer. This is essential for creating a compact and sturdy bar. Apply consistent pressure to ensure that the mixture is tightly packed. Refrigerate for at least 1 hour or until firm. Refrigeration allows the peanut butter mixture to solidify, creating a firm and sliceable bar. The longer you refrigerate, the firmer the bars will become. Lift out using the parchment paper, then cut into 12 bars.
COOKING Rating:
Easy
Serving Suggestions:
- Enjoy as a quick and healthy breakfast on the go.
- Pack in lunchboxes for a satisfying midday snack.
- Serve as a guilt-free dessert after dinner.
- Pair with a glass of milk or a cup of coffee for a complete snack.
- Cut into smaller pieces for a bite-sized treat.
Tips:
- For a chewier texture, use more rolled oats.
- For a sweeter bar, add more honey or maple syrup.
- For a saltier bar, add a pinch more salt.
- Experiment with different types of cereal, nut butter, and add-ins to create your own unique flavor combinations.
- Store the bars in an airtight container in the refrigerator for up to a week.
Prep Time:
10 minutes
Cook Time:
5 minutes
Total Time:
1 hour 15 minutes (includes refrigeration time)
Nutritional Information:
(Note: Nutritional information is an estimate and will vary based on specific ingredients used.)
Calories: Approximately 150-200 per bar Protein: 4-6 grams per bar Sodium: 50-100 mg per bar
Conclusion
These homemade cereal bars are a testament to the fact that healthy snacking can be both easy and delicious. With just a few simple ingredients and minimal effort, you can create a satisfying and customizable treat that’s perfect for any occasion. So, ditch the processed snacks and embrace the joy of homemade goodness!
Questions and Answers about Homemade Cereal Bars
Q1: Can I use a different type of cereal besides crispy rice cereal?
A: Absolutely! The beauty of this recipe is its versatility. While crispy rice cereal provides a classic crunch, you can easily substitute it with other cereals like puffed wheat, corn flakes (lower-sugar varieties), or even a mix of whole-grain cereals. Just be mindful of the sugar content of the cereal you choose, as some varieties can be quite high in sugar. Experiment with different textures and flavors to find your perfect combination. For example, using a mixture of crispy rice cereal and puffed wheat can create a more complex texture, while using corn flakes can add a slightly sweeter flavor. Consider also using cereals with added fiber for a more nutritious bar.
Q2: I’m allergic to peanuts. What can I use instead of peanut butter?
A: No problem! There are plenty of delicious alternatives to peanut butter that work perfectly in this recipe. Almond butter is a popular and readily available option that offers a similar creamy texture and nutty flavor. Cashew butter is another great choice, with a slightly sweeter and milder flavor than peanut butter. Sunflower seed butter is a fantastic option for those with nut allergies, and it provides a good source of vitamin E. Tahini (sesame seed paste) can also be used, though it has a more distinct and slightly bitter flavor. Experiment with different nut butter substitutes to find the one you enjoy most. Keep in mind that different nut butters have different consistencies and may affect the final texture of the bars slightly.
Q3: Can I use something other than honey or maple syrup to sweeten the bars?
A: Yes, you have several options for alternative sweeteners. Brown rice syrup is a good choice if you’re looking for a natural sweetener with a slightly less sweet flavor than honey or maple syrup. Agave nectar is another option, but it’s important to note that it’s highly processed and may not be the healthiest choice. Dates are a fantastic whole-food sweetener that can add both sweetness and fiber to the bars. To use dates, simply soak them in warm water for a few minutes to soften them, then blend them into a paste and add them to the wet ingredients. You can also use a sugar-free alternative, such as stevia or erythritol, but be sure to adjust the amount according to the product’s instructions. Start with a small amount and add more to taste.
Q4: My cereal bars are too crumbly and won’t hold together. What did I do wrong?
A: There are a few reasons why your cereal bars might be falling apart. First, make sure you’re using enough of the wet ingredients (honey/maple syrup and nut butter). These ingredients act as a binder, holding the dry ingredients together. If you’re using a drier nut butter, you may need to add a little more honey or maple syrup. Second, make sure you’re pressing the mixture firmly into the baking dish. This helps to compact the ingredients and create a solid bar. Use the back of a spoon or spatula to apply even pressure across the entire surface. Finally, make sure you’re refrigerating the bars for long enough. The cold temperature helps the peanut butter mixture to solidify and bind the ingredients together.
Q5: Can I make these cereal bars vegan?
A: Absolutely! Making these cereal bars vegan is incredibly easy. Simply substitute the honey with maple syrup or another vegan sweetener like agave nectar or brown rice syrup. Ensure that any chocolate chips or other add-ins you use are also vegan. With these simple substitutions, you can enjoy a delicious and wholesome vegan snack.