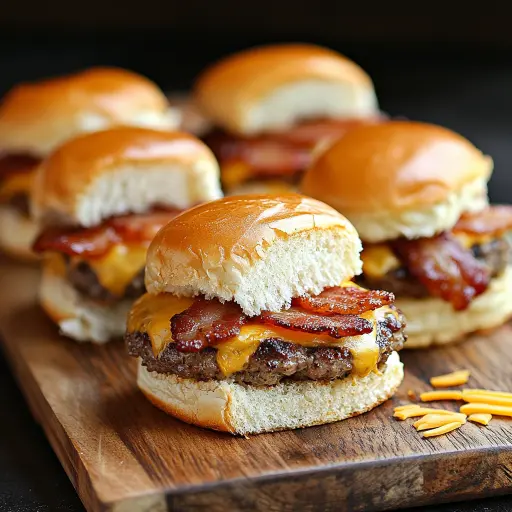
Description: A deliciously indulgent appetizer that combines the classic flavors of a bacon cheeseburger in a fun, bite-sized slider form. Perfect for parties or game day! These sliders are incredibly easy to make and are always a crowd-pleaser. The combination of savory ground beef, creamy cheese, crispy bacon, and sweet Hawaiian rolls is simply irresistible.
Ingredients:
Meat Mixture
- 1 pound ground beef, crumbled
- 1 teaspoon minced garlic
- ½ teaspoon sea salt
- 1 teaspoon dried onion flakes
- ½ teaspoon ground black pepper
- 3 ounces cream cheese, cut into small cubes
- ½ cup barbecue sauce
- 2 teaspoons Dijon mustard
Sliders
- 1½ packages Hawaiian rolls
- 2 cups cheddar cheese, grated
- 1 pound bacon, cooked and crumbled
- ½ cup salted butter, melted
- 1 to 2 tablespoons sesame seeds
Preparation:
Step 1: Prepare the Meat Mixture
In a large mixing bowl, combine the ground beef, minced garlic, sea salt, dried onion flakes, and ground black pepper. Mix until well combined. This initial seasoning is crucial as it lays the foundation for the overall flavor profile of the sliders. Make sure the spices are evenly distributed throughout the ground beef to avoid pockets of intense flavor or blandness. Using your hands is often the best way to ensure everything is thoroughly mixed.
Step 2: Add Cream Cheese, Barbecue Sauce, and Dijon Mustard
Add the cream cheese (cut into small cubes for easier mixing), barbecue sauce, and Dijon mustard to the meat mixture. Mix until everything is evenly incorporated. The cream cheese adds a wonderful creaminess and richness to the patties, while the barbecue sauce contributes a smoky sweetness. Dijon mustard provides a tangy counterpoint that balances the richness of the other ingredients. Again, ensure that all components are thoroughly mixed for a consistent flavor.
Step 3: Form the Patties
Preheat your grill or skillet over medium heat. Shape the meat mixture into small patties, about the size of the Hawaiian rolls. This is a critical step for ensuring uniform cooking and a perfect slider size. Aim for patties that are slightly larger than the rolls, as they will shrink a bit during cooking. You can use a small cookie cutter or a slider press to ensure all patties are the same size. Consistent patty size guarantees even cooking and a visually appealing final product.
Step 4: Cook the Patties
Cook the patties for 4-5 minutes on each side, or until they are cooked through and have a nice sear. The cooking time may vary depending on the thickness of the patties and the heat of your grill or skillet. Use a meat thermometer to ensure the patties reach an internal temperature of 160°F (71°C) for safety. A good sear on the outside of the patties adds texture and flavor, so avoid overcrowding the grill or skillet, which can lower the temperature and prevent proper browning.
Step 5: Assemble the Sliders
Preheat your oven to 350°F (175°C). Slice the Hawaiian rolls in half and place the bottom halves in a baking dish. Place a cooked patty on each roll, followed by a generous sprinkle of grated cheddar cheese and crumbled bacon. The order of assembly is important to ensure that the cheese melts properly and the bacon remains crispy. Using a baking dish that fits the rolls snugly will help keep the sliders together during baking.
Step 6: Top with Roll Tops
Place the top halves of the rolls on each slider. This step completes the slider assembly and prepares them for the final baking process. Ensure that the tops are aligned properly for a neat and presentable look.
Step 7: Brush with Butter
In a small bowl, mix the melted butter with sesame seeds. Brush this mixture over the tops of the slider buns for added flavor and a beautiful finish. The melted butter adds richness and helps the buns turn golden brown in the oven, while the sesame seeds provide a subtle nutty flavor and visual appeal. Be generous with the butter mixture for maximum flavor and browning.
Step 8: Bake the Sliders
Cover the baking dish with aluminum foil and bake for 15 minutes. Remove the foil and bake for an additional 5-10 minutes, or until the cheese is melted and the tops are golden brown. Covering the sliders with foil initially prevents the buns from drying out, while removing the foil for the final baking period allows the tops to brown and the cheese to melt completely. Keep a close eye on the sliders during the final baking period to prevent burning.
Step 9: Serve and Enjoy
Remove from the oven and let cool for a few minutes. Serve warm and enjoy these delightful bacon cheeseburger mini sliders! Allowing the sliders to cool slightly before serving prevents burning and allows the cheese to set slightly. These sliders are best enjoyed warm, as the flavors are most vibrant at that temperature.
Why You Will Love This Recipe
These Bacon Cheeseburger Mini Sliders are a guaranteed hit for several reasons. First, they offer the beloved taste of a classic bacon cheeseburger in a convenient, bite-sized format. This makes them perfect for parties, game days, or any gathering where you want to serve something fun and delicious. Second, the recipe is incredibly easy to follow and requires minimal effort, making it accessible for cooks of all skill levels. The combination of savory, sweet, and creamy elements creates a flavor explosion that everyone will enjoy. Finally, the sliders are highly customizable – you can easily adjust the ingredients to suit your preferences or dietary needs.
Serving Suggestions:
These sliders are versatile and can be served as an appetizer, snack, or even a light meal. Here are a few serving suggestions:
- Serve with a side of crispy French fries or sweet potato fries.
- Pair with a refreshing coleslaw or a simple green salad.
- Offer a variety of dipping sauces, such as ketchup, mustard, mayonnaise, or ranch dressing.
- Garnish with sliced pickles, onions, or tomatoes for added flavor and texture.
- Serve alongside other appetizers, such as chicken wings, nachos, or mozzarella sticks, for a complete party spread.
Tips:
- For best results, use high-quality ground beef with a good amount of fat (around 80/20) to ensure juicy and flavorful patties.
- Cook the bacon until crispy for added texture and flavor. You can cook it in the oven, on the stovetop, or in the microwave.
- Use a good-quality cheddar cheese that melts well. Sharp cheddar provides a bolder flavor, while mild cheddar is more subtle.
- Don’t overcook the patties, as they will become dry and tough. Use a meat thermometer to ensure they reach an internal temperature of 160°F (71°C).
- If you don’t have Hawaiian rolls, you can use other types of slider buns, such as brioche or potato rolls.
- For a spicier kick, add a pinch of cayenne pepper to the meat mixture or use a spicy barbecue sauce.
- These sliders can be assembled ahead of time and baked just before serving.
- Leftover sliders can be stored in the refrigerator for up to 3 days. Reheat them in the oven or microwave before serving.
Prep Time:
15 minutes
Cook Time:
20-25 minutes
Total Time:
35-40 minutes
Nutritional Information:
(Approximate values per slider)
Calories: Approximately 300 kcal
Protein: 15g
Sodium: 500mg (values can vary based on ingredients and quantities used)
Conclusion
Bacon Cheeseburger Mini Sliders are the perfect appetizer for any occasion. They are easy to make, incredibly delicious, and always a crowd-pleaser. The combination of savory ground beef, creamy cheese, crispy bacon, and sweet Hawaiian rolls is simply irresistible. Whether you’re hosting a party, watching a game, or just craving a tasty snack, these sliders are sure to hit the spot. Give this recipe a try and enjoy the ultimate bacon cheeseburger experience in a fun, bite-sized package!
Frequently Asked Questions
- Can I use a different type of cheese?
- Yes, you can definitely use different types of cheese depending on your preference. Monterey Jack, provolone, or even a spicy pepper jack would work well. Just make sure the cheese melts nicely for the best results.
- Can I make these sliders ahead of time?
- Absolutely! You can assemble the sliders ahead of time and keep them covered in the refrigerator. Just add a few extra minutes to the baking time when you’re ready to cook them, ensuring they are heated through properly.
- Is it possible to make these without bacon?
- Of course! If you’re not a fan of bacon or want a slightly healthier version, you can omit it. You might want to add a bit more seasoning to the beef to compensate for the smoky flavor that the bacon provides.
- What’s the best way to reheat leftover sliders?
- The best way to reheat them is in the oven at a low temperature (around 300°F or 150°C) until heated through. This helps to keep the rolls from getting too soggy. You can also microwave them, but be aware that the rolls may become a bit softer.
- Can I freeze these sliders?
- Yes, you can freeze them, but the texture of the rolls might change slightly upon thawing. Assemble the sliders, bake them, let them cool completely, then wrap them individually in plastic wrap before freezing. When ready to eat, thaw them in the refrigerator and reheat in the oven.