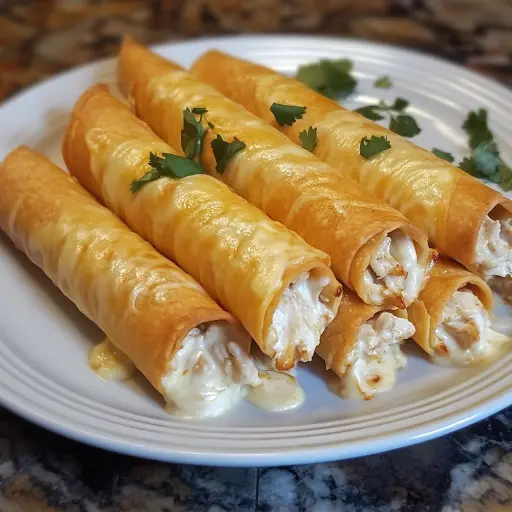
Description: Crispy, cheesy, and packed with flavor, these Baked Cream Cheese Chicken Taquitos are a quick and easy weeknight meal or a crowd-pleasing appetizer. They are a healthier alternative to fried taquitos without sacrificing any of the deliciousness. The creamy, cheesy chicken filling perfectly complements the crispy tortilla, making them irresistible to everyone.
Ingredients:
- 2 cups cooked chicken, shredded: Leftover rotisserie chicken, poached chicken, or even canned chicken (drained well) will work perfectly. Make sure the chicken is shredded into small pieces for even distribution in the filling. Using high-quality chicken will significantly improve the overall taste.
- 4 oz cream cheese, softened: Full-fat cream cheese is recommended for the best flavor and creamy texture. Allow the cream cheese to soften at room temperature for at least 30 minutes for easy mixing. If you’re in a hurry, you can microwave it in 15-second intervals, stirring in between, until softened.
- ½ cup shredded cheddar cheese: Sharp cheddar cheese will provide a more pronounced flavor, but mild or medium cheddar will also work well. You can also use a blend of cheddar and Monterey Jack for a more complex flavor profile. Pre-shredded cheese is convenient, but freshly shredded cheese melts better and has a better texture.
- ¼ cup salsa: Use your favorite salsa – mild, medium, or hot, depending on your preference for spice. A chunky salsa will add some texture to the filling, while a smoother salsa will create a creamier consistency. Consider using a homemade salsa for a fresher, more vibrant flavor. You can even experiment with different types of salsa, like salsa verde or black bean salsa, to change the flavor profile of the taquitos.
- 1 tsp garlic powder: Garlic powder adds a savory depth to the filling. Fresh garlic, minced, can be substituted (use about 1-2 cloves), but garlic powder provides a more consistent and less overpowering garlic flavor.
- 1 tsp onion powder: Onion powder complements the garlic powder and adds a subtle sweetness to the filling. Like with garlic powder, you could technically substitute with finely minced fresh onion, but the powder blends more seamlessly into the mixture.
- 1 tsp cumin: Cumin adds a warm, earthy flavor that complements the chicken and cheese. Ground cumin is essential for that classic Southwestern flavor.
- Salt and pepper, to taste: Season the filling generously with salt and pepper to enhance the flavors of all the other ingredients. Taste the filling before assembling the taquitos and adjust the seasoning as needed.
- 10 small flour or corn tortillas: Small tortillas are easier to roll and prevent the taquitos from becoming too large. Flour tortillas are softer and more pliable, while corn tortillas are gluten-free and have a slightly chewier texture. The choice is really up to your personal preference. Warming the tortillas slightly before filling them will make them more pliable and prevent them from cracking during rolling. You can warm them in a dry skillet for a few seconds per side, or wrap them in a damp paper towel and microwave them for about 15-20 seconds.
- Cooking spray or olive oil for brushing: Cooking spray or olive oil helps the taquitos get golden brown and crispy in the oven. Brushing with olive oil will add a slightly richer flavor.
Preparation:
Step 1: Preheat Oven: Set the oven to 425°F (220°C). Preheat your oven to the specified temperature to ensure that the taquitos cook evenly and become crispy. Line a baking sheet with parchment paper. Parchment paper prevents the taquitos from sticking to the baking sheet and makes cleanup easier.
Step 2: Prepare Filling: In a large mixing bowl, combine the shredded chicken, softened cream cheese, shredded cheddar cheese, salsa, garlic powder, onion powder, cumin, salt, and pepper. It’s extremely important to make sure the cream cheese is softened! Using a hand mixer will ensure everything is properly combined and make the texture smooth. Stir until all ingredients are well combined and the mixture is uniform. Taste the filling and adjust the seasoning as needed. This is your last chance to make sure the flavor is exactly how you want it.
Step 3: Assemble Taquitos: Take a single tortilla. Spoon about 2-3 tablespoons of the prepared filling onto each tortilla, spreading it evenly in a line down the center. Be careful not to overfill the tortillas, as this can cause them to burst open during baking. Now, roll the tortilla up tightly, starting from one end and rolling towards the other. Make sure to keep the roll firm and even. Place the rolled taquito seam-side down on the prepared baking sheet. This will help prevent the taquitos from unrolling during baking. Repeat this process with the remaining tortillas and filling.
Step 4: Bake Taquitos: Once all the taquitos are assembled and placed on the baking sheet, lightly brush each taquito with cooking spray or olive oil. This will help them get golden brown and crispy in the oven. Baking them is a much healthier alternative to frying them in oil. Carefully place the baking sheet in the preheated oven and bake for 15-18 minutes, or until the taquitos are golden brown and crispy. Keep a close eye on them to prevent them from burning.
Step 5: Serve: Once the taquitos are golden brown and crispy, remove them from the oven and let them cool slightly before serving. This will prevent you from burning your mouth. Serve warm with your favorite toppings, such as sour cream, guacamole, salsa, or pico de gallo.
Why You Will Love This Recipe:
- Easy and Quick: These taquitos come together in under 30 minutes, making them perfect for busy weeknights.
- Versatile: You can easily customize the filling with different cheeses, salsas, or spices to suit your taste.
- Healthier Alternative: Baking instead of frying makes these taquitos a lighter and healthier option.
- Kid-Friendly: Kids love the cheesy, crispy texture and the customizable fillings.
- Great for Parties: These taquitos are perfect for serving as appetizers at parties or gatherings.
- Freezable: You can easily freeze these taquitos for a quick and easy meal later.
Serving Suggestions:
- Serve with sour cream, guacamole, salsa, pico de gallo, or your favorite dipping sauce.
- Serve as an appetizer or a light meal.
- Serve with a side of rice and beans for a complete meal.
- Top with shredded lettuce, chopped tomatoes, and a drizzle of your favorite hot sauce.
- Offer a variety of toppings so everyone can customize their taquitos to their liking.
Tips:
- Warm the tortillas before filling them to prevent them from cracking.
- Don’t overfill the tortillas, as this can cause them to burst open during baking.
- Place the taquitos seam-side down on the baking sheet to prevent them from unrolling.
- Adjust the baking time depending on your oven and the desired level of crispness.
- For extra crispy taquitos, broil them for the last 1-2 minutes of baking, but watch them carefully to prevent burning.
- To freeze taquitos, bake them as directed, let them cool completely, and then wrap them individually in plastic wrap before placing them in a freezer bag. They can be stored in the freezer for up to 2 months. Reheat them in the oven at 350°F (175°C) until heated through.
Prep Time: 10 minutes Cook Time: 15 minutes Total Time: 25 minutes
Nutritional Information: (Approximate, per taquito) Note: This is an estimate and may vary depending on specific ingredients and portion sizes.
- Calories: 180 kcal
- Protein: 12g
- Sodium: 300mg
Conclusion:
These Baked Cream Cheese Chicken Taquitos are a delicious and easy way to enjoy a classic Mexican dish. They are a healthier alternative to fried taquitos and can be easily customized to suit your taste. Whether you’re looking for a quick weeknight meal, a crowd-pleasing appetizer, or a tasty snack, these taquitos are sure to be a hit. The combination of creamy, cheesy filling and crispy tortilla is simply irresistible. So, gather your ingredients and get ready to enjoy a batch of these amazing taquitos!
Questions and Answers about Baked Cream Cheese Chicken Taquitos:
- Q: Can I use different types of cheese in the filling?
- A: Absolutely! Feel free to experiment with different cheeses to find your favorite combination. Monterey Jack, pepper jack, Colby Jack, or even a Mexican blend would all work well. Just make sure the cheese is shredded for even distribution in the filling. You can adjust the amount of cheese to your liking as well.
- Q: Can I make these taquitos ahead of time?
- A: Yes, you can assemble the taquitos ahead of time and store them in the refrigerator for up to 24 hours before baking. Just make sure to cover them tightly with plastic wrap to prevent them from drying out. You can also freeze the assembled taquitos for longer storage.
- Q: Can I use corn tortillas instead of flour tortillas?
- A: Yes, you can use corn tortillas for a gluten-free option. However, corn tortillas tend to be more brittle than flour tortillas, so you may need to warm them slightly before filling them to prevent them from cracking. You can warm them in a dry skillet for a few seconds per side, or wrap them in a damp paper towel and microwave them for about 15-20 seconds.
- Q: Can I add vegetables to the filling?
- A: Certainly! Adding vegetables to the filling is a great way to add extra nutrients and flavor. Some good options include diced onions, bell peppers, corn, or black beans. Sauté the vegetables before adding them to the filling to soften them and bring out their flavor.
- Q: What can I do if my taquitos are unrolling during baking?
- A: If your taquitos are unrolling during baking, there are a few things you can try. First, make sure you are rolling them tightly and placing them seam-side down on the baking sheet. You can also try securing the seam with a toothpick before baking. If all else fails, lightly brush the seam with a mixture of beaten egg and water to help seal it.