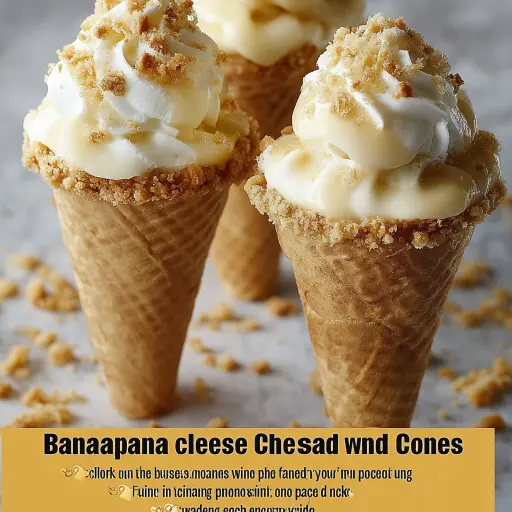
Description: Indulge in the delightful fusion of classic banana pudding and creamy cheesecake, all nestled within a crispy waffle cone. These Banana Pudding Cheesecake Cones are a fun, portable, and utterly irresistible treat that’s perfect for parties, picnics, or simply satisfying your sweet cravings. Combining the creamy richness of cheesecake with the nostalgic flavors of banana pudding, these cones offer a symphony of textures and tastes that will leave you wanting more. This recipe is surprisingly easy to make, and the customizable toppings allow you to tailor each cone to your personal preferences. Get ready to experience dessert bliss in every bite!
Ingredients:
For the Cheesecake Filling:
- 8 oz cream cheese, softened to room temperature: Essential for the cheesecake’s creamy base. Ensure it’s properly softened for a smooth, lump-free filling.
- 1 cup powdered sugar: Adds sweetness and stabilizes the cheesecake filling. Sift the powdered sugar to prevent lumps.
- 1 tsp vanilla extract: Enhances the overall flavor profile, adding a touch of warmth and complexity.
- 1 (3.4 oz) box instant banana pudding mix: Provides the signature banana flavor and helps thicken the filling. Using instant mix ensures a smooth consistency.
- 1 ½ cups cold milk: Activates the pudding mix and creates the creamy texture. Whole milk contributes to a richer flavor, but you can use lower-fat alternatives.
- 1 cup heavy whipping cream (optional, for a fluffier texture): Adds lightness and airiness to the filling. Make sure the cream is very cold for optimal whipping.
For Assembly:
- 6–8 waffle cones: These provide the crunchy vessel for our delicious filling. Choose high-quality cones that are sturdy and not overly sweet.
- 1–2 bananas, sliced: The star of the show, adding natural sweetness and a soft texture. Use ripe but firm bananas for the best flavor and appearance.
- 1 cup crushed Nilla Wafers (or Golden Oreos): These classic cookies add a delightful crunch and a touch of nostalgia. You can crush them in a food processor or by hand in a zip-top bag.
- Whipped cream (store-bought or homemade): Adds a final touch of sweetness and visual appeal. Homemade whipped cream is always a treat, but store-bought works just as well.
- Caramel drizzle (optional): Enhances the sweetness and adds a gooey, decadent element.
- Extra whole wafers or banana slices for topping: For an extra touch of elegance and visual appeal.
Preparation:
Step 1: Soften the Cream Cheese: Allow the cream cheese to sit at room temperature for at least 30 minutes to an hour, until it’s completely softened. This is crucial for achieving a smooth and creamy cheesecake filling without any lumps.
Step 2: Prepare the Waffle Cones (Optional): If desired, add a decorative touch to the waffle cones. Melt white chocolate in a microwave-safe bowl in 30-second intervals, stirring until smooth. Dip the rims of the cones into the melted chocolate, then immediately dip them into the crushed Nilla Wafers or Golden Oreos. Set the cones aside to allow the chocolate to harden.
Step 3: Make the Cheesecake Base: In a large mixing bowl, combine the softened cream cheese, powdered sugar, and vanilla extract. Use an electric mixer (handheld or stand mixer) to beat the ingredients together until the mixture is smooth, creamy, and well combined. Make sure to scrape down the sides of the bowl periodically to ensure even mixing.
Step 4: Prepare the Banana Pudding: In a separate mixing bowl, whisk together the instant banana pudding mix and cold milk. Whisk vigorously for about 2 minutes, until the mixture begins to thicken. It should have a pudding-like consistency. Set aside for a few minutes to allow the pudding to fully thicken.
Step 5: Whip the Heavy Cream (Optional): If you’re using heavy whipping cream to add a fluffier texture to the cheesecake filling, pour the cold heavy cream into a chilled mixing bowl. Use an electric mixer to whip the cream on medium-high speed until stiff peaks form. Be careful not to overwhip the cream, as it can turn into butter.
Step 6: Combine the Mixtures: Gently fold the banana pudding into the cream cheese mixture. Use a rubber spatula or wooden spoon to combine the two mixtures until they are well blended. If you’re using whipped cream, gently fold it into the cheesecake-pudding mixture until just combined. Be careful not to overmix, as this can deflate the whipped cream and result in a less fluffy filling.
Step 7: Chill the Filling: Cover the mixing bowl with plastic wrap and refrigerate the cheesecake filling for at least 10–15 minutes to allow it to thicken slightly. This will make it easier to fill the cones.
Instructions:
Step 1: Prepare the Cones: Before filling the cones, place a few banana slices or crushed Nilla Wafers at the bottom of each cone. This will help prevent the filling from making the cone soggy and add a burst of flavor and texture to the first bite.
Step 2: Fill the Cones: Spoon or pipe the cheesecake-pudding filling into the prepared waffle cones. Alternate layers of filling with crushed Nilla Wafers and sliced bananas. This layering technique ensures that each bite is packed with flavor and texture.
Step 3: Add Toppings: Once the cones are filled, top them with a generous dollop of whipped cream. Drizzle with caramel sauce, if desired. For an extra touch of elegance, garnish with a whole Nilla Wafer or a banana slice.
Step 4: Chill (Optional): If you prefer a firmer filling, refrigerate the filled cones upright for 20–30 minutes before serving. This will help the filling set and prevent it from melting too quickly.
Step 5: Serve Immediately: These Banana Pudding Cheesecake Cones are best enjoyed fresh, as the waffle cones can become soggy over time and the bananas can brown.
Why You Will Love This Recipe:
- Unique Twist on a Classic: It combines the comforting flavors of banana pudding with the creamy indulgence of cheesecake in a fun, portable format.
- Easy to Make: With just a few simple steps and readily available ingredients, this recipe is perfect for beginner bakers and busy individuals.
- Customizable: You can easily adapt the recipe to your preferences by using different types of cookies, adding chocolate chips, or experimenting with various toppings.
- Perfect for Parties: These cones are a crowd-pleasing dessert that’s sure to impress your guests. They’re also easy to serve and eat, making them ideal for gatherings of all sizes.
- Kid-Friendly: Both kids and adults will love the combination of flavors and textures in these cones. They’re a fun and delicious way to satisfy your sweet tooth.
Serving Suggestions:
- Serve these cones as a standalone dessert at parties, picnics, or casual gatherings.
- Pair them with fresh fruit, such as berries or sliced peaches, for a light and refreshing treat.
- Offer a variety of toppings, such as chocolate sauce, sprinkles, and chopped nuts, to allow guests to customize their cones.
- Serve them alongside a scoop of vanilla ice cream for an extra indulgent dessert.
- For a themed party, coordinate the toppings and decorations to match the occasion.
Tips:
- Use High-Quality Ingredients: The quality of the ingredients will directly impact the flavor and texture of the cones. Use good-quality cream cheese, fresh bananas, and sturdy waffle cones.
- Don’t Overmix the Filling: Overmixing the cheesecake filling can result in a tough texture. Mix the ingredients until just combined.
- Prevent Soggy Cones: To prevent the waffle cones from becoming soggy, fill them just before serving. You can also line the inside of the cones with melted chocolate to create a moisture barrier.
- Chill the Filling and Cones: Chilling the cheesecake filling and the filled cones will help them maintain their shape and prevent the filling from melting too quickly.
- Get Creative with Toppings: Don’t be afraid to experiment with different toppings to create your own unique flavor combinations. Consider using chocolate chips, chopped nuts, shredded coconut, or a drizzle of Nutella.
- Make Mini Cones: For bite-sized treats, use mini waffle cones instead of regular-sized ones. These are perfect for parties and portion control.
Prep Time: 20 minutes Cook Time: 0 minutes (chilling time may vary) Total Time: 20 minutes + chilling time (optional)
Nutritional Information: (Estimated, per cone)
- Calories: 350-450
- Protein: 5-7 grams
- Sodium: 150-250 mg
Conclusion:
These Banana Pudding Cheesecake Cones are a delightful and innovative dessert that combines the best of both worlds: the creamy richness of cheesecake and the comforting flavors of banana pudding. With their customizable toppings and easy-to-make recipe, they’re perfect for any occasion, from casual gatherings to festive celebrations. So, grab your waffle cones, gather your ingredients, and get ready to indulge in a taste of dessert paradise!
5 Questions and Answers About This Recipe:
- Can I make these cones ahead of time?
- While these cones are best enjoyed fresh, you can prepare the cheesecake filling a day in advance and store it in the refrigerator. However, it’s recommended to fill the cones just before serving to prevent them from becoming soggy.
- Can I use a different type of cookie instead of Nilla Wafers?
- Absolutely! Golden Oreos, graham crackers, or any other type of crispy cookie would work well in this recipe. Feel free to experiment with different flavors and textures to create your own unique twist.
- Can I make this recipe without heavy whipping cream?
- Yes, you can omit the heavy whipping cream if you prefer a denser cheesecake filling. The filling will still be creamy and delicious without it.
- How do I prevent the bananas from browning?
- To prevent the banana slices from browning, you can toss them with a little lemon juice or orange juice before adding them to the cones. This will help preserve their color and freshness.
- Can I use sugar-free pudding mix to make this recipe healthier?
- Yes, you can use sugar-free instant banana pudding mix to reduce the sugar content of the cones. Keep in mind that the flavor and texture may be slightly different from the original recipe.