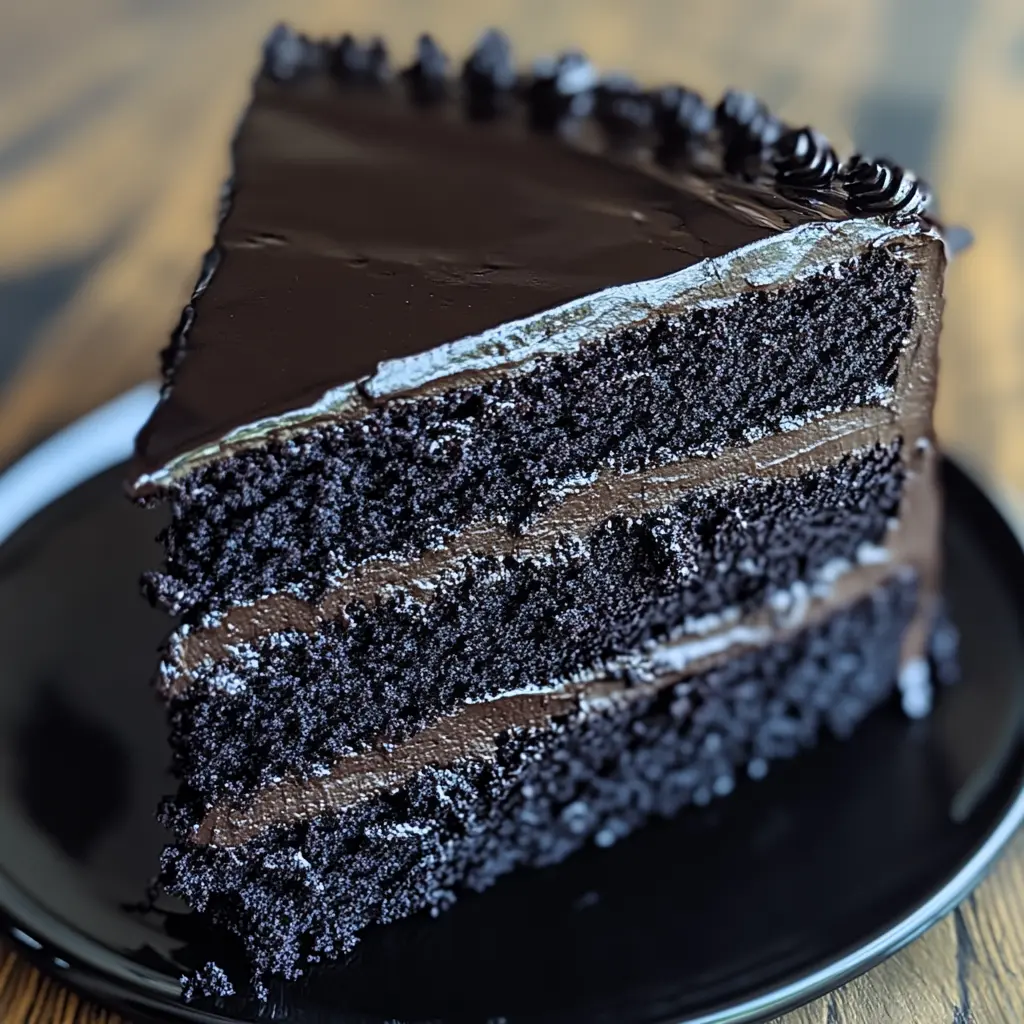
Description of this recipe: The Black Velvet Cake is a dramatic and decadent dessert that boasts a rich, deeply chocolatey flavor, complemented by the subtle tang of buttermilk and the warmth of vanilla. This cake’s captivating dark hue comes from the use of black cocoa powder, which lends it an irresistible visual appeal. Paired with a luscious black cocoa buttercream, adorned with dark berries and shimmering sprinkles, this cake is guaranteed to be the centerpiece of any celebration.
Why you will love this recipe: You will fall in love with this Black Velvet Cake because it’s so much more than just a cake; it’s an experience. The soft, moist crumb melts in your mouth, delivering an intense chocolate flavor that’s both comforting and sophisticated. The contrasting sweetness and slight bitterness of the black cocoa create a uniquely balanced taste that will keep you coming back for more. The show-stopping appearance makes it the perfect cake for birthdays, holidays, or any special occasion when you want to impress. Plus, while the instructions might seem extensive, the recipe is surprisingly straightforward and achievable for home bakers of all skill levels.
Introduction
The Black Velvet Cake is a modern twist on the classic red velvet cake, swapping the vibrant red hue for an equally striking black, achieved through the use of black cocoa powder. This ingredient not only imparts a beautiful color but also contributes to a deeper, more intense chocolate flavor profile. Unlike regular cocoa powder, black cocoa has been heavily processed, resulting in a very low acidity and a distinct, almost Oreo-like flavor.
This recipe isn’t just about aesthetics; it’s about creating a cake that delivers on both flavor and texture. The combination of cake flour and buttermilk ensures a tender, moist crumb that practically melts in your mouth. The addition of hot water or coffee helps to bloom the cocoa powder, intensifying its flavor and creating a richer, darker cake. And the chopped dark chocolate folded into the batter adds pockets of intense chocolatey goodness throughout each slice.
The black cocoa buttercream is the perfect accompaniment to the cake, enhancing the chocolate flavor and providing a smooth, creamy contrast to the cake’s soft texture. The fresh berries and sprinkles add a final touch of elegance and make this cake a true masterpiece. Whether you’re a seasoned baker or just starting out, this Black Velvet Cake is sure to impress with its stunning appearance and unforgettable taste.
Ingredients:
For the Cake:
- 1.5 cups (330g) brown sugar, firmly packed: Brown sugar adds moisture and a subtle molasses flavor to the cake, enhancing its overall richness. Make sure to pack it firmly when measuring for accurate results.
- 1 ¾ cups (260g) cake flour: Cake flour has a lower protein content than all-purpose flour, resulting in a more tender and delicate crumb. If you don’t have cake flour, you can substitute it with all-purpose flour, but reduce the amount by 2 tablespoons per cup and add 2 tablespoons of cornstarch.
- 1 cup (100g) black cocoa: Black cocoa is what gives this cake its signature dark color and intense chocolate flavor. It’s important to use black cocoa and not regular cocoa powder, as the difference in flavor and color is significant.
- 2 tsp bicarbonate of soda: Bicarbonate of soda (baking soda) is a leavening agent that reacts with the acidity in the buttermilk to help the cake rise.
- 1 tsp baking powder: Baking powder is another leavening agent that provides additional lift to the cake. It works by releasing carbon dioxide when heated.
- 2 eggs, room temperature: Eggs provide structure, richness, and moisture to the cake. Using room-temperature eggs helps them emulsify more easily with the other ingredients, resulting in a smoother batter.
- 1 cup (250ml) buttermilk: Buttermilk adds a tangy flavor and tenderizes the cake. If you don’t have buttermilk, you can make a substitute by adding 1 tablespoon of lemon juice or white vinegar to 1 cup of milk and letting it sit for 5 minutes.
- 1 cup (250ml) hot water or coffee: Hot water or coffee helps to bloom the cocoa powder, intensifying its flavor and creating a richer, darker cake. Coffee will enhance the chocolate flavor even more, while hot water will provide a more subtle chocolate taste.
- ½ cup (125ml) neutral oil (grapeseed or rice bran): Neutral oil adds moisture to the cake without adding any unwanted flavors. Grapeseed or rice bran oil are good choices because they have a light, clean taste. Vegetable oil or canola oil can also be used.
- 2 tsp vanilla extract: Vanilla extract enhances the other flavors in the cake and adds a touch of warmth and sweetness.
- 100g (3.5oz) dark chocolate, finely chopped: Chopped dark chocolate adds pockets of intense chocolatey goodness throughout the cake. Choose a high-quality dark chocolate with a cocoa content of at least 70% for the best flavor.
For the Black Cocoa Buttercream:
- 375g (13.3oz) butter, room temperature: Butter is the base of the buttercream, providing richness and flavor. It’s important to use room-temperature butter so that it creams smoothly and incorporates properly with the other ingredients.
- 190g (6.7oz) caster sugar: Caster sugar (superfine sugar) dissolves more easily than granulated sugar, resulting in a smoother buttercream. If you don’t have caster sugar, you can pulse granulated sugar in a food processor until it’s finely ground.
- 115ml (4floz) water, room temperature: Water helps to dissolve the sugar and create a smooth, creamy buttercream.
- ¾ cup black cocoa: Black cocoa adds color and flavor to the buttercream.
- 1 tsp vanilla extract: Vanilla extract enhances the flavor of the buttercream and adds a touch of sweetness.
To Decorate:
- Black cherries: Black cherries add a touch of elegance and sophistication to the cake.
- Blackberries: Blackberries provide a tart contrast to the sweetness of the cake and buttercream.
- Purple and gold sprinkles: Purple and gold sprinkles add a touch of sparkle and whimsy to the cake.
Preparation:
Step 1: Preheat & Prep: Preheat the oven to 160°C (320°F). Ensuring the oven is at the correct temperature is crucial for even baking. Use an oven thermometer to verify accuracy, as ovens can vary. Grease the two round baking tins (one 8-inch and one 4-inch high) thoroughly. This step is essential to prevent the cake from sticking. Use butter, shortening, or cooking spray. Lining the bottom of the tins with parchment paper adds an extra layer of protection and makes it easier to remove the cakes.
Step 2: Mix Dry Ingredients: In a large bowl, whisk together the brown sugar, cake flour, black cocoa, bicarbonate of soda, and baking powder. Whisking is important to evenly distribute the ingredients and remove any lumps, especially in the cocoa powder and brown sugar. This ensures a consistent texture in the final cake.
Step 3: Prepare Wet Ingredients: In another bowl, mix the buttermilk, oil, and vanilla extract. Buttermilk adds a characteristic tang and moisture to the cake. The oil keeps the cake moist, and the vanilla enhances the overall flavor profile. Beat in the eggs until fully combined. Then, gradually mix in the hot water or coffee. Adding the liquid in a slow, steady stream prevents the batter from curdling and ensures a smooth emulsion. The hot liquid helps to bloom the cocoa powder, intensifying its flavor and color.
Step 4: Combine & Bake: Slowly incorporate the wet ingredients into the dry ingredients, mixing until smooth. Be careful not to overmix the batter, as this can develop the gluten in the flour and result in a tough cake. Mix just until the ingredients are combined. Gently fold in the chopped dark chocolate. Ensure the chocolate is evenly distributed throughout the batter. Divide the batter evenly between the prepared tins. Using a kitchen scale ensures accurate division, resulting in cakes that bake at the same rate. Bake for approximately 30 minutes, or until a toothpick inserted into the center comes out clean. Baking times may vary depending on your oven. Begin checking for doneness around 25 minutes, inserting a toothpick or skewer into the center. If it comes out with wet batter, continue baking for a few more minutes and check again.
Step 5: Make Buttercream: Beat the butter, sugar, and black cocoa on low speed for about 1 minute, then gradually increase speed to medium until fully combined. Use a mixer, to get a light, fluffy texture. Gradually add water and vanilla, increasing speed until smooth and creamy. Adding the water slowly prevents the buttercream from becoming too thin or curdled. Beat until the buttercream is light and airy, typically 3-5 minutes.
Step 6: Assemble Cake: Allow cakes to cool completely before slicing horizontally into two layers. It is vital to avoid a hot or warm cake, or the buttercream will melt. Using a long, serrated knife ensures clean, even cuts. Spread the buttercream between the layers and cover the entire cake. Applying a thin “crumb coat” of buttercream first helps to seal in any loose crumbs and create a smooth surface for the final layer. Chill the cake for 15-20 minutes after the crumb coat to allow the buttercream to set before applying the final layer.
Step 7: Decorate & Serve: Use a 1A piping tip to create decorative buttercream dollops. Piping tips can make a beautiful design and be as intricate as you would like. Garnish with fresh black cherries, blackberries, and a sprinkle of purple and gold. Adding fruit or sprinkles adds visual appeal and enhances the cake’s flavor.
COOKING Rating:
- Skill Level: Intermediate
- Complexity: Medium
- Flavor Profile: Rich, chocolatey, slightly tangy, decadent
- Presentation: Stunning, visually impressive, elegant
Serving Suggestions:
- Serve chilled or at room temperature.
- Pair with a scoop of vanilla ice cream or whipped cream.
- Accompany with a glass of milk, coffee, or a dessert wine.
- Dust with cocoa powder or a sprinkle of sea salt for added flavor.
Tips:
- Use high-quality black cocoa powder for the best flavor and color.
- Don’t overmix the cake batter, as this can result in a tough cake.
- Ensure the butter is at room temperature for the buttercream to be smooth and creamy.
- Chill the cake after applying the crumb coat to prevent the buttercream from melting.
- Get creative with your decorations and make the cake your own!
Prep Time:
30 minutes
Cook Time:
30 minutes
Total Time:
1 hour (plus cooling and decorating time)
Nutritional Information (per serving):
(Note: This is an estimate and will vary based on specific ingredients and serving size)
Calories: Approximately 450-550 Protein: 5-7g Sodium: 200-250mg
Conclusion
The Black Velvet Cake is a show-stopping dessert that combines rich chocolate flavor with a stunning visual presentation. The use of black cocoa powder not only gives the cake its captivating dark hue but also adds a unique depth of flavor that sets it apart from other chocolate cakes. Whether you’re celebrating a special occasion or simply want to indulge in a decadent treat, this cake is sure to impress. With its soft, moist crumb, creamy buttercream frosting, and elegant decorations, the Black Velvet Cake is a true masterpiece that will leave a lasting impression on your guests.
Questions and Answers about this recipe:
Q1: Can I use regular cocoa powder instead of black cocoa powder?
A: While you can technically substitute regular cocoa powder for black cocoa powder, the results will be significantly different. Black cocoa powder has a very low acidity and a distinct flavor that is almost Oreo-like. It also imparts a much darker color to the cake. Using regular cocoa powder will result in a lighter-colored cake with a less intense chocolate flavor. If you must substitute, try using Dutch-processed cocoa powder for a slightly darker color and milder flavor. However, for the authentic Black Velvet Cake experience, it’s best to use black cocoa powder.
Q2: What if I don’t have buttermilk? Can I use a substitute?
A: Yes, you can easily make a buttermilk substitute. To make 1 cup of buttermilk, simply add 1 tablespoon of lemon juice or white vinegar to a liquid measuring cup, then fill the cup with milk until it reaches the 1-cup mark. Stir and let it sit for 5 minutes. This allows the milk to curdle slightly, mimicking the acidity and texture of buttermilk. Full-fat milk will provide the best results, but you can use any type of milk.
Q3: Can I make this cake ahead of time?
A: Absolutely! The Black Velvet Cake can be made ahead of time, which is perfect for entertaining. You can bake the cake layers up to 2 days in advance, wrap them tightly in plastic wrap, and store them at room temperature or in the refrigerator. The buttercream can also be made 1-2 days in advance and stored in an airtight container in the refrigerator. When you’re ready to assemble the cake, bring the buttercream to room temperature and rewhip it until smooth and creamy. Assembled and decorated, the cake is best consumed within 2-3 days, stored in the refrigerator to maintain its freshness.
Q4: Can I freeze this cake?
A: Yes, the Black Velvet Cake freezes well. For best results, freeze the unfrosted cake layers separately, tightly wrapped in plastic wrap and then in a layer of foil. The buttercream can also be frozen in an airtight container. Both cake layers and buttercream can be frozen for up to 2-3 months. To thaw, transfer the cake layers and buttercream to the refrigerator overnight. Bring the buttercream to room temperature and rewhip it until smooth and creamy before frosting the cake.
Q5: What is the best way to get a perfectly smooth buttercream frosting?
A: Achieving a perfectly smooth buttercream frosting takes a bit of practice, but here are a few tips:
- Use room-temperature butter: This is crucial for creating a smooth and creamy buttercream. If the butter is too cold, it won’t cream properly, and if it’s too warm, it will be greasy.
- Sift the black cocoa powder: Sifting the cocoa powder helps to remove any lumps and ensures a smooth texture in the buttercream.
- Beat the buttercream for a long time: Beating the buttercream for several minutes, until it’s light and airy, helps to create a smooth and stable frosting.
- Use a bench scraper: A bench scraper is a great tool for smoothing the sides of the cake. Hold the scraper at a slight angle and gently rotate the cake stand to create a smooth, even surface.
- Dip your spatula in hot water: Dipping your spatula in hot water before smoothing the buttercream can help to create a smoother finish. Just make sure to dry the spatula completely before using it. By following these tips, you’ll be well on your way to creating a perfectly smooth and professional-looking buttercream frosting.