Description of this recipe:
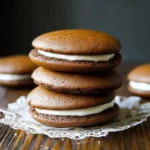
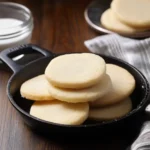
These butter cookies are a delightful treat, perfect for any occasion. With their melt-in-your-mouth texture and rich, buttery flavor, they’re a simple yet satisfying indulgence that will evoke feelings of nostalgia. This recipe is designed for both novice and experienced bakers, providing clear instructions and helpful tips to ensure perfect results every time. Whether you’re looking for a comforting snack or a charming addition to a dessert platter, these butter cookies are sure to impress. The versatility of this recipe also makes it a winner, as you can easily customize the cookies with your favorite toppings or flavors.
Why you will love this recipe:
You’ll adore this butter cookie recipe for several reasons. Firstly, its simplicity is a major draw – the ingredient list is short and sweet, comprising everyday items you likely already have in your pantry. Secondly, the process is straightforward, making it an excellent baking project even for beginners. Thirdly, the taste is absolutely divine; the buttery, melt-in-your-mouth texture is simply irresistible. Finally, the versatility of these cookies allows for endless customization. You can add chocolate chips, sprinkles, or even a delicate glaze to make them your own. These cookies are perfect for sharing with loved ones, gifting during the holidays, or simply enjoying with a cup of tea on a cozy afternoon. They’re a timeless classic that never fails to bring joy.
Ingredients:
- 2¼ cups all-purpose flour
- ¼ teaspoon salt
- 1 cup unsalted butter, softened
- ¾ cup granulated sugar
- 2 teaspoons vanilla extract
- 1 large egg, room temperature
- 2-3 teaspoons milk, if needed
- White chocolate chips (optional)
- Semi-sweet chocolate chips (optional)
- Coconut oil (optional)
- Sprinkles
Preparation:
Step 1: Begin by whisking together the all-purpose flour and salt in a medium-sized bowl. This ensures that the salt is evenly distributed throughout the flour, which is crucial for balancing the sweetness of the cookies. Set this mixture aside for later use. This step is simple but important, as it prevents clumps of salt from ending up in your final product.
Step 2: In the bowl of a stand mixer fitted with the paddle attachment (or using a hand mixer), combine the softened unsalted butter and granulated sugar. Beat on medium speed for about 2 minutes, or until the mixture is light and fluffy. This process is called creaming, and it’s essential for creating the right texture in your cookies. The creaming incorporates air into the butter and sugar, which will result in a tender, delicate crumb.
Step 3: Add the vanilla extract and the room temperature egg to the butter and sugar mixture. Beat for another minute, until everything is well combined. Make sure the egg is at room temperature, as this helps it emulsify properly with the other ingredients, leading to a smoother batter. Vanilla extract enhances the overall flavor profile, adding a warm, inviting note to the cookies.
Step 4: Gradually add the flour mixture to the wet ingredients, beating on low speed just until everything is incorporated. Be careful not to overmix the dough, as this can lead to tough cookies. Overmixing develops the gluten in the flour, resulting in a chewier texture rather than the desired melt-in-your-mouth consistency. If the dough seems too dry, add milk.
Step 5: Evaluate the dough’s consistency. It should be pipeable – meaning it should hold its shape when piped through a piping bag. To test, put a small amount of dough into a piping bag fitted with a large open star tip (such as Ateco 826 or 827). Pipe a small swirl onto a plate. If the swirl holds its shape without spreading too much, the dough is ready. If the dough is too stiff, add milk, one teaspoon at a time, until it reaches the desired consistency.
Step 6: Prepare your cookie sheets by leaving them ungreased.
Step 7: Transfer the dough to a piping bag fitted with a large open star tip. Pipe swirls about 2½ inches apart onto the prepared cookie sheets. The spacing is important to allow the cookies to spread evenly during baking without running into each other.
Step 8: Once the cookies are piped, refrigerate the cookie sheets uncovered for 30-40 minutes. This chilling step is crucial for preventing the cookies from spreading too much in the oven, which helps them retain their beautiful piped shape.
Step 9: Preheat your oven to 350 degrees Fahrenheit (175 degrees Celsius). Make sure your oven is fully preheated before baking, as this ensures even cooking and prevents the cookies from spreading too quickly.
Step 10: Bake the cookies in the preheated oven for 12-15 minutes, or until they are lightly browned around the edges. Keep a close eye on them, as baking times can vary depending on your oven.
Step 11: Remove the cookies from the oven and let them sit on the cookie sheets for about 5 minutes before transferring them to wire racks to cool completely. This allows the cookies to firm up slightly, preventing them from breaking when you move them.
Step 12: Once the cookies are completely cooled, you can decorate them as desired. If using chocolate, melt it in the microwave according to package instructions. A teaspoon of coconut oil per cup of chocolate chips can help thin the chocolate for easier dipping or drizzling, but this is optional.
Step 13: Dip the cooled cookies in melted chocolate, drizzle chocolate over them, or simply dust them with assorted sprinkles. Get creative and have fun with the decorations!
COOKING Rating:
Easy
Serving Suggestions:
These butter cookies are delicious on their own, but they also pair well with a variety of beverages. Enjoy them with a cup of hot coffee, tea, or cocoa for a comforting treat. They also make a wonderful addition to a dessert platter, alongside other cookies, cakes, and candies. For a more elegant presentation, arrange the cookies on a tiered serving stand or in a decorative box. These cookies are also perfect for gifting – package them in cellophane bags or decorative tins for a thoughtful and homemade present.
Tips:
- Make sure your butter is properly softened before creaming it with the sugar. Softened butter should be pliable but not melted.
- Use room temperature eggs for better emulsification and a smoother batter.
- Don’t overmix the dough, as this can result in tough cookies.
- Chilling the dough before baking helps prevent the cookies from spreading too much in the oven.
- For best results, use a piping bag fitted with a large open star tip.
- Store the cooled cookies in an airtight container at room temperature for up to a week.
Prep Time:
20 minutes
Cook Time:
12-15 minutes
Total Time:
45-50 minutes (including chilling time)
Nutritional Information:
(Note: Nutritional information is approximate and can vary based on specific ingredients and serving size.)
Calories:
Approximately 120-150 per cookie
Protein:
Approximately 1-2 grams per cookie
Sodium:
Approximately 20-30 milligrams per cookie
Conclusion:
These butter cookies are a delightful and versatile treat that’s perfect for any occasion. Their simple ingredients, straightforward instructions, and customizable nature make them a winner for bakers of all skill levels. Whether you’re enjoying them with a cup of tea, sharing them with loved ones, or gifting them during the holidays, these cookies are sure to bring joy and satisfaction. So gather your ingredients, preheat your oven, and get ready to create a batch of these irresistible butter cookies that will become a cherished favorite in your recipe collection.
Questions and Answers:
Q1: Can I use salted butter instead of unsalted butter?
A: While you can use salted butter, it’s generally recommended to use unsalted butter in baking recipes, as it gives you more control over the overall salt content. If you do use salted butter, reduce the amount of salt you add to the recipe by about ¼ teaspoon.
Q2: Can I freeze the butter cookie dough?
A: Yes, you can freeze the butter cookie dough. Wrap the dough tightly in plastic wrap and then place it in a freezer-safe bag or container. The dough can be frozen for up to 2-3 months. When you’re ready to bake the cookies, thaw the dough in the refrigerator overnight and then proceed with the recipe as directed.
Q3: Can I add other flavors to the butter cookies?
A: Absolutely! One of the great things about this recipe is its versatility. You can add a variety of flavors to customize the cookies to your liking. Some popular additions include lemon zest, almond extract, cinnamon, or even a touch of cardamom. Simply add these ingredients to the dough along with the vanilla extract.
Q4: Why are my cookies spreading too much in the oven?
A: There are several reasons why your cookies might be spreading too much. One common cause is that the butter was too warm when you creamed it with the sugar. Make sure the butter is softened but not melted. Another reason could be that the oven temperature is too low. Ensure your oven is properly preheated to 350 degrees Fahrenheit (175 degrees Celsius). Finally, chilling the dough before baking helps prevent spreading, so don’t skip that step!
Q5: Can I make these cookies without a piping bag?
A: Yes, you can still make these cookies without a piping bag. Instead of piping the dough, you can roll it out on a lightly floured surface and use cookie cutters to create different shapes. Alternatively, you can drop spoonfuls of dough onto the baking sheets and flatten them slightly with a fork before baking. The texture and flavor will be the same, but the appearance will be slightly different.