Description: Capture the essence of summer with this classic recipe for canning whole strawberries. This method preserves the vibrant flavor and beautiful color of fresh strawberries, allowing you to enjoy them year-round in a variety of delicious ways. Perfect for topping desserts, stirring into yogurt, or simply enjoying straight from the jar, these canned strawberries are a delightful reminder of warmer days.
Ingredients:
- 4 pounds fresh, ripe strawberries (preferably locally sourced for the best flavor)
- 4 cups filtered water
- 2 cups granulated sugar
- 2 tablespoons lemon juice (optional, but recommended for color preservation and added acidity)
- Pinch of sea salt (optional, enhances the sweetness)
Preparation:
Step 1: Strawberry Selection and Washing:
The success of this recipe hinges on the quality of your strawberries. Choose berries that are firm, plump, and deeply red. Avoid any that are bruised, mushy, or show signs of mold. Once you have your perfect berries, gently rinse them under cool, running water. Be careful not to damage them during the washing process. A colander works well for this step.
Step 2: Stemming and Hulling the Berries:
After washing, remove the stems and hulls from the strawberries. You can use a small paring knife or a dedicated strawberry huller for this. The goal is to remove the green parts without wasting too much of the precious fruit. If some berries are particularly large, you may choose to halve or quarter them. This is purely for aesthetic preference, as whole strawberries retain their shape beautifully when canned.
Step 3: Preparing the Light Syrup:
In a large, non-reactive saucepan (stainless steel or enamel-coated cast iron is ideal), combine the filtered water and granulated sugar. Over medium heat, stir constantly until the sugar is completely dissolved. Bring the syrup to a gentle boil, then reduce the heat to low and simmer for about 5 minutes. This step ensures the syrup is clear and free of any sugar crystals. The purpose of the syrup is to add sweetness and protect the fruit’s color and texture during the canning process. For those watching their sugar intake, a sugar substitute can be used, but note that it may affect the color and consistency of the final product.
Step 4: Sterilizing Jars and Lids:
Proper sterilization is crucial for safe canning. Wash your canning jars (pint or quart size) and lids in hot, soapy water, then rinse them thoroughly. There are several methods for sterilization:
- Boiling: Place the jars and lids in a large pot, cover them with water, and bring to a boil. Boil for 10 minutes. Keep the jars and lids in the hot water until you are ready to fill them.
- Dishwasher: If your dishwasher has a sterilization cycle, you can use it to sterilize the jars and lids.
- Oven: Preheat your oven to 250°F (120°C). Place the clean jars on a baking sheet and heat them in the oven for 20 minutes. Boil the lids in a saucepan of water for 10 minutes separately.
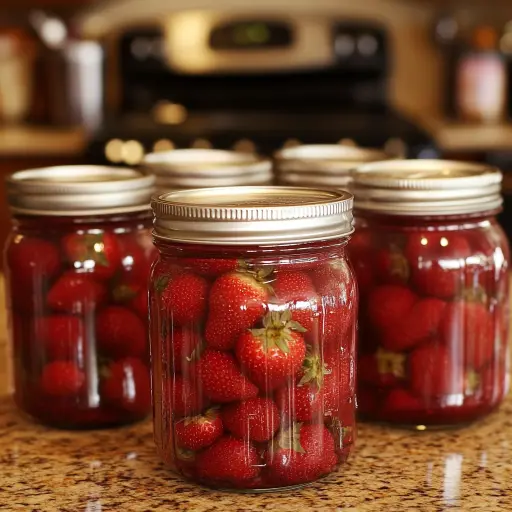
Step 5: Packing the Jars:
Using tongs or a jar lifter, carefully remove a sterilized jar from the hot water (or oven). Pack the prepared strawberries into the jar, leaving about 1/2 inch of headspace at the top. Gently shake the jar to settle the berries and fill any air pockets.
Step 6: Adding Lemon Juice and Hot Syrup:
Add 1 teaspoon of lemon juice (if using) to each pint jar, or 2 teaspoons to each quart jar. This helps to preserve the vibrant color of the strawberries and adds a touch of acidity, which aids in the canning process. Pour the hot syrup over the strawberries, ensuring that they are completely submerged. Again, leave 1/2 inch of headspace.
Step 7: Removing Air Bubbles and Sealing Jars:
Use a non-metallic spatula or bubble popper to gently run around the inside of the jar, releasing any trapped air bubbles. Add more syrup if necessary to maintain the 1/2 inch headspace. Wipe the rims of the jars with a clean, damp cloth to remove any syrup or fruit residue. Place the sterilized lids on the jars and screw on the bands until fingertip-tight. Do not overtighten, as this can prevent a proper seal.
Step 8: Processing in a Boiling Water Canner:
Place the filled jars into a boiling water canner, ensuring that they are covered by at least 1-2 inches of water. Bring the water to a full, rolling boil. Process the jars for 10 minutes for pint jars and 15 minutes for quart jars (adjust processing time based on your altitude – consult a reliable canning guide for specific recommendations).
Step 9: Cooling and Checking the Seals:
Carefully remove the jars from the canner using a jar lifter and place them on a towel-lined surface or cooling rack, leaving space between them for air circulation. Allow the jars to cool undisturbed for 12-24 hours. As the jars cool, you should hear a “pop” sound as the lids seal.
After cooling, check the seals by pressing down on the center of each lid. If the lid does not flex or pop back, the jar is sealed properly. If a jar has not sealed, you can either reprocess it with a new lid, refrigerate it and use it within a few days, or freeze the contents.
Step 10: Labeling and Storing:
Label each jar with the date and contents. Store the sealed jars in a cool, dark, and dry place. Properly canned strawberries should last for up to one year.
Why you will love this recipe:
This recipe is a labor of love that yields incredible rewards. Imagine the delight of opening a jar of sun-ripened strawberries in the dead of winter, bringing back memories of summer days. The process is simpler than it seems, and the flavor of homemade canned strawberries far surpasses anything you can buy in a store. Plus, you have complete control over the ingredients, ensuring a wholesome and delicious product. Canning is a great way to reduce food waste, and share the bounty of your garden.
Serving Suggestions:
- Top pancakes, waffles, or French toast with a generous spoonful of canned strawberries and a dollop of whipped cream.
- Stir into yogurt, oatmeal, or granola for a flavorful breakfast or snack.
- Use as a filling for pies, tarts, or cakes.
- Blend into smoothies for a fruity boost.
- Serve alongside ice cream or other desserts.
- Enjoy straight from the jar as a simple and satisfying treat.
Tips:
- Use high-quality, ripe strawberries for the best flavor.
- Adjust the amount of sugar in the syrup to your taste.
- Add a pinch of salt to enhance the sweetness of the strawberries.
- Use lemon juice to preserve the color of the strawberries and add acidity.
- Make sure to leave the correct amount of headspace in the jars for a proper seal.
- Process the jars for the correct amount of time based on your altitude.
- Cool the jars completely before checking the seals.
- Store the jars in a cool, dark, and dry place.
Prep Time: 45 minutes Cook Time: 20 minutes Total Time: 1 hour 5 minutes (+12-24 hours cooling time)
Nutritional Information (per serving, estimate):
Calories: Approximately 100-150 (depending on syrup-to-strawberry ratio) Protein: Less than 1 gram Sodium: Negligible
Conclusion:
Canning whole strawberries is a rewarding and satisfying way to preserve the flavors of summer. With a little patience and attention to detail, you can create delicious and beautiful jars of strawberries that will bring joy to your table year-round. Don’t be intimidated by the process—with a few simple steps, you can enjoy the taste of homemade goodness anytime you want.
Questions and Answers about Canning Strawberries:
Q1: Can I use frozen strawberries for this recipe?
A: While technically possible, using frozen strawberries is not recommended for canning whole. Frozen strawberries tend to release a lot of water when thawed, which can result in a mushy final product and an unreliable seal. It’s best to use fresh, ripe strawberries for the best results.
Q2: What if I don’t have a boiling water canner? Can I use a large pot?
A: Yes, you can use a large pot as long as it’s deep enough to fully submerge the jars by at least 1-2 inches of water. Place a rack or towel at the bottom of the pot to prevent the jars from directly touching the heat source, which could cause them to break.
Q3: Why is lemon juice added? Can I skip it?
A: Lemon juice serves two main purposes: it helps preserve the vibrant red color of the strawberries and adds acidity, which is crucial for safe canning, especially with low-acid fruits like strawberries. While you can technically skip it, the strawberries may lose some of their color, and the added acidity ensures a safer product with a longer shelf life.
Q4: How do I know if my jars have sealed properly?
A: The most reliable way to check for a proper seal is to press down on the center of the lid after the jars have cooled for 12-24 hours. If the lid doesn’t flex or pop back when you press it, the jar is sealed. You can also listen for a “popping” sound as the jars cool, which indicates that the vacuum seal is forming. If a jar doesn’t seal, you can either reprocess it with a new lid, refrigerate it, or freeze the strawberries.
Q5: Can I reduce the amount of sugar in the syrup to make it healthier?
A: Yes, you can reduce the amount of sugar to some extent, but keep in mind that sugar plays a role in preserving the fruit’s color and texture. You can also use a sugar substitute, but be aware that this may affect the consistency and color of the final product. If you reduce the sugar significantly, it’s important to follow tested canning recipes that specify the reduced sugar ratio to ensure the safety of the preserved fruit.