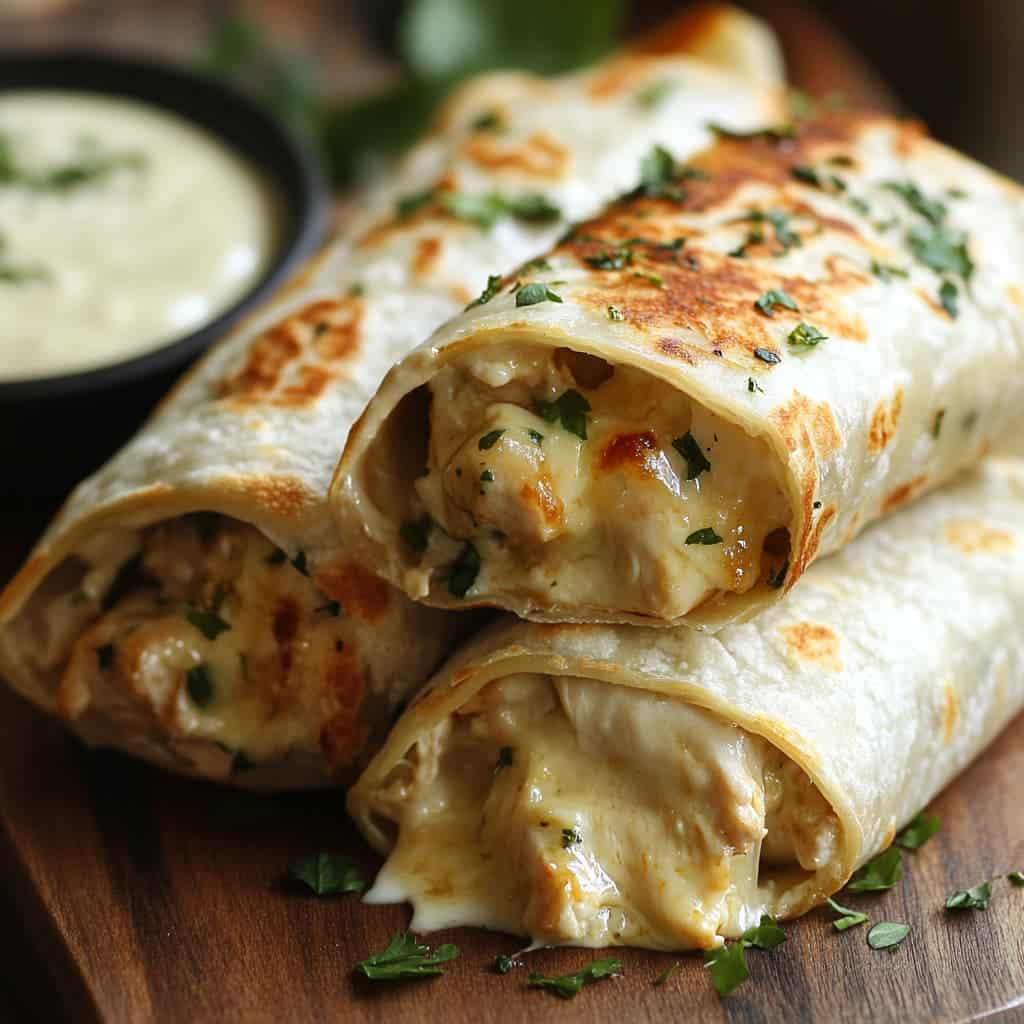
Description
These Cheesy Garlic Chicken Wraps are a quick, easy, and delicious meal perfect for lunch or dinner. They combine the savory flavors of garlic and chicken with gooey melted cheese, all wrapped in a warm, crispy tortilla. This recipe is incredibly versatile and can be customized to suit your taste preferences with added veggies or different types of cheese.
Ingredients:
- 2 cups cooked shredded or chopped chicken (rotisserie chicken works great)
- 1 tbsp olive oil
- 1 tsp garlic powder
- ½ tsp onion powder
- Salt and black pepper to taste
- 1½ cups shredded mozzarella cheese
- ½ cup shredded cheddar cheese
- ¼ cup cream cheese, softened
- 2 tbsp mayonnaise or sour cream
- 2 tbsp chopped fresh parsley (or 1 tsp dried)
- 4 large flour tortillas
- 2 tbsp melted butter
- 1 tsp minced garlic (for brushing)
- Optional: baby spinach, lettuce, or sliced tomatoes for extra filling
Preparation:
Step 1: In a large bowl, mix the cooked chicken, olive oil, garlic powder, onion powder, salt, pepper, mozzarella, cheddar, cream cheese, mayonnaise (or sour cream), and parsley until well combined. Make sure the cream cheese is softened for easy mixing.
Step 2: Lay out each tortilla on a flat surface. Spoon the cheesy chicken mixture evenly across the center of each tortilla, leaving some space at the edges.
Step 3: If desired, add optional veggies like baby spinach, lettuce, or sliced tomatoes on top of the chicken mixture for extra flavor and texture.
Step 4: Roll up each tortilla tightly, tucking in the sides as you roll to form a secure wrap. This will help prevent the filling from spilling out during cooking.
Step 5: In a small bowl, mix the melted butter with the minced garlic. Brush this garlic butter mixture generously over each wrap. This will give the wraps a beautiful golden color and a delicious garlicky flavor.
Step 6: Heat a skillet or griddle over medium heat. Place the wraps seam-side down in the skillet and cook for 2-3 minutes per side, or until golden brown and crisp. Press down gently on the wraps with a spatula to ensure even cooking.
Step 7: Remove the wraps from the skillet and let them cool slightly before cutting them in half (optional) and serving.
Why You’ll Love This Recipe
This recipe is a winner because it’s quick, easy, and satisfying. It uses simple ingredients that you probably already have on hand, and it comes together in just about 20 minutes. The combination of cheesy, garlicky chicken in a warm tortilla is incredibly comforting, and the recipe is flexible enough to accommodate different dietary needs and preferences. Plus, it’s a great way to use up leftover cooked chicken!
Serving Suggestions:
- Serve warm as a quick lunch or dinner.
- Cut into smaller pieces for appetizers or snacks.
- Pair with a side salad or a bowl of soup for a complete meal.
- Serve with your favorite dipping sauce, such as ranch dressing, sour cream, or salsa.
Tips:
- Use rotisserie chicken for a super-fast preparation.
- Don’t overfill the tortillas, or they will be difficult to roll.
- Make sure the skillet is hot enough before adding the wraps to prevent them from sticking.
- For extra crispy wraps, brush with garlic butter and cook in a panini press.
- Feel free to experiment with different types of cheese, such as pepper jack or provolone.
- Add a sprinkle of red pepper flakes to the chicken mixture for a little heat.
Preparation Time: 10 minutes
Cook Time: 10 minutes
Total Time: 20 minutes
Nutritional Information: (Approximate, per wrap)
- Calories: ~450 kcal
- Protein: ~35g
- Sodium: ~700mg (depending on ingredients)
DRINK Rating
This recipe pairs well with a light beer, a crisp white wine (like Pinot Grigio), or a refreshing iced tea. A sparkling lemonade would also be a great non-alcoholic option.
Conclusion
These Cheesy Garlic Chicken Wraps are a guaranteed crowd-pleaser. Whether you’re looking for a quick weeknight dinner or a tasty snack, this recipe is sure to hit the spot. The combination of flavors and textures is irresistible, and the ease of preparation makes it a go-to recipe for busy cooks. Enjoy!
Questions and Answers:
Q1: Can I make these wraps ahead of time?
A: Yes, you can assemble the wraps ahead of time and store them in the refrigerator. However, it’s best to cook them just before serving to prevent the tortillas from getting soggy.
Q2: Can I use a different type of meat?
A: Absolutely! You can substitute the chicken with shredded turkey, ground beef, or even black beans for a vegetarian option.
Q3: Can I freeze these wraps?
A: It’s not recommended to freeze the assembled wraps, as the tortillas may become soggy when thawed. However, you can freeze the chicken and cheese mixture separately and then assemble the wraps when ready to cook.
Q4: Can I use whole wheat tortillas?
A: Yes, whole wheat tortillas are a great option for adding extra fiber to the recipe.
Q5: Can I add any vegetables to the chicken mixture?
A: Definitely! Feel free to add diced bell peppers, onions, or corn to the chicken mixture for added flavor and nutrients.