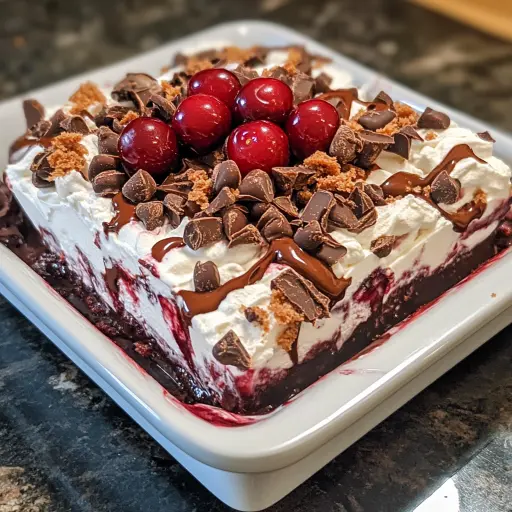
Description: This Chocolate Cherry Lush is a decadent layered dessert that combines a buttery nut crust, sweet cherry pie filling, a creamy cream cheese layer, rich chocolate pudding, and a fluffy Cool Whip topping. It’s an easy-to-make, no-bake delight perfect for any occasion.
Ingredients:
- First Layer (Crust):
- 1 cup all-purpose flour
- 1/2 cup crushed nuts (pecans, walnuts, or almonds work well)
- 1/4 cup granulated sugar
- 8 tablespoons (1 stick) salted butter, melted
- Second Layer (Cherry Filling):
- 1 can (21 ounces) cherry pie filling
- Third Layer (Cream Cheese Layer):
- 8 ounces cream cheese, softened
- 1 cup powdered sugar
- 1 cup Cool Whip, from an 8-ounce container
- Fourth Layer (Chocolate Pudding):
- 2 packages (3.4 ounces each) chocolate instant pudding mix
- 3 cups milk (whole or 2% recommended)
- Fifth Layer (Topping):
- Remaining Cool Whip from the 8-ounce container
- 1/2 cup chocolate shavings or chocolate jimmies (optional, for garnish)
Preparation:
Step 1: Preheat the Oven (For the Crust): Preheat your oven to 375°F (190°C). Ensure your oven rack is in the middle position for even baking.
Step 2: Prepare the Crust Mixture: In a medium mixing bowl, combine the all-purpose flour, crushed nuts, granulated sugar, and melted butter. Use a fork or your hands to mix the ingredients thoroughly until they are well combined and form a slightly crumbly mixture. Make sure there are no large clumps of flour or sugar.
Step 3: Press the Crust into the Baking Dish: Take a 9×13 inch baking dish and lightly grease the bottom and sides with cooking spray or butter to prevent the crust from sticking. Pour the crust mixture into the dish and use your fingers or the back of a spoon to press it evenly across the bottom. Ensure the crust is uniformly distributed to avoid any thin or thick spots, which could affect the texture and baking.
Step 4: Bake the Crust: Place the baking dish in the preheated oven and bake for 10 minutes, or until the crust is lightly golden brown around the edges. Keep a close eye on it to prevent burning. Once baked, remove the dish from the oven and let the crust cool completely. This is crucial for the layers to set properly and prevent the cherry filling from soaking into the crust.
Step 5: Add the Cherry Pie Filling: Once the crust has cooled completely, open the can of cherry pie filling and spread it evenly over the baked crust. Use a spoon or spatula to ensure the cherries are distributed uniformly, creating a consistent layer of fruity goodness.
Step 6: Soften the Cream Cheese: In a large mixing bowl, place the softened cream cheese. It’s essential that the cream cheese is at room temperature to avoid lumps in the final mixture. You can leave it out for about 30 minutes to an hour, or microwave it in 15-second intervals until softened, being careful not to melt it.
Step 7: Make the Cream Cheese Layer: Using an electric mixer, beat the softened cream cheese until it is light and fluffy. Gradually add the powdered sugar, mixing on low speed to prevent a cloud of sugar. Once the powdered sugar is incorporated, increase the speed and continue beating until the mixture is smooth and creamy.
Step 8: Fold in the Cool Whip: Add 1 cup of Cool Whip to the cream cheese mixture and gently fold it in using a spatula. Be careful not to overmix, as this can deflate the Cool Whip. Continue folding until the mixture is smooth and uniform in color.
Step 9: Spread the Cream Cheese Layer: Carefully spread the cream cheese mixture over the cherry layer, using a spatula to create an even and smooth surface. Ensure the entire cherry layer is covered to create a distinct and appealing separation between the layers.
Step 10: Prepare the Chocolate Pudding: In a separate medium mixing bowl, whisk together the two packages of chocolate instant pudding mix and 3 cups of milk. Follow the package instructions for the pudding mix, whisking vigorously until the pudding thickens. This usually takes about 2-3 minutes.
Step 11: Layer the Pudding: Gently spread the chocolate pudding over the cream cheese layer. Use a spatula to ensure it is evenly distributed and covers the entire cream cheese layer.
Step 12: Top with Cool Whip: Spread the remaining Cool Whip over the chocolate pudding layer, creating a fluffy and attractive topping. Use a spatula to smooth it out and create an even surface.
Step 13: Garnish (Optional): Sprinkle chocolate shavings or chocolate jimmies over the Cool Whip topping for a decorative touch. This adds visual appeal and enhances the chocolate flavor of the dessert.
Step 14: Chill and Serve: Cover the baking dish with plastic wrap and refrigerate for at least 4 hours, or preferably overnight, to allow the layers to set properly. This will ensure the dessert holds its shape when cut and served.
Step 15: Cut and Serve: When ready to serve, cut the Chocolate Cherry Lush into squares and use a spatula to lift each piece onto individual plates. Serve chilled and enjoy the delightful combination of flavors and textures!
Why You Will Love This Recipe
- Easy to Make: This recipe requires minimal baking and mostly involves layering, making it a straightforward dessert to prepare, even for beginner bakers.
- Make-Ahead Dessert: You can prepare this lush a day in advance, making it perfect for parties or gatherings where you want to reduce stress on the day of the event.
- Crowd-Pleaser: The combination of chocolate, cherries, and creamy layers is universally appealing, making it a guaranteed hit with both kids and adults.
- Customizable: You can easily adapt the recipe to suit your preferences, such as using different types of nuts in the crust or adding other fruits to the filling.
- Visually Appealing: The distinct layers create a beautiful presentation that is sure to impress your guests.
Serving Suggestions:
- Serve Chilled: This dessert is best served cold to enhance the flavors and textures.
- Garnish: Top each serving with a dollop of whipped cream or a fresh cherry for an extra touch.
- Pair with Beverages: Serve with a glass of milk, coffee, or a sweet dessert wine.
- Special Occasions: Perfect for holidays, birthdays, potlucks, or any special celebration.
- Elegant Plating: For a more elegant presentation, serve individual slices on dessert plates with a drizzle of chocolate sauce.
Tips:
- Softening Cream Cheese: Ensure the cream cheese is fully softened to avoid lumps in the cream cheese layer.
- Cooling the Crust: Allow the crust to cool completely before adding the cherry filling to prevent it from becoming soggy.
- Even Layers: Spread each layer evenly to ensure a balanced flavor profile in every bite.
- Chilling Time: Give the lush enough time to chill in the refrigerator to allow the layers to set properly.
- Nuts: Toast the nuts before crushing them to enhance their flavor.
- Variations: Use different flavors of pudding, such as vanilla or white chocolate, for a different twist.
Prep Time:
- 20 minutes
Cook Time:
- 10 minutes
Total Time:
- 30 minutes (plus 4 hours chilling time)
Nutritional Information: (Approximate values per serving)
- Calories: 450
- Protein: 5g
- Sodium: 250mg
Conclusion
The Chocolate Cherry Lush is a delightful and visually stunning dessert that is perfect for any occasion. Its combination of a buttery crust, sweet cherry filling, creamy cream cheese layer, and rich chocolate pudding creates a symphony of flavors and textures that will leave everyone wanting more. Easy to make and customizable to your preferences, this lush is sure to become a family favorite. Whether you’re celebrating a special event or simply looking for a sweet treat, the Chocolate Cherry Lush is a guaranteed crowd-pleaser that will impress your guests and satisfy your sweet tooth. So gather your ingredients, follow the simple steps, and indulge in this layered delight that promises to be the highlight of any gathering.
Questions and Answers about this Recipe:
- Can I make this recipe ahead of time?
- Yes, absolutely! In fact, the Chocolate Cherry Lush is an ideal make-ahead dessert. Preparing it a day in advance allows the layers to set properly and the flavors to meld together, resulting in an even more delicious treat. Just ensure you cover it tightly with plastic wrap before refrigerating.
- What type of nuts works best for the crust?
- Pecans are a classic choice for the crust due to their rich, buttery flavor that complements the chocolate and cherries. However, walnuts or almonds also work well. You can use a single type of nut or a combination, depending on your preference. Make sure to crush them into small pieces for an even texture.
- Can I use fresh cherries instead of cherry pie filling?
- While using fresh cherries is possible, it requires a bit more preparation. You would need to pit and cook the cherries with sugar and a thickening agent like cornstarch to create a cherry filling consistency. Cherry pie filling is used to save time and ensure a consistent result. If you prefer fresh cherries, be prepared for the extra steps and adjust the sweetness to your liking.
- Is it necessary to bake the crust?
- Baking the crust is recommended as it helps to create a firm base that won’t become soggy when the other layers are added. Baking the crust briefly ensures it has a pleasant texture and a slightly nutty flavor. If you prefer a no-bake option, you can use crushed graham crackers mixed with melted butter as an alternative crust, but it may not provide the same structural integrity.
- Can I use a different flavor of pudding?
- Yes, you can definitely experiment with different flavors of instant pudding to customize the Chocolate Cherry Lush to your liking. Vanilla or white chocolate pudding can provide a lighter, sweeter contrast to the cherry filling, while other flavors like cheesecake or butterscotch can add a unique twist. Just make sure the flavor complements the other ingredients in the dessert.