Description: These Chocolate Lasagna Cupcakes are a delightful, individual serving take on the classic no-bake Chocolate Lasagna dessert. They feature a crunchy Oreo crust, a creamy sweet cream cheese layer, a rich chocolate pudding filling, and a fluffy whipped topping, all in a perfectly portioned cupcake. This recipe offers a delightful combination of textures and flavors that will appeal to chocolate lovers of all ages.
Why you will love this recipe:
- Easy and No-Bake (Mostly): While the crust is briefly baked to set it, the rest of the cupcake is assembled without any further baking, making it perfect for warm weather or when you’re short on time.
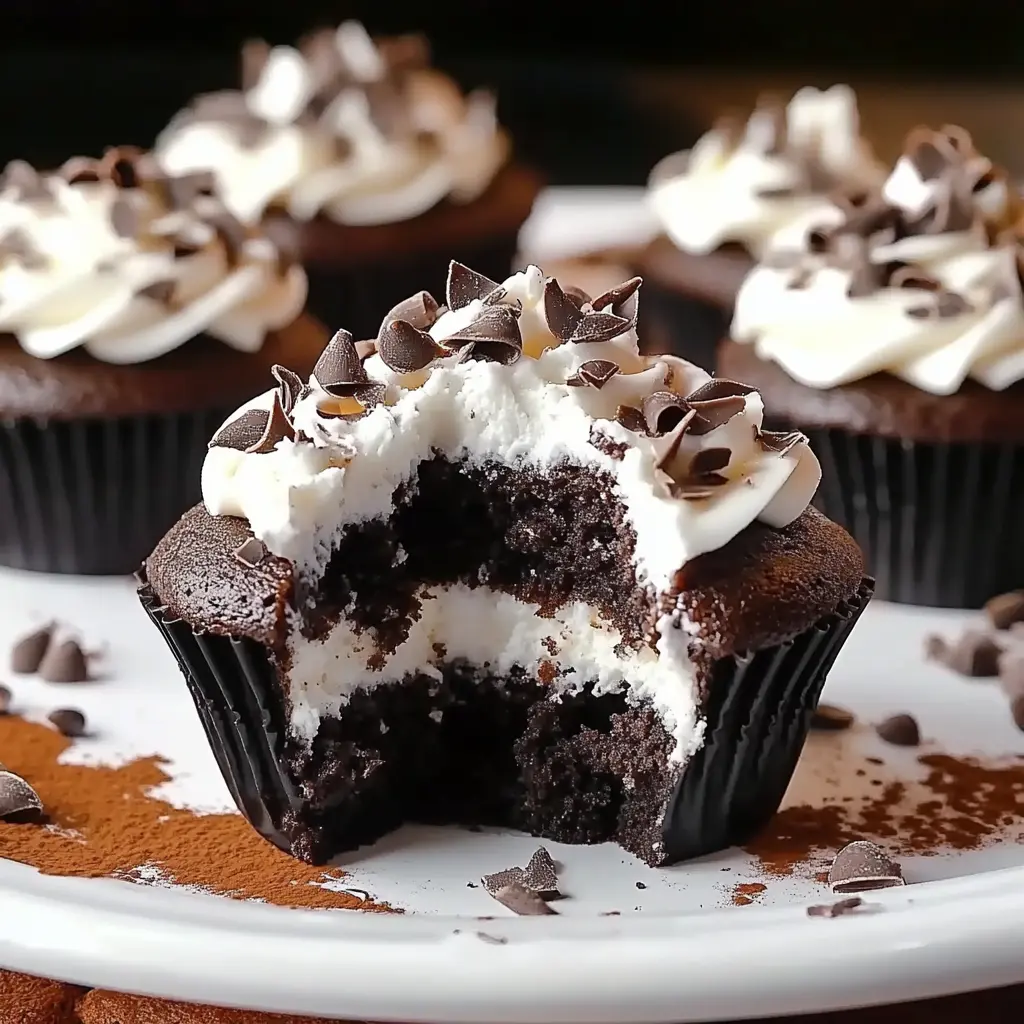
- Impressive Presentation: These cupcakes look beautiful and decadent, making them ideal for parties, potlucks, or a special treat for yourself. The layered effect is visually stunning, and the mini chocolate chip garnish adds the perfect finishing touch.
- Customizable: You can easily adjust the sweetness, add different flavors to the pudding layer (like a dash of peppermint extract), or use different types of cookies for the crust. The possibilities are endless!
- Kid-Friendly: This is a great recipe to make with kids. They can help crush the cookies, mix the pudding, and assemble the layers. It’s a fun and engaging activity that results in a delicious treat.
- Perfect Portion Size: Each cupcake is perfectly portioned, making it easy to control your indulgence and enjoy a satisfying dessert without overdoing it.
- Make Ahead: The cupcakes can be made a day or two in advance, making them a convenient option for busy schedules. Just be sure to store them properly in the refrigerator.
- A new twist on a classic: Everyone loves chocolate lasagna, now everyone can have their own!
Introduction:
Chocolate Lasagna is a beloved dessert, known for its indulgent layers of chocolatey goodness. This recipe transforms the classic into individual cupcakes, making them perfect for parties, potlucks, or a simple weeknight treat. The combination of a crunchy Oreo crust, a creamy cream cheese filling, a rich chocolate pudding layer, and a light whipped topping is simply irresistible.
These Chocolate Lasagna Cupcakes are surprisingly easy to make. The Oreo crust is quickly baked to set, while the rest of the cupcake is assembled without any further baking. This makes it a great recipe for warm weather or when you’re looking for a no-fuss dessert. The layering effect creates a visually appealing treat that is sure to impress.
The cupcakes are also highly customizable. You can experiment with different types of cookies for the crust, add extracts to the cream cheese or pudding layers, or use different toppings to personalize your cupcakes. This recipe is a great starting point for your own creative dessert adventures.
Whether you’re a seasoned baker or a beginner, these Chocolate Lasagna Cupcakes are a guaranteed crowd-pleaser. They are a fun, easy, and delicious way to satisfy your sweet tooth and impress your friends and family. So, gather your ingredients and get ready to create these delightful layered cupcakes!
Ingredients:
- 24 Oreo cookies, crushed (about 2 cups of crumbs)
- 4 tablespoons (1/2 stick) unsalted butter, melted
- 8 ounces cream cheese, softened to room temperature
- 1/4 cup granulated sugar
- 1 tablespoon milk
- 1 teaspoon vanilla extract
- 1 1/2 cups whipped topping (such as Cool Whip), divided
- 1 package (3.9 ounces) instant chocolate pudding mix
- 1 3/4 cups cold milk (for pudding)
- 1/2 cup mini chocolate chips, for garnish (optional)
Preparation:
Step 1: Prepare the Oreo Crust
- Preheat your oven to 350°F (175°C). This helps the butter melt properly and set the crust.
- Line a 12-cup muffin tin with cupcake liners. Using liners makes it easy to remove the cupcakes and prevents them from sticking to the pan.
- In a medium bowl, combine the crushed Oreo cookies and melted butter. Mix well with a fork or spoon until the cookie crumbs are evenly coated with butter. The mixture should resemble wet sand. The butter acts as a binder, holding the cookie crumbs together to form the crust.
Step 2: Press the Crust into the Liners
- Spoon approximately 1 tablespoon of the Oreo crumb mixture into the bottom of each cupcake liner.
- Use the back of a spoon or your fingers to firmly press the crumbs into an even layer in the bottom of the liner. This creates a compact and sturdy crust that will hold the fillings. Ensure the crust is evenly distributed in each liner for a consistent base.
Step 3: Bake the Crust
- Place the muffin tin in the preheated oven and bake for 5-7 minutes.
- Baking the crust helps to set the butter and create a firmer base that won’t crumble when you add the fillings.
- Remove from the oven and let the crust cool completely before adding the cream cheese filling. Cooling the crust prevents the cream cheese layer from melting.
Step 4: Prepare the Cream Cheese Filling
- In a large bowl, beat the softened cream cheese and granulated sugar together using an electric mixer (hand mixer or stand mixer) until smooth and creamy. Make sure the cream cheese is at room temperature for easy blending.
- Add the milk and vanilla extract to the cream cheese mixture and continue to beat until well combined. The milk adds moisture, while the vanilla enhances the flavor of the cream cheese filling. Scrape down the sides of the bowl as needed to ensure all ingredients are fully incorporated.
- Gently fold in 1 cup of the whipped topping into the cream cheese mixture. Be careful not to overmix, as this can deflate the whipped topping. Folding helps to maintain the light and airy texture of the whipped topping.
Step 5: Layer the Cream Cheese Filling
- Spoon the cream cheese filling over the cooled Oreo crusts in the cupcake liners, filling each liner about halfway.
- Spread the filling evenly over the crusts using the back of a spoon or a small spatula. The cream cheese layer should be smooth and consistent in each cupcake.
Step 6: Prepare the Chocolate Pudding
- In a separate bowl, whisk together the instant chocolate pudding mix and 1 3/4 cups of cold milk until the pudding thickens. Follow the instructions on the pudding package for the best results. Whisking ensures that the pudding mix is fully dissolved and prevents lumps from forming.
- The pudding should thicken within a few minutes. If it doesn’t thicken, ensure you’ve used cold milk and that the pudding mix is fresh.
Step 7: Layer the Chocolate Pudding
- Spoon the chocolate pudding layer over the cream cheese layer in each cupcake liner, filling the liners almost to the top.
- Spread the pudding evenly over the cream cheese layer using the back of a spoon or a small spatula. The pudding layer should be smooth and consistent in each cupcake.
Step 8: Top with Whipped Topping and Garnish
- Top each cupcake with a dollop of the remaining whipped topping (about 1/2 cup). Use a spoon or a piping bag to create a decorative swirl.
- Sprinkle the mini chocolate chips over the whipped topping for garnish. You can also use other toppings such as chocolate shavings, crushed Oreos, or sprinkles.
Step 9: Chill and Serve
- Refrigerate the cupcakes for at least 1-2 hours before serving. Chilling allows the layers to set and the flavors to meld together.
- The cupcakes can be stored in the refrigerator for up to 2-3 days.
COOKING Rating:
- Easy
Serving Suggestions:
- Serve chilled as a dessert for parties, potlucks, or a simple weeknight treat.
- Garnish with additional chocolate chips, chocolate shavings, or crushed Oreos.
- Serve with a scoop of vanilla ice cream or a dollop of whipped cream for an extra indulgent treat.
- Serve alongside fresh berries for a balanced flavor profile.
- Present them on a pretty platter or cupcake stand to elevate the presentation.
Tips:
- Make sure the cream cheese is at room temperature for easy blending.
- Don’t overmix the cream cheese filling after adding the whipped topping.
- Chill the cupcakes for at least 1-2 hours before serving to allow the layers to set.
- Use different types of cookies for the crust, such as chocolate chip cookies or graham crackers.
- Add a dash of peppermint extract or coffee extract to the cream cheese or pudding layers for a flavor variation.
- Top with different toppings such as chocolate shavings, crushed Oreos, or sprinkles.
Prep Time:
- 20 minutes
Cook Time:
- 5-7 minutes
Total Time:
- 2 hours 25 minutes (includes chilling time)
Nutritional Information:
Note: Nutritional information is an estimate and may vary depending on specific ingredients and portion sizes.
- Calories: Approximately 350-400 calories per cupcake
- Protein: Approximately 5-7 grams per cupcake
- Sodium: Approximately 200-250 mg per cupcake
Conclusion
These Chocolate Lasagna Cupcakes are a fun and easy twist on a classic dessert. The combination of a crunchy Oreo crust, a creamy cream cheese filling, a rich chocolate pudding layer, and a light whipped topping makes them a truly irresistible treat. They are perfect for parties, potlucks, or a simple weeknight indulgence.
The recipe is also highly customizable, allowing you to experiment with different flavors and toppings to create your own unique version. Whether you’re a seasoned baker or a beginner, these cupcakes are sure to impress. So, gather your ingredients and get ready to create these delightful layered cupcakes!
Questions and Answers about this Recipe:
- Can I make these cupcakes ahead of time?
- Absolutely! In fact, making them a day or two in advance can actually enhance the flavors as the layers have time to meld together. Just be sure to store them in an airtight container in the refrigerator to prevent them from drying out or absorbing any off-flavors from the fridge.
- Can I use a different type of cookie for the crust?
- Yes, you can definitely experiment with different types of cookies for the crust! Graham crackers, chocolate chip cookies, or even peanut butter cookies would all be delicious alternatives. Just be sure to adjust the amount of butter accordingly, as some cookies may absorb more or less butter than Oreos. The texture and flavor of the crust will change, but it can be a fun way to customize the cupcakes to your preferences.
- Can I use regular pudding instead of instant pudding?
- While you can technically use regular pudding, it’s important to note that the texture and setting time will be different. Regular pudding typically requires cooking and takes longer to set, which can affect the overall consistency of the cupcakes. Additionally, regular pudding may not hold its shape as well as instant pudding, which could result in a less defined layer. If you choose to use regular pudding, be sure to allow it to cool completely before adding it to the cupcakes to prevent the other layers from melting.
- What can I use if I don’t have whipped topping?
- If you don’t have whipped topping on hand, you can make your own by whipping heavy cream with a little powdered sugar and vanilla extract until stiff peaks form. This will give you a light and airy whipped cream that is similar to Cool Whip. Alternatively, you could use marshmallow fluff or even a homemade buttercream frosting as a substitute. Keep in mind that these substitutions will alter the flavor and texture of the cupcakes slightly.
- How do I prevent the Oreo crust from being too hard?
- To prevent the Oreo crust from becoming too hard, be sure to use the correct amount of melted butter and avoid over-baking it. Baking the crust for just 5-7 minutes will help to set the butter without making the cookies too crispy. Also, allowing the crust to cool completely before adding the cream cheese filling will help to prevent it from absorbing too much moisture and becoming hard. If you find that the crust is still too hard, you can add a tablespoon or two of milk to the cookie crumb mixture to make it more pliable.