Description of this recipe
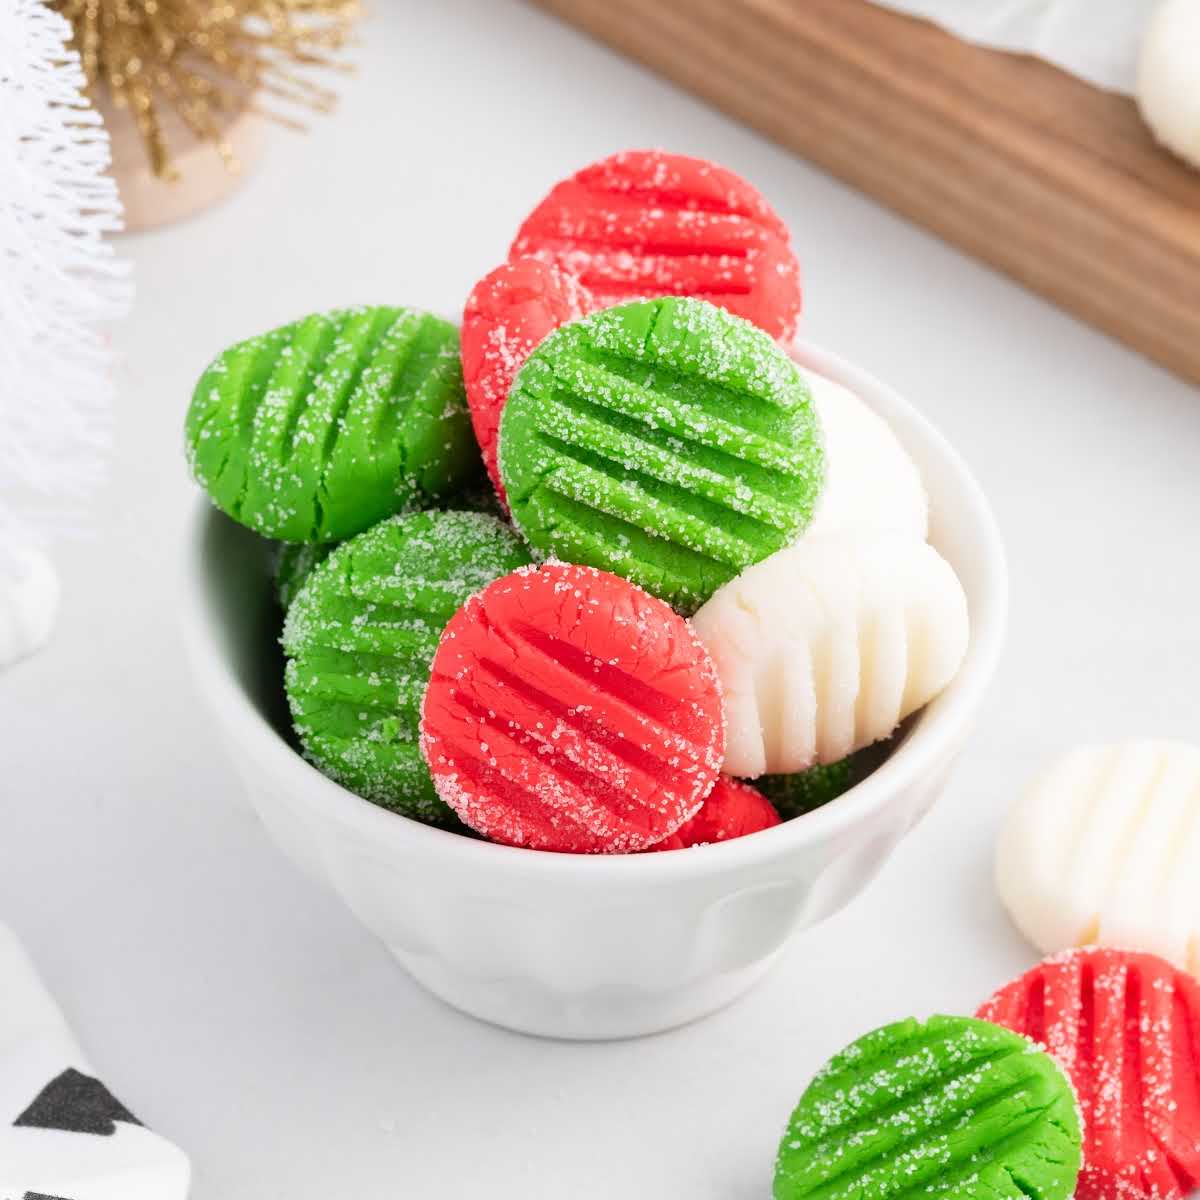
These Christmas Mints are a delightful, melt-in-your-mouth confection perfect for adding a touch of sweetness and festive cheer to your holiday gatherings. These colorful, peppermint-flavored treats are incredibly easy to make and require no baking, making them an ideal activity to enjoy with family and friends during the busy holiday season. With their vibrant red, green, and white hues, these mints are not only delicious but also visually appealing, adding a pop of color to any dessert table or gift platter.
Why you will love this recipe
You’ll absolutely adore this Christmas Mints recipe for several reasons. First and foremost, it’s incredibly simple and straightforward, requiring minimal effort and ingredients. The no-bake aspect makes it a perfect choice for busy holiday schedules or for those who prefer not to spend hours in the kitchen. The recipe is also highly customizable, allowing you to adjust the flavors and colors to suit your preferences and create unique variations. These mints are a fantastic way to get creative in the kitchen and add a personal touch to your holiday treats. Furthermore, the delightful peppermint flavor and creamy texture make them an irresistible treat for both kids and adults. These mints are a guaranteed crowd-pleaser, perfect for sharing with loved ones or gifting to friends and neighbors.
Ingredients:
- ⅓ cup granulated sugar
- 4 ounces cream cheese, room temperature
- 2 tablespoons unsalted butter, room temperature
- 2 tablespoons light/clear corn syrup, I used Karo brand
- 1 teaspoon peppermint extract
- 4¼ to 5 cups powdered sugar, divided
- 6 drops green liquid food coloring
- 6 drops red liquid food coloring
Preparation:
Step 1: Prepare your workspace by lining a large rimmed baking tray with parchment paper. This will prevent the mints from sticking and make cleanup a breeze. Place the granulated sugar into a small bowl and set it aside. This will be used for coating the mints later.
Step 2: In a large mixing bowl, using a handheld mixer on low speed, combine the cream cheese, unsalted butter, light corn syrup, and peppermint extract. Beat the ingredients together for about 1 minute, or until the mixture is smooth and well combined. Make sure the cream cheese and butter are at room temperature to ensure a smooth and creamy texture.
Step 3: Gradually add 4¼ cups of powdered sugar to the bowl, adding it ½ cup at a time while mixing on low speed. As you incorporate the powdered sugar, the dough will become increasingly thick. Once it becomes difficult to mix with the handheld mixer, switch to a spatula or wooden spoon and finish mixing the dough by hand. This will prevent overmixing and ensure a tender texture.
Step 4: Lay out a piece of parchment paper onto a clean counter and sprinkle ¼ cup of the remaining powdered sugar onto the parchment paper. Turn the dough out onto the prepared parchment paper. This will prevent the dough from sticking to the counter and make it easier to handle.
Step 5: Divide the dough into three equal parts. Create a shallow well in the center of two of the dough balls. Add the red food coloring to the first dough ball and the green food coloring to the second dough ball. The third dough ball will remain white.
Step 6: Carefully knead the red dough ball to evenly distribute the food coloring. You may need to add up to an additional ¼ cup of powdered sugar as you knead because the liquid food coloring will make the dough sticky. Repeat this process with the green dough ball. You may need to knead your white dough just a little with a tablespoon or two of additional powdered sugar. The amount of extra powdered sugar you need for kneading depends on how wet or sticky your dough is. If the temperature is very warm, you may need more, or if very cold, you may need less. Add the powdered sugar gradually, as you can always add more but you can’t take it away.
Step 7: Once all your Christmas peppermint patty dough balls have been colored and kneaded, roll each dough ball into a rope about 18 inches long and approximately 1 inch thick.
Step 8: Make ½-inch slices, starting at one end, until you have cut the entire rope into ½-inch pieces. Repeat this process with the remaining dough ropes.
Step 9: Roll all the pieces of peppermint dough in the palm of your hand to make little balls. Set them aside.
Step 10: Drop 2 to 3 dough balls into the small bowl of granulated sugar and toss to coat. Place them onto the prepared baking tray. Repeat this process until all the dough balls are coated and on the baking tray.
Step 11: Using the tip of a fork, lightly press the Christmas peppermint patties into little discs. The tines of the fork will leave a pretty striped pattern on the tops of each peppermint patty.
Step 12: Allow the Christmas peppermint patties to sit out at room temperature, on the tray, for up to 24 hours before you place them onto a platter to serve. This allows them to dry and set up, resulting in a firmer texture and preventing them from sticking together.
COOKING Rating:
Easy
Serving Suggestions:
- Serve these Christmas Mints on a festive platter as part of your holiday dessert spread.
- Package them in decorative tins or bags to give as gifts to friends, family, and neighbors.
- Place them in small bowls around your home for guests to enjoy throughout the holiday season.
- Use them as edible decorations for cakes, cupcakes, and other desserts.
- Pair them with a cup of hot cocoa or tea for a cozy and comforting treat.
Tips:
- Use high-quality peppermint extract for the best flavor.
- If the dough becomes too sticky, add a little more powdered sugar, one tablespoon at a time, until it reaches the desired consistency.
- If the dough is too dry, add a tiny amount of corn syrup, a teaspoon at a time.
- Store the mints in an airtight container at room temperature to maintain their freshness.
- For a more intense peppermint flavor, add a few drops of peppermint oil to the dough along with the extract.
- Experiment with different food colorings to create unique and festive color combinations.
- Add a sprinkle of edible glitter to the mints for extra sparkle and visual appeal.
- You can use cookie cutters to create different shapes instead of rolling the dough into balls.
Prep Time:
20 minutes
Cook Time:
0 minutes (no baking required)
Total Time:
20 minutes (plus 24 hours for drying)
Nutritional Information:
Note: Nutritional information is an estimate and can vary depending on specific ingredients and portion sizes.
Calories:
Approximately 30-40 calories per mint
Protein:
Less than 1 gram per mint
Sodium:
Varies depending on ingredients
Conclusion
Christmas Mints are a delightful and festive treat that’s sure to bring joy to your holiday celebrations. With their easy preparation, customizable flavors, and vibrant colors, they’re a perfect addition to any dessert table or gift basket. Whether you’re baking with family, sharing with friends, or simply indulging in a sweet treat, these mints are a guaranteed crowd-pleaser. So, gather your ingredients, put on some holiday music, and get ready to create these magical Christmas Mints that will add a touch of sweetness and sparkle to your holiday season.
Questions and Answers:
Q1: Can I use a different type of extract instead of peppermint?
A: Absolutely! While peppermint is the traditional flavor for Christmas Mints, you can certainly experiment with other extracts to create unique variations. Vanilla extract, almond extract, or even citrus extracts like lemon or orange would all be delicious options. Just be sure to adjust the amount of extract to your taste preference, as some extracts are stronger than others.
Q2: What if my dough is too sticky, even after adding more powdered sugar?
A: If your dough remains stubbornly sticky despite adding extra powdered sugar, try chilling it in the refrigerator for about 15-20 minutes. This will help firm up the dough and make it easier to handle. You can also lightly dust your hands and your work surface with powdered sugar to prevent sticking. Remember to add powdered sugar gradually, as you can always add more, but you can’t take it away.
Q3: How long will these Christmas Mints last?
A: Christmas Mints will generally last for up to 2 weeks if stored in an airtight container at room temperature. The key is to ensure they are properly dried and set before storing them to prevent them from becoming sticky or soft. Avoid storing them in the refrigerator, as this can cause them to become overly hard.
Q4: Can I freeze these mints for longer storage?
A: While it’s not ideal, you can freeze these mints for longer storage if necessary. To do so, arrange the dried and set mints in a single layer on a baking sheet and freeze them for about 1-2 hours until solid. Then, transfer them to an airtight freezer-safe container and store them in the freezer for up to 2-3 months. When you’re ready to enjoy them, thaw them in the refrigerator overnight or at room temperature for a few hours. Keep in mind that freezing may slightly alter the texture of the mints, making them a bit more crumbly.
Q5: Can I make these mints without food coloring?
A: Yes, absolutely! If you prefer to avoid using artificial food coloring, you can leave the dough uncolored, resulting in all white mints. Alternatively, you can use natural food colorings derived from fruits, vegetables, or spices. For example, beet juice can be used to create a pink or red hue, spinach juice can be used for green, and turmeric powder can be used for yellow. Just be aware that natural food colorings may not be as vibrant as artificial ones, and they may slightly alter the flavor of the mints.