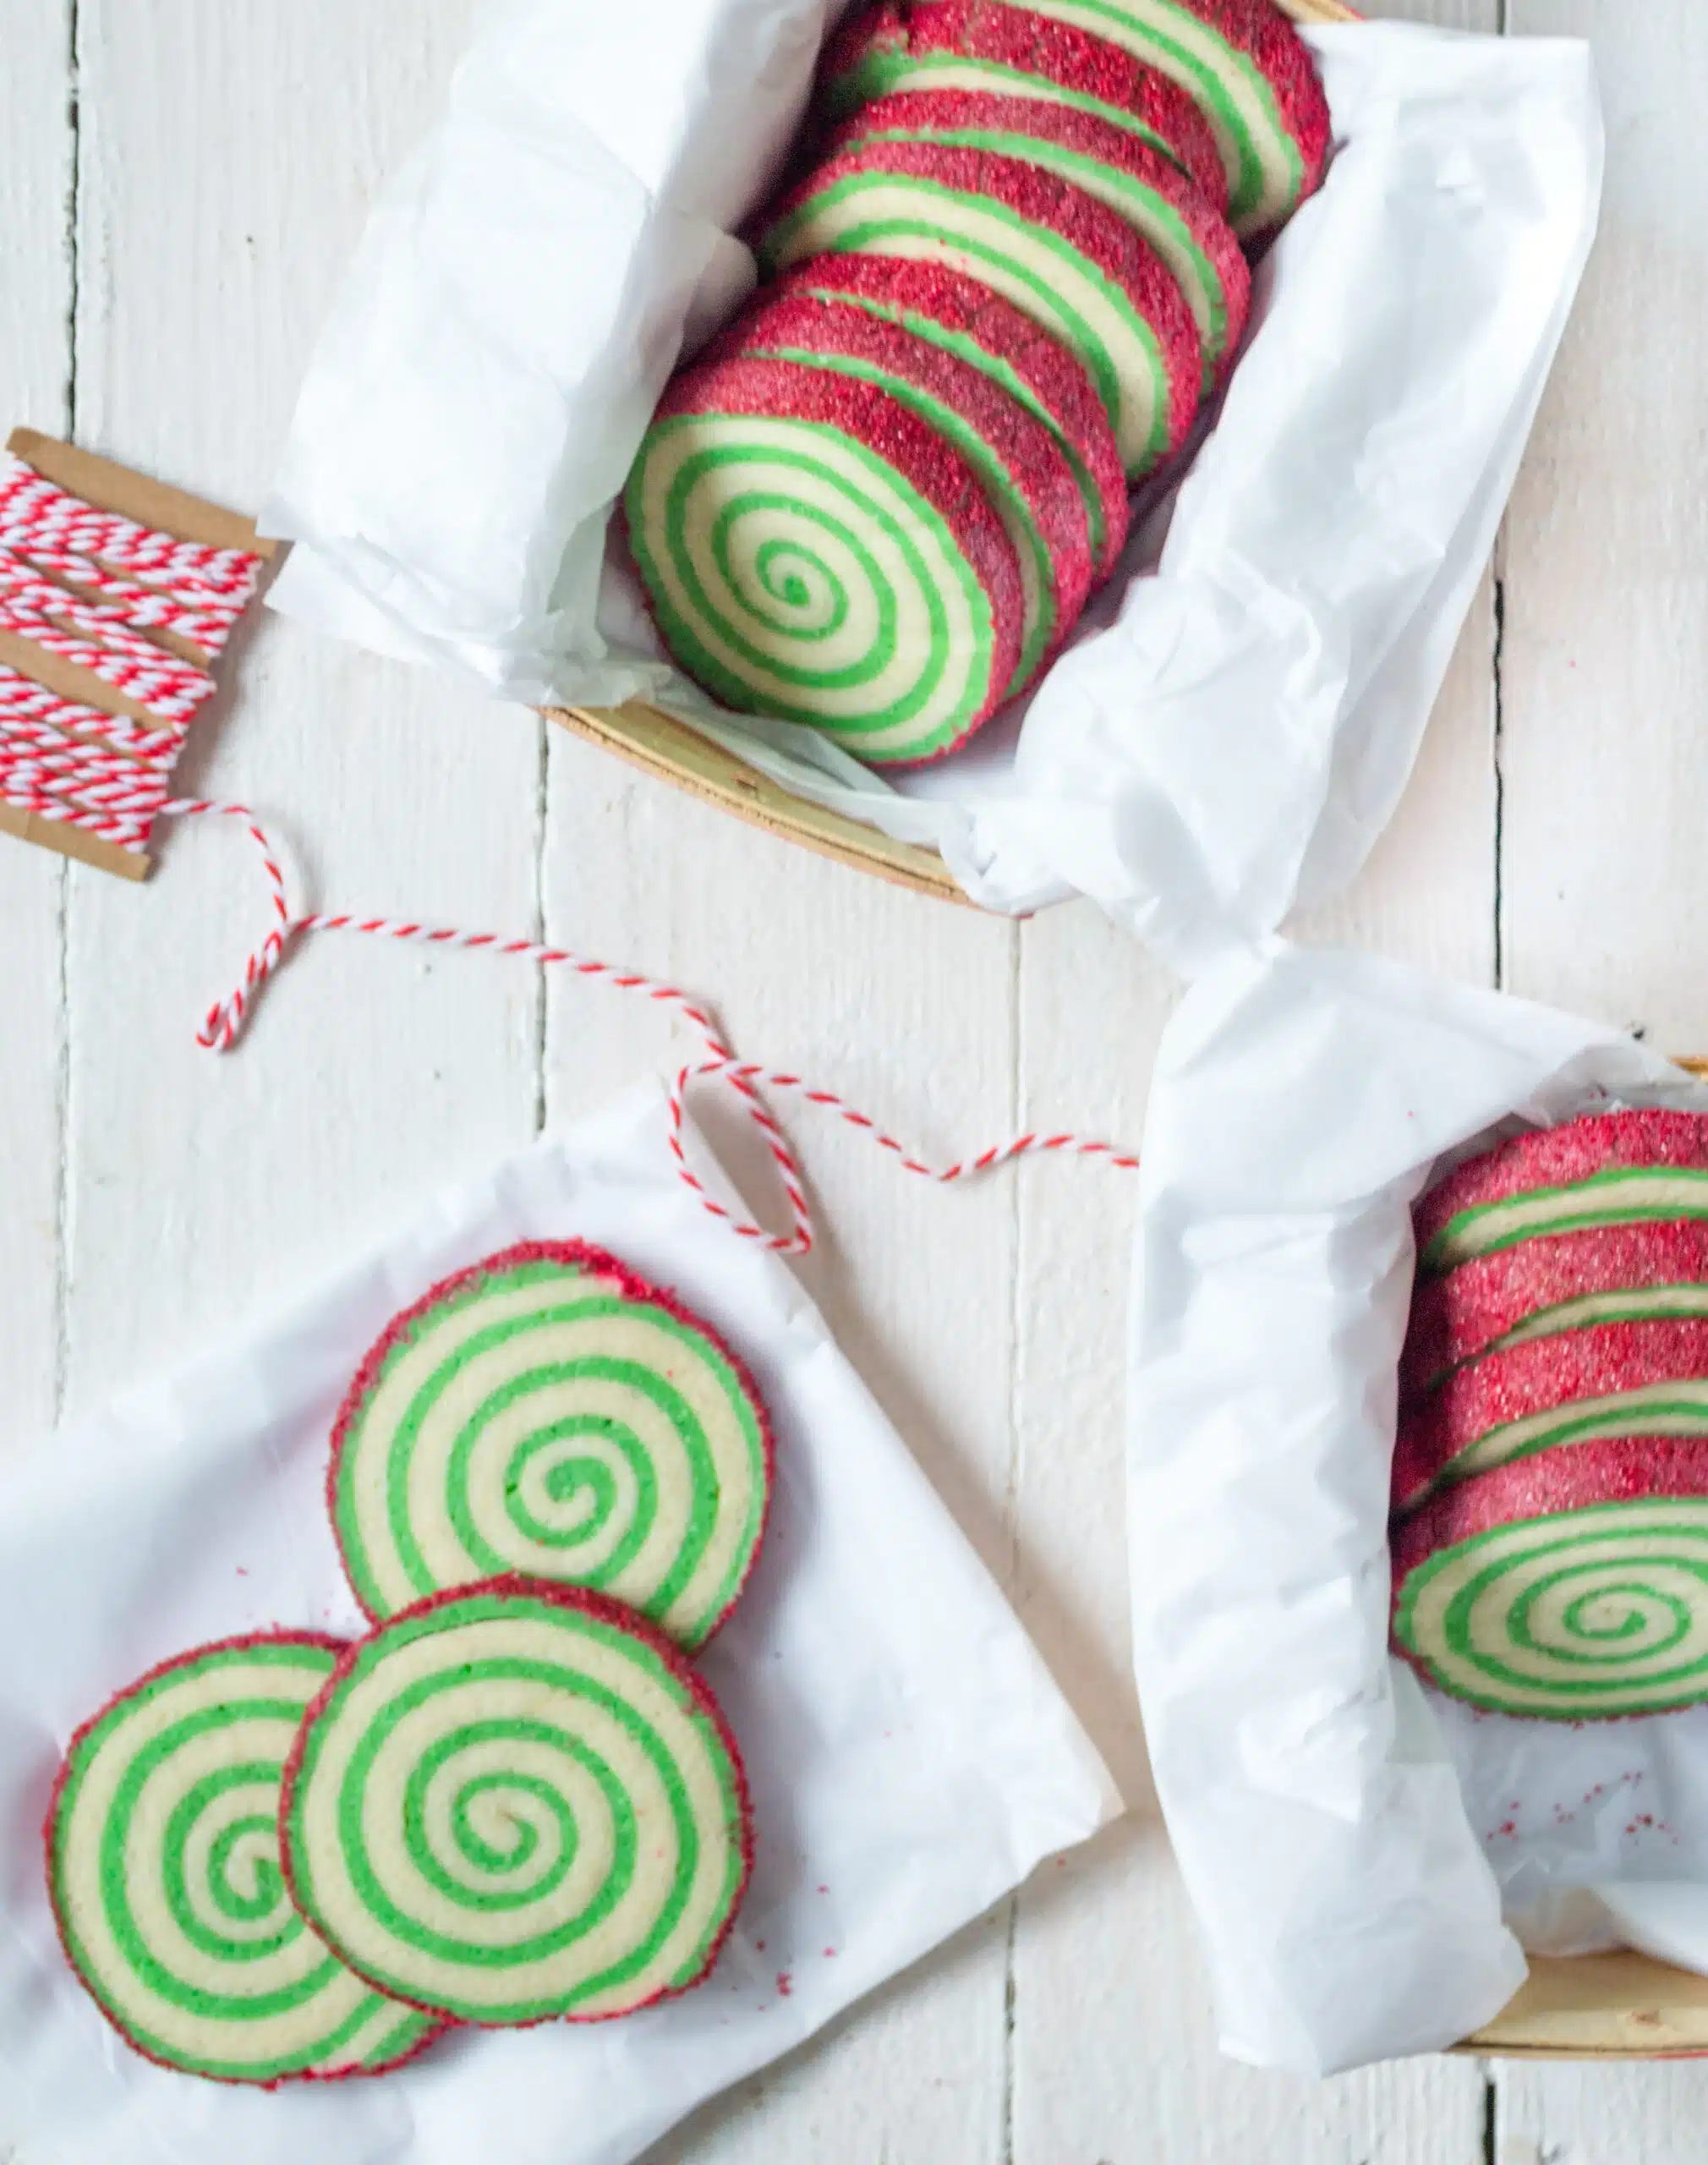
These Christmas Pinwheel Cookies are not just cookies; they’re edible holiday cheer! Swirls of vibrant green and classic vanilla dough create a festive treat that’s as beautiful to look at as it is delicious to eat. Adorned with sparkling red sanding sugar, these cookies are guaranteed to brighten any holiday gathering or cookie exchange. Their delightful appearance and buttery flavor make them a must-have for your Christmas baking repertoire.
Why You Will Love This Recipe
These pinwheel cookies are a perfect blend of simplicity and elegance. The dough is easy to work with, allowing you to create impressive-looking cookies without requiring advanced baking skills. The combination of buttery, vanilla-flavored dough with a hint of vibrant green adds a festive touch that captures the spirit of the holiday season. Kids and adults alike will be mesmerized by the swirling patterns, and the satisfying crunch from the sanding sugar adds a delightful textural element. Plus, these cookies hold their shape beautifully, making them ideal for gifting or displaying on a holiday dessert platter.
Ingredients:
- 2 ½ cups all-purpose flour
- ½ teaspoon baking powder
- ½ cup (1 stick) salted butter, at room temperature
- 1 cup granulated sugar
- 2 large eggs
- 2 teaspoons vanilla extract
- 4 drops Leaf Green food coloring paste (such as Americolor)
- Red sanding sugar
Preparation:
Step 1: Prepare the Dry Ingredients In a medium bowl, whisk together the all-purpose flour and baking powder. This ensures that the baking powder is evenly distributed throughout the flour, which will help the cookies rise properly. Set aside this mixture.
Step 2: Cream Butter and Sugar In the bowl of a stand mixer fitted with the paddle attachment (or using a hand mixer), beat the softened butter and granulated sugar at medium speed until the mixture is light and creamy. This process, known as creaming, incorporates air into the butter, which is essential for creating a tender cookie. Scrape down the sides of the bowl as needed to ensure everything is evenly mixed.
Step 3: Incorporate Eggs and Vanilla Add the eggs one at a time to the butter-sugar mixture, beating until the yellow disappears after each addition. This step is crucial for emulsifying the fats and liquids, creating a smooth and cohesive dough. Mix in the vanilla extract, which enhances the overall flavor of the cookies, adding a warm and comforting note.
Step 4: Combine Wet and Dry Ingredients Gradually add the flour mixture to the wet ingredients, beating until just well combined. Be careful not to overmix the dough, as this can develop the gluten in the flour, resulting in tough cookies. Mix until the flour is fully incorporated but the dough is still tender.
Step 5: Divide and Color the Dough Divide the dough in half and place one half in a separate bowl. Add 4 drops of leaf green food coloring paste to one half of the dough, and beat until the color is evenly distributed. This step is what gives the cookies their vibrant green swirl. If you prefer a different color or want to create a multi-colored swirl, feel free to experiment with other food colorings.
Step 6: Roll Out the Dough On a lightly floured surface, roll the green dough into a 9×16-inch rectangle between two sheets of parchment paper. This prevents the dough from sticking to the surface and makes it easier to handle. Repeat the process with the plain dough, rolling it into another 9×16-inch rectangle. Place both dough sheets in the refrigerator and let them chill for 30 minutes. Chilling the dough makes it firmer and easier to roll and shape.
Step 7: Assemble the Pinwheel Unwrap the green dough and place it on a clean surface. Turn out the plain dough on top of the green dough, and trim the edges if necessary to ensure both sheets are aligned. Starting with one long end, roll the dough into a tight log. The tighter the roll, the more defined the pinwheel pattern will be.
Step 8: Chill the Log Wrap the log with plastic wrap or parchment paper and refrigerate for 2 hours. This chilling period is essential for firming up the dough, making it easier to slice and preventing the cookies from spreading too much during baking.
Step 9: Prepare for Baking Preheat the oven to 350°F (175°C). Pour the red sanding sugar into a rimmed baking sheet. Unwrap the dough and roll the cookie dough log in sanding sugar until the dough is completely covered. The sanding sugar not only adds a festive look but also provides a delightful crunch.
Step 10: Slice and Bake Trim off the ends of the log and cut the dough into ¼-inch-thick slices with a sharp knife. A sharp knife is crucial for creating clean slices and preventing the dough from becoming distorted.
Step 11: Bake the Cookies Place the cookies 1 inch apart on parchment paper-lined baking sheets. This allows for even baking and prevents the cookies from sticking to the baking sheet. Bake for 10 to 12 minutes, or until the cookies are set but not browned. Keep a close eye on them to prevent overbaking, as this can make them dry and brittle.
Step 12: Cool and Enjoy Let the cookies stand on the baking sheets for 2 minutes before transferring them to a wire rack to cool completely. This allows them to firm up and prevents them from breaking. Once cooled, the cookies are ready to be enjoyed!
COOKING Rating:
Easy
Serving Suggestions:
- Serve these cookies with a glass of cold milk or hot cocoa for a cozy holiday treat.
- Include them in a festive cookie box for gifting to friends, family, and neighbors.
- Arrange them on a dessert platter alongside other holiday favorites like gingerbread men and sugar cookies.
- Offer them as a sweet ending to a holiday dinner.
- Enjoy them as a delightful snack while decorating the Christmas tree or watching your favorite holiday movies.
Tips:
- Ensure your butter is at room temperature for easier creaming.
- Don’t overmix the dough to avoid tough cookies.
- Chill the dough thoroughly before rolling and slicing for best results.
- Use a sharp knife for clean, even slices.
- Keep a close eye on the cookies while baking to prevent browning.
- For a more intense green color, add a few extra drops of food coloring.
- Experiment with different sanding sugar colors for a unique look.
- If the dough becomes too soft while working with it, return it to the refrigerator for a few minutes to firm up.
- Store the baked cookies in an airtight container at room temperature for up to a week.
- Freeze the unbaked cookie dough log for up to two months. When ready to bake, thaw in the refrigerator overnight, then slice and bake as directed.
Prep Time: 30 minutes
Cook Time: 10-12 minutes
Total Time: 2 hours 45 minutes (includes chilling time)
Nutritional Information: (per cookie, approximate)
Calories: 120
Protein: 1g
Sodium: 30mg
Conclusion
Christmas Pinwheel Cookies are more than just a dessert; they’re a cherished tradition that brings joy and warmth to the holiday season. The combination of buttery flavor, festive colors, and delightful crunch makes these cookies a hit with everyone. Whether you’re baking them for a cookie exchange, a holiday party, or simply to enjoy at home with your loved ones, these pinwheel cookies are sure to become a beloved part of your Christmas celebrations. So, gather your ingredients, put on your favorite holiday music, and get ready to create some edible holiday magic!
Questions and Answers:
Q1: Can I use unsalted butter instead of salted butter? A: Yes, you can use unsalted butter. If you do, add a pinch of salt (about ¼ teaspoon) to the dry ingredients to balance the sweetness.
Q2: Can I make these cookies ahead of time? A: Absolutely! The dough log can be made several days in advance and stored in the refrigerator. You can also freeze the unbaked cookie dough log for up to two months. Just thaw it in the refrigerator overnight before slicing and baking.
Q3: What can I use if I don’t have sanding sugar? A: If you don’t have sanding sugar, you can use regular granulated sugar or decorative sprinkles. Keep in mind that granulated sugar will not provide the same sparkling effect as sanding sugar.
Q4: Can I use gel food coloring instead of food coloring paste? A: Yes, gel food coloring is a great alternative to food coloring paste. It’s more concentrated, so you’ll need less of it to achieve the desired color.
Q5: My cookies spread too much while baking. What did I do wrong? A: There are several reasons why your cookies might have spread too much. Make sure your butter wasn’t too soft, and that you chilled the dough thoroughly before baking. Also, ensure your oven is at the correct temperature and avoid overmixing the dough.