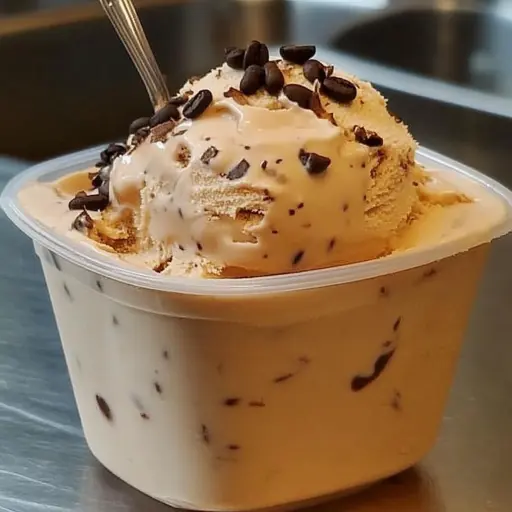
Description: Indulge in the rich and invigorating flavor of homemade coffee ice cream. This recipe delivers a smooth, creamy texture infused with the bold aroma of coffee, perfect for a refreshing treat on a warm day or a comforting dessert any time of year. It’s incredibly easy to make with just a few simple ingredients, and the result is far superior to store-bought versions. Get ready to experience coffee in a whole new, delicious way!
Ingredients:
- 350 ml Heavy Whipping Cream (at least 30% fat content)
- 3 tablespoons Instant Coffee Granules (adjust to taste for desired coffee intensity)
- 290 ml Sweetened Condensed Milk
- Optional: Chocolate shavings or chocolate syrup for decoration
Preparation:
Step 1: Chill the Essentials. Place your mixing bowl and whisk attachment (or beaters if using a hand mixer) in the freezer for at least 30 minutes before starting. This is crucial for achieving maximum volume when whipping the cream. A cold bowl and whisk will help the cream stiffen more quickly and easily. Also, ensure your heavy cream is well-chilled. Temperature plays a vital role in the success of this recipe.
Step 2: Whip the Cream and Coffee. Pour the chilled heavy whipping cream into the cold mixing bowl. Add the instant coffee granules. Begin whipping the mixture on medium speed, gradually increasing to high speed. Continue whipping until stiff peaks form. Stiff peaks mean that when you lift the whisk or beaters, the cream holds its shape and the peaks stand up straight without collapsing. This process usually takes about 5-8 minutes, depending on your mixer. Be careful not to overwhip, as this can turn the cream into butter.
Step 3: Incorporate the Sweetened Condensed Milk. Once the cream has reached stiff peaks, gently pour in the sweetened condensed milk. Use a spatula to carefully fold the condensed milk into the whipped cream mixture. Avoid overmixing, as this can deflate the cream and result in a less airy ice cream. Fold until the condensed milk is just evenly distributed throughout the cream.
Step 4: Transfer to Freezer Container. Pour the coffee ice cream mixture into a freezer-safe container. A metal loaf pan works well, or you can use a plastic container with a tight-fitting lid. Spread the mixture evenly in the container.
Step 5: Freeze for Optimal Texture. Cover the container tightly with a lid or plastic wrap, pressing the wrap directly onto the surface of the ice cream to prevent ice crystals from forming. Freeze for at least 6 hours, or preferably overnight, to allow the ice cream to fully set. The longer it freezes, the firmer it will become.
Why You Will Love This Recipe
This homemade coffee ice cream recipe is a guaranteed winner for several compelling reasons:
- Unparalleled Flavor: The deep, rich coffee flavor is far superior to many store-bought options. You can customize the intensity of the coffee taste by adjusting the amount of instant coffee used.
- Creamy Texture: The combination of heavy cream and sweetened condensed milk creates a luxuriously smooth and creamy texture that melts in your mouth.
- Easy to Make: With just a few simple ingredients and minimal effort, you can whip up a batch of delicious homemade ice cream in no time. No ice cream maker required!
- Customizable: You can easily add other flavors and toppings to personalize this recipe to your liking. Consider adding chocolate chips, chopped nuts, or a swirl of caramel sauce.
- Impressive Presentation: Serving homemade ice cream is always a crowd-pleaser. It’s a delightful dessert that is perfect for any occasion.
COOKING Rating: Easy
Serving Suggestions:
- Classic Scoop: Enjoy a scoop of coffee ice cream in a bowl or cone.
- Affogato: Pour a shot of hot espresso over a scoop of coffee ice cream for a classic Italian treat.
- Ice Cream Float: Combine coffee ice cream with cold brew coffee or your favorite soda for a refreshing float.
- Sundae: Create a decadent sundae with coffee ice cream, chocolate syrup, whipped cream, and your favorite toppings.
- Alongside Dessert: Serve a scoop of coffee ice cream with a slice of warm chocolate cake or brownies.
- Coffee Milkshake: Blend a scoop of coffee ice cream with milk and a splash of coffee extract for a delicious coffee milkshake.
Tips:
- Quality Ingredients Matter: Use high-quality heavy cream and instant coffee for the best flavor and texture.
- Adjust Coffee Intensity: Feel free to adjust the amount of instant coffee to suit your taste preferences. For a stronger coffee flavor, use more coffee granules.
- Prevent Ice Crystals: Press plastic wrap directly onto the surface of the ice cream before freezing to help prevent ice crystals from forming.
- Softening Before Serving: Let the ice cream sit at room temperature for a few minutes before scooping to make it easier to serve.
- Storage: Store the ice cream in an airtight container in the freezer for up to 2 weeks.
Prep Time: 15 minutes Cook Time: 0 minutes (freezing time is not considered cooking time) Total Time: 6 hours 15 minutes (including freezing time)
Nutritional Information: (per serving, approximate) Note: Nutritional information is an estimate and can vary based on specific ingredients and serving size.
- Calories: 350-450
- Protein: 5-7g
- Sodium: 50-80mg
Conclusion
This homemade coffee ice cream recipe offers a simple and rewarding way to create a decadent treat at home. With its rich coffee flavor and creamy texture, it’s sure to become a new favorite. The recipe is versatile and can be customized to suit your taste preferences. So, gather your ingredients, follow the steps, and get ready to enjoy a truly delightful coffee ice cream experience!
Questions and Answers about this Recipe:
Q1: Can I use regular coffee instead of instant coffee?
A: While technically you could try to use strongly brewed regular coffee, it’s not recommended for this particular recipe. Regular coffee contains a lot of water, which can lead to a less creamy and more icy texture in the final product. Instant coffee dissolves directly into the cream, providing a concentrated coffee flavor without adding excess liquid. If you absolutely must use regular coffee, try reducing the amount of heavy cream slightly to compensate for the added liquid. However, the best results will always be achieved with instant coffee. You can also use coffee extract.
Q2: What if I don’t have heavy cream? Can I use half-and-half or milk?
A: Unfortunately, using half-and-half or milk instead of heavy cream will significantly impact the texture of the ice cream. Heavy cream has a high fat content (at least 30%), which is essential for creating a creamy and stable ice cream. Half-and-half and milk have much lower fat contents, which will result in a watery and icy ice cream. For the best results, stick to using heavy whipping cream.
Q3: How can I prevent ice crystals from forming in my ice cream?
A: Ice crystal formation is a common issue with homemade ice cream. Here are a few tips to minimize ice crystals: * Use high-quality ingredients: As mentioned earlier, use heavy cream with a high fat content. * Chill everything: Make sure your mixing bowl, whisk, and heavy cream are well-chilled before starting. * Prevent Air Exposure: Press plastic wrap directly onto the surface of the ice cream before freezing to prevent air from coming into contact with the mixture. * Minimize Thawing and Refreezing: Avoid letting the ice cream thaw and then refreezing it, as this can encourage ice crystal formation. * Add a little alcohol: One tablespoon of vodka will help to prevent ice crystals from forming.
Q4: Can I add other flavors or ingredients to this coffee ice cream?
A: Absolutely! This recipe is a great base for adding other flavors and ingredients. Here are a few ideas: * Chocolate Chips: Add chocolate chips or chunks for a chocolate coffee ice cream. * Nuts: Mix in chopped walnuts, pecans, or almonds for added texture and flavor. * Caramel Swirl: Drizzle caramel sauce into the ice cream mixture before freezing for a caramel coffee ice cream. * Espresso Beans: Incorporate finely ground espresso beans for an even more intense coffee flavor. * Liqueur: Add a splash of coffee liqueur, such as Kahlua or Baileys, for an extra kick. * Cinnamon: Add a pinch of cinnamon for a warm and spicy twist.
Q5: How long will this ice cream last in the freezer?
A: Properly stored in an airtight container, homemade coffee ice cream can last for up to 2 weeks in the freezer. After that, the texture may start to deteriorate and ice crystals may begin to form. For the best quality, it’s best to consume the ice cream within the first week.