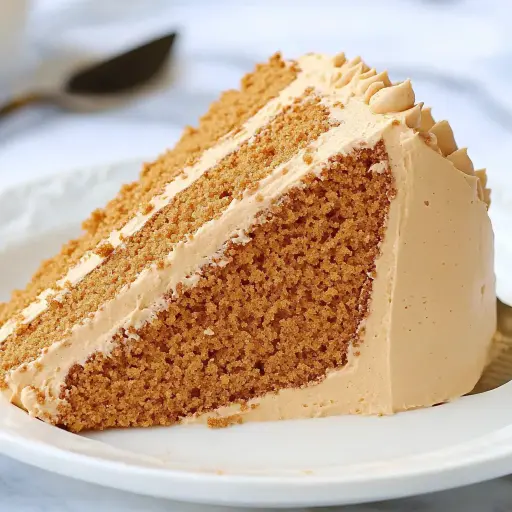
Description: A light and airy sponge cake infused with the rich flavor of coffee, topped with a luscious coffee buttercream frosting. Perfect for coffee lovers!
Ingredients:
For the Cake:
- All-purpose flour – 1½ cups (190g)
- Baking powder – 2 tsp
- Salt – ¼ tsp
- Instant coffee powder – 1 tbsp (dissolved in 2 tbsp hot water)
- Unsalted butter – ¾ cup (170g), softened
- Granulated sugar – 1 cup (200g)
- Eggs – 4 large
- Whole milk – ¼ cup (60ml)
- Vanilla extract – 1 tsp
For the Coffee Buttercream Frosting:
- Unsalted butter – 1 cup (225g), softened
- Powdered sugar – 3 cups (360g), sifted
- Instant coffee – 1 tbsp (dissolved in 1 tbsp hot water, cooled)
- Vanilla extract – 1 tsp
- Milk or cream – 1–2 tbsp (optional, for desired consistency)
Preparation:
Step 1: Preheat your oven to 180°C (350°F). This is a crucial step as it ensures the cake bakes evenly. Prepare two 8-inch (20cm) round cake pans by greasing them thoroughly with butter or cooking spray. Then, line the bottoms with parchment paper circles. This will prevent the cake from sticking and make it easy to remove once cooled. The parchment paper provides an extra layer of protection against burning and ensures a clean release.
Step 2: In a medium bowl, whisk together the all-purpose flour, baking powder, and salt. This step is essential for achieving a light and airy texture. Whisking ensures that the baking powder and salt are evenly distributed throughout the flour, which will help the cake rise properly and have a consistent flavor. Set this bowl aside; it will be added to the wet ingredients later.
Step 3: In a small bowl or cup, dissolve the instant coffee powder in 2 tablespoons of hot water. Stir until the coffee is completely dissolved, creating a strong coffee concentrate. This coffee concentrate will add a rich, coffee flavor to the cake. Set aside to cool slightly.
Step 4: In a separate, large mixing bowl, cream together the softened unsalted butter and granulated sugar until light and fluffy. This is a critical step for creating a tender and moist cake. Use an electric mixer, either a stand mixer or a hand mixer, to beat the butter and sugar together for at least 3-5 minutes. The mixture should become pale and fluffy as air is incorporated, which will lighten the texture of the cake.
Step 5: Add the eggs one at a time, beating well after each addition. Ensure that each egg is fully incorporated before adding the next. Beating well after each egg emulsifies the mixture, helping to create a smooth and stable batter. This prevents the batter from curdling and ensures a uniform texture in the final cake.
Step 6: Mix in the dissolved coffee and vanilla extract. The cooled coffee concentrate will impart a distinct coffee flavor, while the vanilla extract enhances the overall sweetness and aroma. Stir until these ingredients are evenly distributed throughout the batter.
Step 7: Gradually add the dry ingredients to the wet ingredients in two batches, alternating with the milk. Begin by adding about half of the flour mixture to the butter mixture and mix until just combined. Then, add all the milk and mix again. Finally, add the remaining flour mixture and mix until everything is just combined. Be careful not to overmix the batter, as this can develop the gluten in the flour and result in a tough cake. Mix until the flour streaks disappear, but no further.
Step 8: Divide the batter evenly between the prepared cake pans. Use a spatula to smooth the tops of the batter, ensuring an even layer in each pan. This will help the cakes bake evenly and prevent them from having a dome shape.
Step 9: Bake in the preheated oven for 22–25 minutes, or until a toothpick inserted into the center of the cake comes out clean. The baking time may vary depending on your oven, so start checking for doneness around 22 minutes. If the toothpick comes out with wet batter on it, continue baking for a few more minutes and check again.
Step 10: Let the cakes cool in the pans for 10 minutes before transferring them to a wire rack to cool completely. This allows the cakes to firm up slightly, making them easier to handle. After 10 minutes, carefully invert the cake pans onto a wire rack and peel off the parchment paper. Allow the cakes to cool completely before frosting, as the frosting will melt if applied to warm cakes.
Step 11: While the cakes are cooling, prepare the coffee buttercream frosting. In a large mixing bowl, beat the softened unsalted butter until creamy. This should take a few minutes, as the butter needs to be very soft to create a smooth frosting.
Step 12: Gradually add the sifted powdered sugar, mixing well after each addition. Sifting the powdered sugar helps to remove any lumps and ensures a smooth and creamy frosting. Add the powdered sugar in small increments to prevent it from flying all over.
Step 13: Add the dissolved coffee and vanilla extract to the frosting. Again, make sure the coffee is cooled before adding it to the frosting. Mix until smooth and fluffy. If the frosting is too thick, add milk or cream, one tablespoon at a time, until you reach the desired consistency.
Step 14: Once the cakes are completely cool, it’s time to assemble and frost the cake. Place one cake layer on a serving plate or cake stand. Spread a generous layer of coffee buttercream frosting on top of the first layer. Carefully place the second cake layer on top of the frosting.
Step 15: Frost the top and sides of the cake with the remaining coffee buttercream frosting. You can create a smooth finish with a spatula or use a piping bag and decorating tips to create decorative swirls or patterns.
Step 16: Optionally, decorate the cake with coffee beans, chocolate shavings, or a light dusting of cocoa powder. These decorations will enhance the coffee flavor and add a visually appealing touch to the cake.
Why you will love this recipe:
This Coffee Sponge Cake is a delightful treat that combines the light and airy texture of a sponge cake with the rich and aromatic flavor of coffee. The coffee buttercream frosting adds a layer of creamy sweetness that perfectly complements the cake. It’s a perfect dessert for coffee lovers and a wonderful addition to any occasion, whether it’s a simple afternoon tea or a special celebration. The cake is relatively easy to make, using simple ingredients and straightforward instructions. It’s also versatile, as you can customize the decorations to suit your personal preferences. The moist and tender texture of the cake, combined with the decadent frosting, makes every bite a truly satisfying experience.
Serving Suggestions:
- Serve slices of the Coffee Sponge Cake with a cup of hot coffee or tea. The warm beverage will complement the coffee flavor of the cake and enhance the overall experience.
- Pair the cake with a scoop of vanilla ice cream or a dollop of whipped cream. The creamy sweetness will provide a delightful contrast to the coffee flavor.
- Serve the cake as part of a dessert buffet or afternoon tea spread. It’s a versatile dessert that pairs well with other sweets and treats.
- Offer individual slices of the cake as a party favor for guests to take home. This is a thoughtful and delicious way to thank your guests for attending your event.
- For a more elegant presentation, garnish each slice of cake with a few coffee beans or chocolate shavings. This adds a touch of sophistication to the dessert.
Tips:
- Make sure your butter and eggs are at room temperature for a smoother batter. This helps the ingredients emulsify properly, resulting in a more tender cake.
- Don’t overmix the batter, as this can develop the gluten in the flour and make the cake tough. Mix until the flour streaks disappear, but no further.
- Use a serrated knife to slice the cake for clean, even slices. This will prevent the cake from crumbling and ensure a neat presentation.
- Store the cake in an airtight container in the refrigerator to keep it fresh. The cake will stay moist and flavorful for up to 3 days.
- For a more intense coffee flavor, add a teaspoon of espresso powder to the cake batter or frosting. This will give the cake a stronger coffee kick.
- If you don’t have parchment paper, you can grease and flour the cake pans instead. This will help prevent the cake from sticking and make it easier to remove.
- Experiment with different decorations, such as chopped nuts, caramel drizzle, or a sprinkle of cinnamon. This allows you to customize the cake to your personal preferences.
Prep Time: 30 minutes
Cook Time: 22-25 minutes
Total Time: Approximately 2 hours (including cooling and frosting)
Nutritional Information: (Per serving, approximate)
- Calories: 450
- Protein: 5g
- Sodium: 200mg
Conclusion:
The Coffee Sponge Cake is a delightful treat that’s perfect for coffee lovers and anyone who enjoys a light and flavorful dessert. The combination of the tender sponge cake and the creamy coffee buttercream frosting is simply irresistible. Whether you’re serving it at a party or enjoying it with a cup of coffee on a quiet afternoon, this cake is sure to be a hit. With its simple ingredients and easy-to-follow instructions, it’s a recipe that anyone can master. So, gather your ingredients, preheat your oven, and get ready to bake a cake that will impress your friends and family. Enjoy the process and savor every bite of this delicious Coffee Sponge Cake!
Questions and Answers:
- Can I use decaf coffee in this recipe?
- Yes, you can definitely use decaf coffee in this recipe if you prefer. The taste will be similar to use regular coffee
- Can I make this cake ahead of time?
- Yes, you can bake the cake layers a day in advance. Wrap them tightly in plastic wrap and store them at room temperature. Prepare the frosting on the day you plan to assemble the cake.
- Can I freeze this cake?
- Yes, you can freeze the cake, either frosted or unfrosted. Wrap it tightly in plastic wrap and then in aluminum foil. Freeze for up to 2 months. Thaw overnight in the refrigerator before serving.
- What can I use instead of coffee?
- if you want to replace coffee, you can replace it with chocolate or mocha, the important is that you replace it with something that has a solid flavor.
- Can I use different size pans?
- Yes, but keep in mind that changing the size of the baking pans will affect the baking time. If you use smaller pans, the cakes will bake faster, and if you use larger pans, they will bake slower. Adjust the baking time accordingly, checking for doneness with a toothpick.