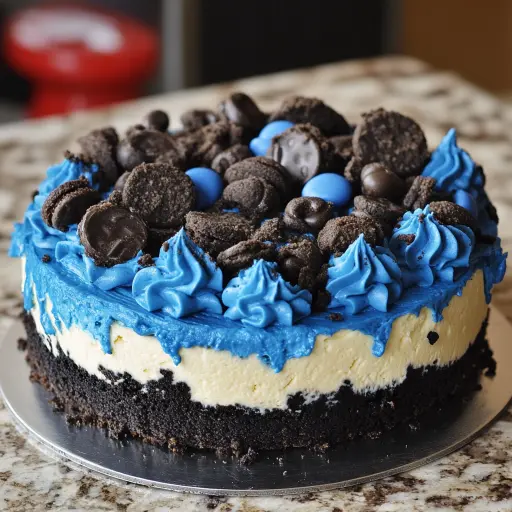
Description: Indulge in a whimsical and delightful dessert that captures the essence of everyone’s favorite cookie-loving monster! This Cookie Monster Cheesecake features a rich Oreo crust, a creamy, vibrant blue cheesecake filling studded with chopped cookies and Oreos, and a generous topping of even more miniature cookies and chocolate chips. It’s a fun, decadent treat that’s perfect for birthdays, celebrations, or any occasion that calls for a touch of playful sweetness.
Ingredients:
- 24 Oreo cookies, crushed into fine crumbs
- 5 tablespoons unsalted butter, melted
- 16 ounces cream cheese, softened to room temperature
- 1 cup granulated sugar
- 2 teaspoons vanilla extract
- 2 cups heavy whipping cream, chilled
- 1 packet (0.25 ounce) unflavored gelatin
- 1/4 cup cold water
- Blue gel food coloring (adjust to desired intensity)
- 1 1/2 cups mini chocolate chip cookies, roughly chopped
- 1 1/2 cups mini Oreos, roughly chopped
- Additional mini cookies, mini Oreos, and chocolate chips for topping (optional, but highly recommended!)
Preparation:
Step 1: Prepare the Oreo Crust: Begin by thoroughly crushing the Oreo cookies. You can use a food processor for a fine crumb, or place them in a zip-top bag and crush them with a rolling pin for a slightly coarser texture. In a medium-sized bowl, combine the crushed Oreo crumbs with the melted unsalted butter. Mix well until the crumbs are evenly moistened and resemble wet sand.
Step 2: Press the Crust into the Pan: Transfer the Oreo crumb mixture to a 9-inch springform pan. Press the crumbs firmly and evenly into the bottom of the pan to create a solid, compact crust. You can use the bottom of a measuring cup or a flat-bottomed glass to help create an even surface. Once the crust is pressed, place the springform pan in the refrigerator to chill while you prepare the cheesecake filling. This will help the crust set and prevent it from crumbling when you add the filling.
Step 3: Soften Gelatin: In a small bowl, sprinkle the unflavored gelatin over the cold water. Let it sit undisturbed for about 5 minutes. This process, known as “blooming,” allows the gelatin granules to absorb the water and soften, which is essential for properly dissolving it and ensuring the cheesecake sets correctly. After 5 minutes, microwave the gelatin mixture for about 10 seconds, or until the gelatin is completely dissolved. Stir to ensure there are no clumps. Set aside to cool slightly.
Step 4: Prepare the Cheesecake Filling: In a large mixing bowl, beat the softened cream cheese with the granulated sugar until smooth and creamy. Use an electric mixer (stand mixer or hand mixer) for best results. Make sure the cream cheese is truly softened to avoid lumps in the finished cheesecake. Add the vanilla extract and continue to beat until well combined.
Step 5: Incorporate Gelatin and Color: Gradually pour the slightly cooled, dissolved gelatin into the cream cheese mixture while continuing to beat on low speed. Mix until the gelatin is evenly incorporated. Add the blue gel food coloring, starting with a small amount (a few drops) and gradually adding more until you reach your desired Cookie Monster blue hue. Remember that the color will intensify slightly as the cheesecake sets, so err on the side of caution and add color gradually.
Step 6: Whip the Heavy Cream: In a separate clean and chilled bowl, whip the heavy whipping cream using an electric mixer until stiff peaks form. Be careful not to overwhip, as this can turn the cream into butter. Stiff peaks mean the cream holds its shape when the beaters are lifted.
Step 7: Fold in the Cream and Cookies: Gently fold the whipped cream into the cream cheese mixture, working in batches to avoid deflating the cream. Use a spatula and a light hand to combine the mixtures until they are just incorporated. Avoid overmixing. Now, gently fold in the chopped mini chocolate chip cookies and chopped mini Oreos. Distribute them evenly throughout the cheesecake filling.
Step 8: Assemble and Chill: Pour the cheesecake filling over the prepared Oreo crust in the springform pan. Smooth the top with a spatula or the back of a spoon to create an even surface. Cover the springform pan tightly with plastic wrap and refrigerate for at least 6 hours, or preferably overnight, to allow the cheesecake to set completely.
Step 9: Garnish and Serve: Once the cheesecake is fully set, carefully remove it from the springform pan. You can run a thin knife or spatula around the edge of the pan to loosen the cheesecake before releasing the sides. Transfer the cheesecake to a serving plate. Before serving, decorate the top with additional mini cookies, mini Oreos, and chocolate chips. Get creative with your decorations to create a fun and festive Cookie Monster theme!
Why You Will Love This Recipe:
This Cookie Monster Cheesecake is more than just a dessert; it’s an experience! Here’s why you’ll fall in love with it:
- Nostalgic Charm: It’s a playful homage to the beloved Cookie Monster, bringing back childhood memories and creating a sense of fun and whimsy.
- Irresistible Flavor Combination: The combination of the rich Oreo crust, the creamy, slightly tangy cheesecake filling, and the bursts of chocolate chip cookies and Oreos is simply irresistible. It’s a symphony of textures and flavors that will satisfy any sweet tooth.
- Visually Stunning: The vibrant blue color, reminiscent of the Cookie Monster’s fur, makes this cheesecake a showstopper. It’s a guaranteed conversation starter and a delightful centerpiece for any gathering.
- Surprisingly Easy: While it looks impressive, this cheesecake is relatively easy to make. The steps are straightforward, and the recipe is forgiving.
- Perfect for Any Occasion: Whether it’s a birthday party, a holiday celebration, or just a fun weekend treat, this Cookie Monster Cheesecake is the perfect dessert to brighten up any occasion.
COOKING Rating: Intermediate
Serving Suggestions:
- Serve chilled, straight from the refrigerator.
- Cut into slices and serve with a dollop of whipped cream or a scoop of vanilla ice cream.
- Drizzle with chocolate sauce or caramel sauce for an extra layer of indulgence.
- Pair with a glass of cold milk or a cup of hot coffee.
- Garnish with fresh berries or a sprinkle of powdered sugar for an elegant touch.
Tips:
- Use Room Temperature Cream Cheese: Softened cream cheese is crucial for a smooth, lump-free cheesecake filling.
- Don’t Overmix: Overmixing the cheesecake filling can incorporate too much air, which can cause cracks during baking or a less dense texture.
- Use Gel Food Coloring: Gel food coloring provides a more concentrated color than liquid food coloring, so you’ll need less of it to achieve a vibrant blue hue.
- Chill Thoroughly: Chilling the cheesecake for at least 6 hours, or preferably overnight, is essential for allowing it to set properly.
- Line the Pan: For easy cheesecake removal, you can line the bottom of the springform pan with parchment paper. Simply cut a circle of parchment paper that fits the bottom of the pan and place it under the crust.
- For a deeper Oreo Flavor: Add 2 tablespoons of Oreo crumbs to the cheesecake mixture
Prep Time: 25 minutes
Cook Time: 10 seconds (for gelatin only)
Chilling Time: 6 hours minimum (preferably overnight)
Total Time: 6 hours 25 minutes (plus chilling time)
Nutritional Information: (Approximate, per slice)
- Calories: 480 kcal
- Protein: 6 g
- Sodium: 250 mg
Conclusion:
The Cookie Monster Cheesecake is a guaranteed crowd-pleaser that combines fun, flavor, and visual appeal. It’s a unique and memorable dessert that’s perfect for creating smiles and satisfying sweet cravings. So go ahead, unleash your inner Cookie Monster and bake up a batch of this delightful cheesecake! Your friends and family will thank you for it.
Frequently Asked Questions:
- Can I use a different type of cookie for the crust?
- Absolutely! While Oreos are classic for this recipe, you can experiment with other cookies like graham crackers, chocolate wafers, or even biscoff cookies. Just adjust the amount of melted butter as needed to achieve the right consistency for the crust.
- Can I make this cheesecake without gelatin?
- Yes, but the texture will be slightly different. Without gelatin, the cheesecake will be softer and less firm. You can try using a no-bake cheesecake recipe as a base and adapting it with the Cookie Monster elements. Look for recipes that use ingredients like condensed milk or lemon juice to help set the filling.
- How do I prevent the cheesecake from cracking?
- Preventing cracks in a cheesecake is a common concern. Here are a few tips:
- Don’t overmix the batter.
- Bake in a water bath: While this recipe is a no-bake recipe, If baking you can help keep the cheesecake moist and prevent cracking.
- Cool the cheesecake slowly: Don’t put the cheesecake in the freezer, instead, allow the cheesecake to cool at room temperature for about an hour, then refrigerate it.
- Preventing cracks in a cheesecake is a common concern. Here are a few tips:
- Can I freeze this cheesecake?
- Yes, you can freeze this cheesecake. Wrap it tightly in plastic wrap, then in foil, and freeze for up to 2 months. Thaw it in the refrigerator overnight before serving. The texture might be slightly altered after freezing, but it will still be delicious.
- Can I make this cheesecake ahead of time?
- Absolutely! In fact, it’s recommended. Making the cheesecake a day or two ahead of time allows the flavors to meld and the cheesecake to set completely. Just keep it refrigerated until you’re ready to serve.