Description: This Cool Whip and Pudding Frosting recipe is a simple, no-fuss way to add a touch of nostalgic sweetness to any cake or cupcake. It’s light, fluffy, and incredibly easy to make, reminiscent of Grandma’s classic desserts. With only three essential ingredients and minimal effort, this frosting is perfect for beginner bakers or anyone looking for a quick and delicious topping.
Ingredients:
- 1 package (3.4 oz) instant pudding mix (any flavor – vanilla, chocolate, butterscotch, or even cheesecake!)
- 2 cups milk (whole milk works best for richness, but 2% or even non-dairy alternatives can be used)
- 1 container (8 oz) Cool Whip, thawed (make sure it’s fully thawed for a smooth consistency)
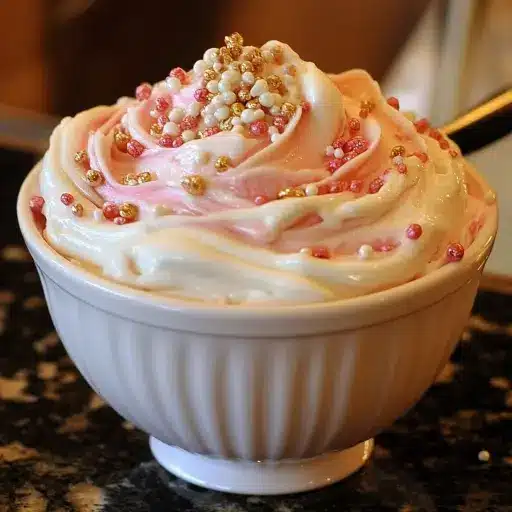
- Optional: Sprinkles or chocolate shavings for decoration (because everyone loves a little extra flair!)
Preparation:
Step 1: Selecting Your Ingredients – The Foundation of Flavor
The beauty of this frosting lies in its simplicity, but the quality of your ingredients can make a noticeable difference. Start by choosing an instant pudding mix that appeals to your taste. Vanilla is a classic choice, offering a blank canvas for other flavors to shine. Chocolate provides a rich, decadent base, while butterscotch brings a warm, caramel-like sweetness. For a tangier twist, consider cheesecake or lemon pudding mix. The possibilities are endless!
When it comes to milk, whole milk will yield the creamiest, most luxurious frosting due to its higher fat content. However, 2% milk is a perfectly acceptable substitute and will still provide a lovely texture. If you’re looking for a non-dairy option, almond milk or soy milk can be used, but be aware that they may slightly alter the flavor and consistency of the final product. Unsweetened varieties are recommended to prevent the frosting from becoming overly sweet.
Lastly, ensure that your Cool Whip is fully thawed before beginning. This is crucial for achieving a smooth, even texture. You can thaw it in the refrigerator for several hours or at room temperature for a shorter period. Just be sure to keep an eye on it to prevent it from melting completely.
Step 2: Mixing the Pudding – The Flavor Infusion
In a medium to large mixing bowl, combine the instant pudding mix and milk. The size of the bowl is important because the mixture will expand slightly as it thickens. Using a whisk, vigorously mix the pudding mix and milk together for approximately 2 minutes. This step is crucial for activating the thickening agents in the pudding mix and creating a smooth, lump-free base for your frosting.
Continue whisking until the mixture begins to thicken and develop a pudding-like consistency. You should notice that the mixture is no longer thin and watery but has a slight resistance when whisking. This indicates that the pudding mix has properly hydrated and is ready to be combined with the Cool Whip.
Step 3: Folding in the Cool Whip – The Fluffy Cloud
This is where the magic happens! Gently add the thawed Cool Whip to the thickened pudding mixture. The key here is to fold the Cool Whip into the pudding, rather than stirring it in. Folding involves using a spatula to carefully scoop the Cool Whip from the bottom of the bowl and gently bring it over the top of the pudding mixture, turning the bowl as you go.
This technique helps to incorporate the Cool Whip without deflating it, preserving its light and airy texture. Be careful not to overmix the frosting at this stage, as this can cause the Cool Whip to lose its volume and result in a denser, less fluffy frosting. Continue folding until the Cool Whip is evenly distributed throughout the pudding mixture and no streaks of white remain.
Step 4: Chilling the Frosting – The Setting Stage
Once the Cool Whip is fully incorporated, cover the bowl with plastic wrap, pressing it directly onto the surface of the frosting to prevent a skin from forming. This is particularly important if you plan to chill the frosting for an extended period. Place the bowl in the refrigerator for at least 30 minutes to allow the frosting to set and the flavors to meld together.
Chilling the frosting also helps to improve its consistency, making it easier to spread on your cake or cupcakes. For best results, chill the frosting for at least an hour, or even overnight. The longer it chills, the firmer and more stable it will become.
Step 5: Frosting Your Cake – The Final Flourish
After the frosting has chilled sufficiently, remove it from the refrigerator and give it a gentle stir to ensure that it is smooth and evenly textured. Now, it’s time to unleash your creativity and frost your favorite cake or cupcakes!
Using a spatula or icing knife, spread the frosting evenly over the top and sides of your cake or cupcakes. For a more decorative touch, you can use a piping bag fitted with a decorative tip to create swirls, rosettes, or other intricate designs.
Once the frosting is applied, add your desired decorations. Sprinkles are a classic choice, adding a pop of color and a playful texture. Chocolate shavings provide a more sophisticated touch, while chopped nuts or fresh berries can add a burst of flavor and visual appeal. Let your imagination run wild and create a masterpiece that is both beautiful and delicious!
Step 6: Serving and Enjoying – The Sweet Reward
Slice and serve your frosted cake or cupcakes, and enjoy the creamy, nostalgic flavor of this simple yet satisfying frosting. This Cool Whip and Pudding Frosting is perfect for birthdays, holidays, or any occasion that calls for a sweet treat. It’s also a great way to introduce young children to the joys of baking, as it’s so easy to make and requires minimal supervision.
Why You Will Love This Recipe:
- Easy and Quick: This recipe is incredibly simple and can be made in minutes with minimal effort.
- Versatile: You can customize the flavor by using different pudding mix flavors to complement your cake.
- Light and Fluffy: Unlike heavy buttercream frostings, this Cool Whip frosting is light, airy, and not overly sweet.
- Nostalgic: It evokes a sense of childhood memories and classic homemade desserts.
- Budget-Friendly: The ingredients are readily available and inexpensive, making it a great option for budget-conscious bakers.
Serving Suggestions:
- Pair it with a classic vanilla cake, chocolate cake, or even a spice cake.
- Use it as a topping for cupcakes, brownies, or cookies.
- Serve it with fresh fruit for a light and refreshing dessert.
- Use it as a filling for crepes or waffles.
- Add a dollop to your favorite hot chocolate or coffee for a creamy, sweet treat.
Tips:
- Make sure your Cool Whip is fully thawed for a smooth, lump-free frosting.
- Don’t overmix the frosting, as this can deflate the Cool Whip and make it less fluffy.
- Chill the frosting for at least 30 minutes to allow it to set and the flavors to meld.
- Use different pudding flavors to create unique frosting combinations.
- For a more intense flavor, add a teaspoon of extract (such as vanilla, almond, or peppermint) to the pudding mixture.
- If you want to make the frosting ahead of time, store it in an airtight container in the refrigerator for up to 3 days.
- For a dairy-free option, use non-dairy milk and a non-dairy whipped topping alternative.
Prep Time: 5 minutes
Cook Time: 0 minutes
Total Time: 35 minutes (includes chilling time)
Nutritional Information (per serving, approximate):
- Calories: 150-200 (depending on pudding flavor and milk used)
- Protein: 2-3g
- Sodium: 150-200mg (depending on pudding flavor)
Conclusion:
This Cool Whip and Pudding Frosting is a timeless classic for a reason. It’s easy to make, versatile, and utterly delicious. Whether you’re a seasoned baker or just starting out, this recipe is sure to become a staple in your kitchen. So, grab your ingredients, gather your family, and create a sweet memory together with this “Just Like Grandma Used to Make” frosting. Enjoy!
Questions and Answers:
- Can I use sugar-free pudding mix to make this frosting healthier?
- Yes, you can absolutely use sugar-free pudding mix. This will significantly reduce the sugar content of the frosting without compromising the texture or flavor. Just be aware that some sugar-free pudding mixes may have a slightly different taste due to the artificial sweeteners used.
- My frosting is too thin. What can I do to thicken it?
- If your frosting is too thin, there are a few things you can try. First, make sure you are using the correct amount of milk specified in the recipe. If you’ve already done that, you can try chilling the frosting for a longer period of time. The longer it chills, the firmer it will become. You can also add a tablespoon of powdered sugar at a time, mixing well after each addition, until you reach your desired consistency. Be careful not to add too much, as this can make the frosting overly sweet.
- Can I freeze this frosting for later use?
- While you can freeze this frosting, it’s not recommended as the texture may change upon thawing. The Cool Whip can separate and become watery, resulting in a less desirable consistency. For best results, make the frosting fresh when you plan to use it.
- What are some other flavor combinations I can try with this frosting?
- The possibilities are endless! Consider using banana pudding mix with a dash of cinnamon for a tropical twist. You can also try using pistachio pudding mix with chopped pistachios for a nutty and vibrant flavor. For a coffee-inspired frosting, use coffee-flavored pudding mix or add a teaspoon of instant coffee to the vanilla pudding mix. And don’t forget seasonal flavors like pumpkin spice for fall or peppermint for the holidays.
- Can I use this frosting to pipe decorations on cupcakes?
- Yes, you can use this frosting to pipe decorations on cupcakes, but it’s important to note that it’s not as stable as buttercream frosting. It may not hold intricate designs as well, especially in warm temperatures. For best results, use a piping bag fitted with a decorative tip and work quickly. Chill the frosted cupcakes for a few minutes before serving to help the frosting set. For more stable decorations, you might consider using a buttercream or cream cheese frosting for the intricate piped sections, and the Cool Whip frosting for general topping.