Description of this recipe
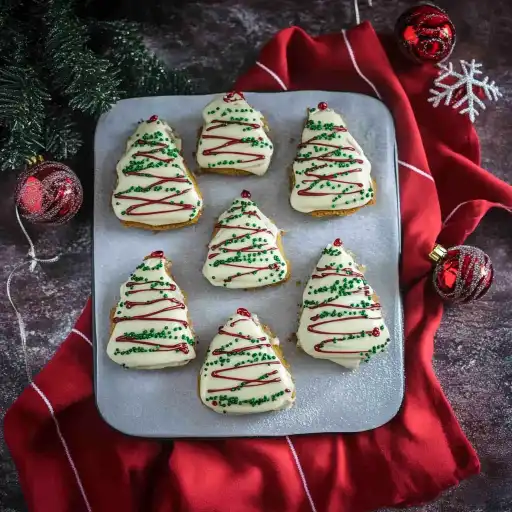
Indulge in the festive spirit with this Copycat Homemade Little Debbie Christmas Tree Cake Recipe! These adorable, tree-shaped treats capture the nostalgic joy of the original, but with a homemade touch that elevates the flavor and texture. This recipe meticulously recreates the iconic layered cake, creamy filling, white candy coating, and festive decorations, ensuring a delightful holiday experience.
Why you will love this recipe
You’ll adore this recipe because it brings the beloved Christmas Tree Cakes to your kitchen, allowing you to customize and enjoy them with fresh, homemade goodness. The process of making these treats is not only fun but also incredibly rewarding. Each bite offers a perfect balance of soft cake, luscious filling, and a sweet candy coating that will bring back cherished memories of holidays past. Plus, you get to share these adorable creations with family and friends, spreading joy and deliciousness during the festive season. It’s a fantastic way to add a personal touch to your holiday baking, making it a cherished tradition for years to come.
Ingredients:
For the Cake
- ½ cup unsalted butter, softened
- 1 cup granulated sugar
- 2 teaspoons vanilla extract
- ¼ teaspoon almond extract
- ½ teaspoon salt
- 2 teaspoons baking powder
- 4 large egg yolks
- 1 ½ cups all-purpose flour
- ⅔ cup milk
For the Filling
- 4 large egg whites
- ¾ cup granulated sugar
- ½ teaspoon salt
- 1 cup unsalted butter, softened and cubed
- 1 teaspoon vanilla extract
- ¼ teaspoon almond extract
To decorate
- 16 ounces white candy coating, melted
- ¼ cup red candy melts, melted
- Green sugar sprinkles
Preparation:
Step 1: Prepare the Cake Batter In the bowl of a stand mixer fitted with the paddle attachment, combine the softened butter, sugar, vanilla extract, almond extract, salt, and baking powder. Cream together on medium speed until light and fluffy, about 3-5 minutes. This step is crucial for creating a tender cake crumb. Ensuring the butter is properly softened will allow it to incorporate smoothly with the sugar, resulting in a uniform batter.
Step 2: Incorporate Egg Yolks Add the egg yolks to the mixture one at a time, mixing well after each addition. Scrape down the sides of the bowl frequently to ensure all ingredients are fully incorporated. The egg yolks contribute to the richness and moisture of the cake, so it’s important to blend them thoroughly.
Step 3: Add Flour and Milk Gradually add the flour to the batter, alternating with the milk. Begin and end with the flour, mixing on low speed until just combined. Overmixing can develop the gluten in the flour, leading to a tough cake, so be gentle and avoid excessive mixing. The alternation of flour and milk ensures that the batter remains smooth and emulsified.
Step 4: Bake the Cake Preheat the oven to 350 degrees Fahrenheit (175 degrees Celsius). Line a 10×17 inch jelly roll pan with parchment paper and spray with non-stick cooking spray. This prevents the cake from sticking and makes it easier to remove once cooled. Pour the batter into the prepared pan and spread evenly using an offset spatula. Bake for 15-18 minutes, or until the edges are slightly golden brown and the center is set.
Step 5: Cool the Cake Remove the cake from the oven and let it cool completely in the pan. Once cooled, carefully invert the cake onto a wire rack and remove the parchment paper. Allowing the cake to cool completely prevents it from crumbling when you cut and assemble the treats.
Step 6: Prepare the Filling In a large, heat-proof bowl, combine the egg whites, sugar, and salt. Place the bowl over a pot of simmering water, ensuring the bowl doesn’t touch the water. Whisk constantly until the sugar is dissolved and the mixture is smooth. This process pasteurizes the egg whites and creates a stable base for the filling.
Step 7: Whip the Filling Remove the bowl from the heat and use a hand mixer or stand mixer to whip the egg white mixture on medium-high speed until stiff peaks form. This may take about 5-7 minutes. The meringue should be glossy and hold its shape.
Step 8: Incorporate Butter and Extracts Gradually add the softened, cubed butter to the meringue, one cube at a time, mixing on low speed until fully incorporated. The mixture may appear curdled at first, but continue mixing until it becomes smooth and creamy. Add the vanilla and almond extracts, and mix until just combined.
Step 9: Assemble the Cake Carefully cut the cooled cake in half lengthwise to create two equal-sized layers. Place one layer on a sheet of parchment paper and spread the filling evenly over the entire surface. Top with the remaining cake layer and press gently to secure.
Step 10: Freeze the Cake Place the assembled cake in the freezer for about 30 minutes to firm up. This makes it easier to cut out the Christmas tree shapes.
Step 11: Cut Out Shapes Remove the cake from the freezer and use a 3-4 inch Christmas tree cookie cutter to cut out the cake layers. You should be able to get 8-10 trees, depending on the size of your cookie cutter and how efficiently you space them.
Step 12: Prepare Candy Coating Melt the white candy coating in a microwave-safe bowl in 30-second intervals, stirring well between each interval until smooth. In a separate bowl, melt the red candy melts using the same method. Transfer the melted red candy coating to a piping bag.
Step 13: Decorate the Trees Remove the cut cake pieces from the freezer one at a time and dip them in the melted white candy coating. Ensure all sides are fully coated. Use a fork to lift the cake from the coating, tapping gently to remove excess. Place the coated trees on parchment paper and immediately sprinkle with green sugar sprinkles. Drizzle with the melted red candy coating from the piping bag in a festive pattern.
Step 14: Set and Serve Allow the decorated Christmas tree cakes to set completely at room temperature or in the refrigerator. Once the candy coating is firm, they are ready to serve and enjoy!
COOKING Rating:
Intermediate – This recipe involves several steps and requires some experience with baking and candy making. Attention to detail is key to achieving the best results.
Serving Suggestions:
Serve these Copycat Homemade Little Debbie Christmas Tree Cakes as a delightful treat during holiday gatherings, parties, or as a special dessert for family and friends. They pair perfectly with a warm cup of cocoa, coffee, or tea. Arrange them on a festive platter for an eye-catching presentation, or wrap them individually as homemade gifts.
Tips:
- Ensure all ingredients are at room temperature for better emulsification and a smoother batter.
- Do not overmix the cake batter to avoid a tough cake.
- When melting the candy coating, microwave in short intervals and stir frequently to prevent burning.
- Work quickly when decorating the trees to ensure the sprinkles adhere to the melted candy coating.
- If the filling appears curdled after adding the butter, continue mixing until it becomes smooth.
- For a richer flavor, use high-quality vanilla and almond extracts.
- Store the finished cakes in an airtight container in the refrigerator to maintain their freshness.
Prep Time: 45 minutes Cook Time: 18 minutes Total Time: 2 hours (includes cooling and freezing time)
Nutritional Information: (per serving, approximate) Calories: 350 Protein: 4g Sodium: 150mg
Conclusion
This Copycat Homemade Little Debbie Christmas Tree Cake Recipe offers a wonderful opportunity to recreate a beloved holiday treat in your own kitchen. The combination of soft cake, creamy filling, and sweet candy coating provides a delightful balance of flavors and textures that will bring joy to anyone who tastes them. While the recipe requires some time and effort, the end result is well worth it, offering a homemade touch that surpasses the store-bought version. These festive cakes are perfect for sharing with loved ones, adding a special and personal element to your holiday celebrations. Enjoy the process of baking and decorating these charming treats, and create memories that will last for years to come. Embrace the festive spirit, gather your ingredients, and embark on a culinary adventure that will fill your home with the sweet aroma of holiday cheer.
5 Questions and Answers about this recipe:
Question 1: Can I make the cake ahead of time? Answer: Yes, you can bake the cake layers a day in advance. Wrap them tightly in plastic wrap and store them at room temperature or in the refrigerator. Make sure they are completely cooled before wrapping to prevent them from becoming soggy. Preparing the cake ahead of time can help break up the tasks and make the assembly process more manageable.
Question 2: What can I use if I don’t have almond extract? Answer: If you don’t have almond extract, you can substitute it with an equal amount of vanilla extract or a different flavoring extract, such as lemon or orange. Alternatively, you can omit the almond extract altogether. While the almond extract adds a distinctive flavor that is reminiscent of the original Little Debbie Christmas Tree Cakes, the recipe will still taste delicious without it.
Question 3: How do I prevent the candy coating from seizing when melting? Answer: To prevent the candy coating from seizing, make sure to microwave it in short intervals (30 seconds each) and stir well between each interval. Avoid overheating the candy coating, as this can cause it to seize and become unusable. If the candy coating does seize, you can try adding a small amount of vegetable shortening or coconut oil to help smooth it out.
Question 4: Can I use a different type of sprinkles for decoration? Answer: Absolutely! While green sugar sprinkles are traditionally used to decorate Little Debbie Christmas Tree Cakes, you can use any type of sprinkles you like. Consider using a mix of green, red, and white sprinkles for a more festive look, or try using edible glitter for a touch of sparkle. The decoration is a great opportunity to get creative and personalize your Christmas Tree Cakes.
Question 5: How long will these cakes last, and how should I store them? Answer: These cakes will last for about 3-4 days when stored in an airtight container in the refrigerator. The cool temperature helps to keep the filling and candy coating from melting. Before serving, allow the cakes to sit at room temperature for a few minutes to soften slightly. Avoid freezing the decorated cakes, as this can affect the texture of the candy coating and filling.