Description of this recipe
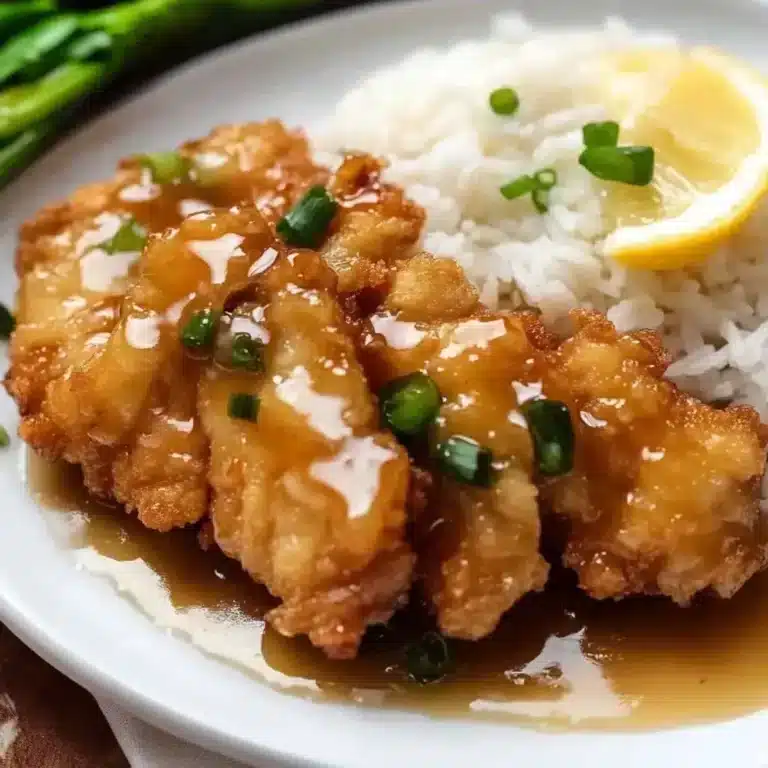
This Crispy Chinese Lemon Chicken recipe delivers an irresistible combination of textures and flavors. Imagine succulent, crispy chicken pieces coated in a tangy, sweet, and savory lemon sauce that will tantalize your taste buds. This dish brings the vibrant essence of Chinese takeout right to your kitchen, offering a homemade alternative that is both healthier and more flavorful. Each bite is an explosion of crispy, juicy, and citrusy goodness, making it an instant family favorite.
Why you will love this recipe
There are countless reasons to fall in love with this Crispy Chinese Lemon Chicken. First and foremost, the contrasting textures are a delight. The perfectly crispy chicken exterior gives way to tender, juicy meat, creating a satisfying eating experience. The lemon sauce is the star of the show, balancing sweet, sour, and savory notes with a hint of ginger and garlic, making it incredibly addictive.
This recipe is also surprisingly easy to make at home. With simple ingredients and straightforward instructions, you can recreate a restaurant-quality dish without spending hours in the kitchen. Plus, making it yourself means you can control the quality of ingredients, ensuring a healthier and fresher meal. It’s a fantastic way to impress your family and friends with your culinary skills.
Ingredients:
Chicken:
- 4 x 125g/3oz chicken thigh fillets, skinless and boneless (or 2 breasts)
- 1/2 tsp cooking salt / kosher salt
- 1/4 cup cornflour / cornstarch
Frying:
- 1 – 1 1/2 litres (4 – 6 cups) vegetable or canola oil, for frying (4cm / 1.6″ depth)
Stay-Crisp Fry Batter:
- 1/3 cup cornflour / cornstarch
- 1/3 cup + 1 tbsp plain flour (all-purpose flour)
- 1/2 tsp cooking salt / kosher salt
- 1/4 tsp baking powder
- 1/2 cup COLD soda water, not sparkling mineral water
Lemon Sauce:
- 6 tsp cornflour/cornstarch
- 1/2 cup chicken stock/broth, low sodium
- 1/2 cup lemon juice, fresh
- 1/3 cup white sugar
- 1/2 tsp garlic, finely grated
- 1/2 tsp ginger, finely grated
- 1 tbsp Chinese cooking wine (optional)
Garnish (optional):
- Lemon slices, to serve
- 1 green onion, finely sliced on the diagonal, to serve
Preparation:
Step 1: Prepare the Chicken
Place the chicken fillets on a cutting board. Cover them with a freezer bag or plastic wrap to prevent splattering. Use a meat mallet or the bottom of a skillet to pound the chicken until it is an even 0.7cm / 1/3″ thick. This ensures even cooking and a tender texture. Sprinkle both sides of the pounded chicken with 1/2 teaspoon of salt.
Step 2: Dust with Cornflour
Spread the 1/4 cup of cornflour on a plate. Dredge each piece of chicken in the cornflour, ensuring it is evenly coated. Shake off any excess cornflour. Place the dusted chicken pieces on a separate plate and set aside. This step helps create a crispy crust when frying.
Step 3: Prepare the Stay-Crisp Fry Batter
In a mixing bowl, whisk together 1/3 cup of cornflour, 1/3 cup plus 1 tablespoon of plain flour, 1/2 teaspoon of salt, and 1/4 teaspoon of baking powder until well combined. Place the bowl in the refrigerator while you proceed with the other steps. This chilling process helps to achieve a lighter, crispier batter.
Step 4: Preheat the Frying Oil
In a large, heavy-based pot, pour in the vegetable or canola oil until it reaches a depth of at least 4cm / 1.6″. Heat the oil over medium heat to 160°C/320°F. Use a thermometer to monitor the temperature accurately. Maintaining the correct oil temperature is crucial for achieving the desired crispy texture.
Step 5: Finish the Fry Batter
Remove the bowl with the dry batter ingredients from the refrigerator. Pour in 1/2 cup of cold soda water. Whisk gently until just combined. It’s okay if there are some small lumps; over-whisking can result in a less puffy and light crust. The batter should be fairly thin, just enough to coat the chicken lightly.
Step 6: First Fry
Dip a piece of chicken into the batter, allowing any excess to drip off. Carefully place the coated chicken into the preheated oil. Repeat with another piece of chicken if there is enough space in the pot without overcrowding. Fry for 3 minutes until the chicken is very pale golden. Remove the chicken pieces from the oil and place them on a paper towel-lined tray to drain. Repeat with the remaining chicken.
Step 7: Cool the Chicken
Allow the fried chicken pieces to cool for 20 minutes. This step is essential as it allows the chicken to rest and the crust to set, resulting in a crispier final product.
Step 8: Prepare the Lemon Sauce
In a small saucepan, combine the 6 teaspoons of cornflour with a splash of the chicken stock. Whisk until smooth and lump-free. Add the remaining chicken stock, lemon juice, sugar, grated garlic, grated ginger, and Chinese cooking wine (if using). Whisk all ingredients together.
Step 9: Simmer the Lemon Sauce
Place the saucepan over medium heat and bring the mixture to a simmer. Continue to simmer for 3 minutes, whisking occasionally, until the sauce thickens to a thin honey-like consistency. Initially, the sauce will thicken considerably, but it will thin out as it simmers. Remove the saucepan from the heat, cover, and keep warm. If needed, reheat the sauce to loosen it before serving.
Step 10: Second Fry
Increase the heat under the oil to bring it to 200°C/390°F. Fry two pieces of chicken for 3 minutes until they are deep golden and super crispy, turning the chicken halfway through to ensure even cooking. Remove the chicken from the oil and place it on a paper towel-lined tray to drain. Repeat with the remaining chicken.
Step 11: Serving
Cut the crispy fried chicken into 2cm (3/4″) thick slices. Transfer the sliced chicken onto a serving plate. Pour the warm lemon sauce over the chicken. Garnish with lemon slices and finely sliced green onions, if desired. Serve immediately with steamed rice.
COOKING Rating:
- Difficulty: Medium
- Taste: Sweet, Sour, Savory, Crispy
- Overall: 5/5 Stars
Serving Suggestions:
- Serve with steamed rice to soak up the delicious lemon sauce.
- Pair with stir-fried vegetables like broccoli, bok choy, or snap peas for a complete meal.
- Offer a side of egg rolls or spring rolls for a more elaborate Chinese-inspired feast.
- Garnish with sesame seeds for added flavor and visual appeal.
- Serve with a light salad to balance the richness of the dish.
Tips:
- Ensure the oil temperature is consistent throughout the frying process to achieve even crispiness.
- Do not overcrowd the pot when frying; fry in batches to maintain the oil temperature.
- Chilling the batter helps to create a lighter, crispier crust.
- Adjust the amount of sugar in the lemon sauce to suit your taste preferences.
- For a richer flavor, use homemade chicken stock in the lemon sauce.
- If you don’t have soda water, you can use sparkling water, but soda water is better as it has less mineral taste.
Prep Time:
- 25 minutes
Cook Time:
- 25 minutes
Total Time:
- 50 minutes
Nutritional Information:
(Note: Nutritional information is approximate and can vary based on specific ingredients and portion sizes.)
- Calories: 450
- Protein: 30g
- Sodium: 500mg
Conclusion
This Crispy Chinese Lemon Chicken recipe is a delightful and satisfying dish that brings the authentic flavors of Chinese takeout to your home kitchen. With its perfect balance of crispy texture and tangy, sweet lemon sauce, it’s a guaranteed crowd-pleaser. Whether you’re cooking for a family dinner or entertaining guests, this recipe is sure to impress. So, gather your ingredients, follow the easy steps, and enjoy a restaurant-quality meal made with love in your own home.
Q&A
Q1: Can I use chicken breasts instead of chicken thighs?
A: Yes, you can use chicken breasts. However, chicken thighs are generally more flavorful and tend to stay more moist during the frying process. If using chicken breasts, make sure not to overcook them to prevent them from becoming dry. Pound the chicken breasts to an even thickness, just like the thighs, to ensure even cooking.
Q2: What can I use if I don’t have Chinese cooking wine?
A: If you don’t have Chinese cooking wine, you can omit it from the recipe. Alternatively, you can substitute it with dry sherry or rice vinegar. These substitutes will add a similar depth of flavor to the lemon sauce, though the taste will be slightly different.
Q3: How can I make the sauce less sweet?
A: If you prefer a less sweet sauce, you can reduce the amount of sugar in the recipe. Start by reducing the sugar by a tablespoon or two, and taste the sauce as it simmers. Adjust the amount of sugar to your liking until you achieve the desired balance of sweet and sour.
Q4: Can I bake the chicken instead of frying it?
A: While frying is essential for achieving the crispy texture of this dish, you can attempt to bake the chicken for a healthier alternative. Preheat your oven to 200°C/400°F. Place the battered chicken pieces on a baking sheet lined with parchment paper. Spray the chicken with cooking oil and bake for about 15-20 minutes, flipping halfway through, until golden brown and cooked through. The texture will not be as crispy as fried chicken, but it will still be delicious.
Q5: How do I store leftovers, and how long will they last?
A: To store leftovers, allow the chicken and sauce to cool completely. Store the chicken and sauce separately in airtight containers in the refrigerator. They will last for up to 3 days. When reheating, it’s best to reheat the chicken in the oven or air fryer to maintain its crispiness. Reheat the sauce in a saucepan over low heat. Combine the chicken and sauce just before serving.