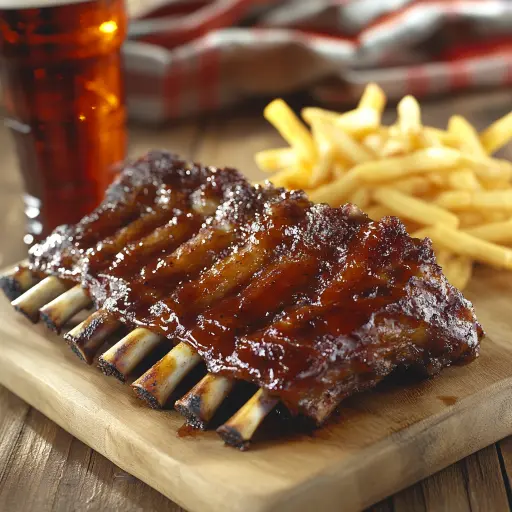
Description: Fall-off-the-bone tender baby back ribs infused with the unique, sweet, and slightly spicy flavor of Dr Pepper. These Dr Pepper Ribs are first marinated in the soda, then slow-baked to perfection, and finally glazed with a homemade Dr Pepper BBQ sauce that will have everyone licking their fingers. A delightful twist on a classic BBQ favorite, perfect for gatherings, cookouts, or a special family meal.
Ingredients:
- 2 racks of baby back ribs
- 1 can (12 oz) Dr Pepper soda
- 1 cup BBQ sauce (your favorite)
- 1/4 cup brown sugar
- 1 tbsp Worcestershire sauce
- 2 tsp smoked paprika
- 1 tsp garlic powder
- 1 tsp onion powder
- 1/2 tsp black pepper
- Salt, to taste
Preparation:
Step 1: Prepare the Ribs: Begin by prepping your baby back ribs. Lay each rack on a clean cutting board, bone-side up. Locate the thin, translucent membrane on the back of the ribs. This membrane can become tough and chewy when cooked, so removing it will yield more tender ribs. To remove the membrane, slide a butter knife under the membrane at one end of the rack. Use a paper towel to grip the loosened membrane and pull it away from the bones. The paper towel will help you get a better grip and prevent the membrane from slipping. Continue pulling until the entire membrane is removed. Discard the membrane.
Step 2: Season the Ribs: In a small bowl, combine the smoked paprika, garlic powder, onion powder, and black pepper. Generously season both sides of the ribs with salt. Then, sprinkle the spice mixture evenly over both sides of the ribs. Use your hands to rub the spices into the meat, ensuring that every part is well-coated. This process not only adds flavor but also helps to create a nice bark during cooking.
Step 3: Marinate with Dr Pepper: Place the seasoned ribs in a large dish or a resealable plastic bag. Pour the entire can of Dr Pepper soda over the ribs, ensuring that they are mostly submerged in the liquid. If using a dish, you may need to flip the ribs occasionally to ensure even marination. Seal the bag or cover the dish tightly with plastic wrap. Refrigerate the ribs for at least 2 hours, or preferably overnight for the best flavor infusion. The longer the ribs marinate, the more the Dr Pepper flavor will penetrate the meat, resulting in a more flavorful and tender final product.
Step 4: Preheat Oven and Prepare for Baking: Preheat your oven to 300°F (150°C). This low temperature is crucial for slow-cooking the ribs, which will make them incredibly tender. Remove the ribs from the Dr Pepper marinade, reserving ½ cup of the marinade for later use in the BBQ sauce. Place the ribs on a baking sheet lined with aluminum foil. The foil will make cleanup easier and help to retain moisture during baking.
Step 5: Bake the Ribs: Cover the ribs tightly with another layer of aluminum foil. Ensure that the foil is sealed tightly around the edges of the baking sheet to create a steam-filled environment that will help tenderize the ribs. Bake the ribs in the preheated oven for 2.5 to 3 hours, or until they are very tender. To check for doneness, insert a fork into the meat between the bones. If the fork slides in easily with little resistance, the ribs are ready.
Step 6: Make the Dr Pepper BBQ Sauce: While the ribs are baking, prepare the Dr Pepper BBQ sauce. In a medium saucepan, combine the reserved ½ cup of Dr Pepper marinade, your favorite BBQ sauce, brown sugar, and Worcestershire sauce. Place the saucepan over medium heat and bring the mixture to a simmer, stirring occasionally to prevent sticking. Continue to simmer for about 10 minutes, or until the sauce has thickened slightly. The brown sugar will dissolve and add sweetness, while the Worcestershire sauce will add depth of flavor and umami.
Step 7: Broil or Grill: Once the ribs are tender, carefully remove them from the oven. Brush the ribs generously with the Dr Pepper BBQ sauce on both sides, ensuring that they are fully coated. You have the option to finish the ribs either in the broiler or on the grill, depending on your preference.
*   **Broil:** Place the ribs under the broiler, about 6-8 inches from the heat source. Broil for 5-7 minutes per side, watching carefully to prevent burning. The sauce should caramelize and become sticky.
*   **Grill:** Preheat your grill to medium-high heat. Place the ribs on the grill grates and grill for 5-7 minutes per side, brushing with additional sauce as needed. The sauce should caramelize and the ribs should have slight grill marks.
Step 8: Serve: Remove the ribs from the broiler or grill and let them rest for a few minutes before slicing. Slice the ribs between the bones and serve them hot. Offer extra Dr Pepper BBQ sauce on the side for those who want an extra dose of flavor.
Why You Will Love This Recipe
This Dr Pepper Ribs recipe is a guaranteed crowd-pleaser for several reasons:
- Unique Flavor Profile: The combination of Dr Pepper and BBQ sauce creates a distinctive flavor that is both sweet and savory. The Dr Pepper adds a subtle spiciness and depth that complements the smoky flavors of the ribs.
- Incredibly Tender: The slow baking process ensures that the ribs are fall-off-the-bone tender. The low heat allows the collagen in the meat to break down, resulting in a melt-in-your-mouth texture.
- Easy to Make: Despite the impressive results, this recipe is surprisingly easy to follow. The steps are straightforward, and the ingredients are readily available.
- Perfect for Any Occasion: Whether you’re hosting a backyard BBQ, celebrating a special occasion, or simply craving some delicious comfort food, these Dr Pepper Ribs are a perfect choice.
- Customizable: The recipe is easily adaptable to your taste preferences. You can use your favorite BBQ sauce, adjust the amount of brown sugar to control the sweetness, and experiment with different spice combinations.
Serving Suggestions:
- Classic BBQ Sides: Serve these ribs with traditional BBQ sides like coleslaw, potato salad, corn on the cob, and baked beans.
- Comfort Food Pairings: Mac and cheese, mashed potatoes, and cornbread also make excellent accompaniments to these flavorful ribs.
- Fresh Salads: A fresh garden salad or a tangy vinegar-based salad can provide a refreshing contrast to the richness of the ribs.
- Grilled Vegetables: Grilled asparagus, bell peppers, or zucchini are healthy and delicious options to serve alongside the ribs.
- Bread: Don’t forget some crusty bread or rolls to soak up all the delicious sauce.
Tips:
- Marinating Time: For the best flavor, marinate the ribs overnight. If you’re short on time, even a few hours of marinating will make a difference.
- Foil Seal: Ensure that the foil is tightly sealed around the ribs during baking. This will help to trap moisture and prevent the ribs from drying out.
- Sauce Consistency: If the Dr Pepper BBQ sauce is too thick, add a splash of water or Dr Pepper to thin it out. If it’s too thin, continue to simmer it until it reaches your desired consistency.
- Don’t Overcook: Be careful not to overcook the ribs, as they can become dry and tough. The ribs are done when a fork easily slides into the meat between the bones.
- Rest Time: Allow the ribs to rest for a few minutes before slicing. This will allow the juices to redistribute, resulting in more flavorful and tender ribs.
Prep Time: 15 minutes (plus marinating time)
Cook Time: 3 hours
Total Time: 3 hours 15 minutes (plus marinating time)
Nutritional Information:
(Note: Nutritional information is an estimate and may vary based on specific ingredients and portion sizes.)
- Calories: Approximately 500 kcal per serving
- Protein: Approximately 40g
- Sodium: Approximately 700mg
Conclusion:
These Dr Pepper Ribs are a mouthwatering twist on a classic BBQ favorite that are sure to impress. The unique flavor of Dr Pepper, combined with tender, slow-baked ribs and a sticky, caramelized BBQ sauce, creates a dish that is both memorable and satisfying. Whether you’re a seasoned BBQ enthusiast or a beginner in the kitchen, this recipe is easy to follow and guaranteed to deliver delicious results. So fire up the oven, gather your ingredients, and get ready to enjoy some of the best ribs you’ve ever tasted! Questions and Answers about this recipe
- Can I use a different type of ribs for this recipe? Answer: Yes, while baby back ribs are commonly used and provide a good balance of meat and tenderness, you can substitute them with spare ribs or St. Louis-style ribs. Spare ribs have more meat and a slightly tougher texture compared to baby back ribs, so they may require a longer cooking time. St. Louis-style ribs are spare ribs with the sternum bone and cartilage removed, making them more uniform and easier to cook evenly. If using either spare ribs or St. Louis-style ribs, adjust the baking time accordingly, potentially adding an extra hour or two, and ensure the meat is fall-off-the-bone tender before moving on to the broiling or grilling step.
- What if I don’t have smoked paprika? Can I use regular paprika? Answer: While smoked paprika is preferred because it adds a depth of smoky flavor that enhances the overall BBQ profile of the ribs, you can indeed substitute it with regular paprika if that’s what you have on hand. However, keep in mind that regular paprika lacks the smoky element, so the final flavor will be slightly different. To compensate for the missing smoky flavor, you could consider adding a small amount of liquid smoke (about 1/2 teaspoon) to the Dr Pepper BBQ sauce. Alternatively, you can use a different smoky spice, such as chipotle powder, but be cautious with the amount, as chipotle powder is spicier than smoked paprika.
- Can I make the Dr Pepper BBQ sauce ahead of time? Answer: Absolutely! Making the Dr Pepper BBQ sauce ahead of time is a great way to save time on the day you plan to cook the ribs. The sauce can be made up to a week in advance and stored in an airtight container in the refrigerator. In fact, making it in advance can even improve the flavor, as the ingredients have more time to meld together. When you’re ready to use the sauce, simply reheat it in a saucepan over low heat, stirring occasionally, until it’s warmed through. If the sauce has thickened too much during storage, you can add a splash of water or Dr Pepper to thin it out to your desired consistency.
- Is it necessary to remove the membrane from the back of the ribs? Answer: While it’s not absolutely necessary to remove the membrane from the back of the ribs, doing so is highly recommended for the best eating experience. The membrane is a thin, tough layer of connective tissue that can become chewy and unpleasant when cooked. Removing it allows the marinade and seasonings to penetrate the meat more effectively, resulting in more flavorful and tender ribs. Additionally, removing the membrane prevents the ribs from curling up during cooking, ensuring they cook more evenly. If you find it difficult to remove the membrane, try using a butter knife to loosen it and then grip it with a paper towel for a better grip.
- Can I cook these ribs in a slow cooker instead of baking them in the oven? Answer: Yes, you can adapt this recipe for a slow cooker. To do so, follow the steps for preparing and seasoning the ribs as outlined in the recipe. Then, place the ribs in the slow cooker, pouring the Dr Pepper marinade over them. Cook on low heat for 6-8 hours, or until the ribs are very tender. Once the ribs are cooked, remove them from the slow cooker and brush them with the Dr Pepper BBQ sauce. You can then finish them under the broiler or on the grill, as described in the original recipe, to caramelize the sauce. Keep in mind that slow cooker ribs may be slightly more moist and less firm than oven-baked ribs, but they will still be incredibly tender and flavorful.