Description of this recipe
Pelmeni are the heart of Russian comfort food. These small, flavorful dumplings, filled with a savory meat mixture, are a beloved dish enjoyed during family gatherings, festive occasions, and cozy evenings. Pelmeni are more than just a meal; they’re a tradition, a connection to heritage, and a warm embrace of homemade goodness. Making pelmeni from scratch is a labor of love, but the delightful taste and the joy of sharing them make it all worthwhile. Each bite is an explosion of juicy meat and perfectly cooked dough, creating a memorable culinary experience that will leave you craving more.
Why you will love this recipe
You’ll fall in love with this pelmeni recipe because it’s a truly authentic, homemade experience. Unlike store-bought versions, these pelmeni are bursting with fresh flavors and made with carefully selected ingredients. The process of making them, while a bit time-consuming, is incredibly rewarding. There’s a special satisfaction in creating something delicious from scratch, especially when it’s a dish that brings people together. The dough is tender and perfectly complements the savory meat filling, which is seasoned to perfection with a blend of herbs and spices. Plus, the recipe is versatile, allowing you to customize the filling with your favorite meats and seasonings. Whether you’re a seasoned cook or a beginner, this recipe offers a fun and delicious way to explore Russian cuisine and impress your friends and family with your culinary skills. The joy of sharing these homemade dumplings will make you the star of any gathering!
Ingredients:
Dough:
- 2/3 cup whole milk
- 1 tsp salt
- 1 large egg
- 3/4 cup water
- 4 1/4 cups all-purpose flour (measured then sifted)
Meat Filling:
- 1 lb ground pork
- 1 lb ground chicken
- 1 medium onion, grated
- 2 garlic cloves, minced
- 2 tsp salt
- ¼ tsp ground black pepper
- 1 tsp vinegar
- 1 Tbsp water
- 3 Tbsp dill, chopped
Preparation:
Step 1: Make the Dough
Begin by preparing the dough. If you have a KitchenAid mixer, attach the dough hook. In the mixer bowl, combine the milk, salt, egg, and water. Mix these wet ingredients together until they are well combined.
Step 2: Add Flour Gradually
With the mixer running on low speed, gradually add the sifted flour, one cup at a time. Continue mixing until the dough starts to come together. The dough should be smooth and no longer stick to your hands. If it’s too sticky, add a little more flour, one tablespoon at a time, until it reaches the right consistency.
Step 3: Rest the Dough
Once the dough is smooth, cover it with a clean kitchen towel or plastic wrap. Allow it to rest for 15-30 minutes. Resting the dough helps relax the gluten, making it more elastic and easier to work with. This step is crucial for achieving tender, perfectly textured pelmeni.
Step 4: Prepare the Meat Filling
While the dough is resting, prepare the meat filling. In a large mixing bowl, combine the ground pork, ground chicken, grated onion, minced garlic, salt, black pepper, vinegar, water, and chopped dill.
Step 5: Mix the Filling Thoroughly
Use your hands or a spatula to thoroughly mix all the ingredients until they are evenly distributed. Ensure that the spices and herbs are well incorporated throughout the meat mixture. This step is essential for creating a flavorful and cohesive filling.
Step 6: Set Aside the Filling
Cover the bowl with plastic wrap and set the meat filling aside until you’re ready to assemble the pelmeni. If you’re prepping in advance, you can refrigerate the filling to keep it fresh.
Step 7: Shaping with a Mold (Option 1)
If you’re using a pelmeni mold, roll out a portion of the dough to a thickness that will cover the mold. Place the rolled-out dough over the mold.
Step 8: Fill the Mold
Use a teaspoon to fill each hole in the mold with the meat filling. Make sure to distribute the filling evenly across all the holes.
Step 9: Cover and Seal
Roll out another layer of dough and place it over the meat-filled mold. Use a rolling pin to roll over the top of the mold until the edges of the pelmeni protrude. This process seals the dumplings.
Step 10: Remove the Pelmeni
Gently push the pelmeni out of the mold. They should easily separate from the mold. Repeat the process with the remaining dough and meat filling. Gather any scraps of dough, reroll them, and continue making more pelmeni.
Step 11: Shaping by Hand (Option 2)
If you’re shaping the pelmeni by hand, divide the dough into three equal balls.
Step 12: Roll Out the Dough
On a lightly floured surface, roll out one ball of dough into a thin layer, about 1/8 inch thick.
Step 13: Cut into Squares
Use a knife or a pastry cutter to cut the rolled-out dough into small squares, approximately 1.5 to 2 inches in size.
Step 14: Fill and Fold
Place a teaspoon of the meat filling in the center of each square. Take one square into your hand and fold it over diagonally to form a triangle. Press the edges together firmly to seal the dumpling tightly. You can also bring the two bottom corners of the triangle together to form a traditional pelmeni shape.
Step 15: Repeat
Repeat the filling and folding process with the remaining squares of dough.
Step 16: Cook the Pelmeni
Bring a large pot of water to a rolling boil. Season the water generously with salt.
Step 17: Add the Pelmeni
Carefully drop the pelmeni into the boiling water, a few at a time. Avoid overcrowding the pot, as this can cause the pelmeni to stick together.
Step 18: Cook Until Floating
Cook the pelmeni for 2-3 minutes, or until they float to the top of the pot. Once they float, continue cooking for another minute to ensure the meat filling is fully cooked.
Step 19: Remove and Serve
Use a slotted spoon to remove the cooked pelmeni from the pot. Drain them well and serve immediately.
COOKING Rating:
5/5 Stars
Serving Suggestions:
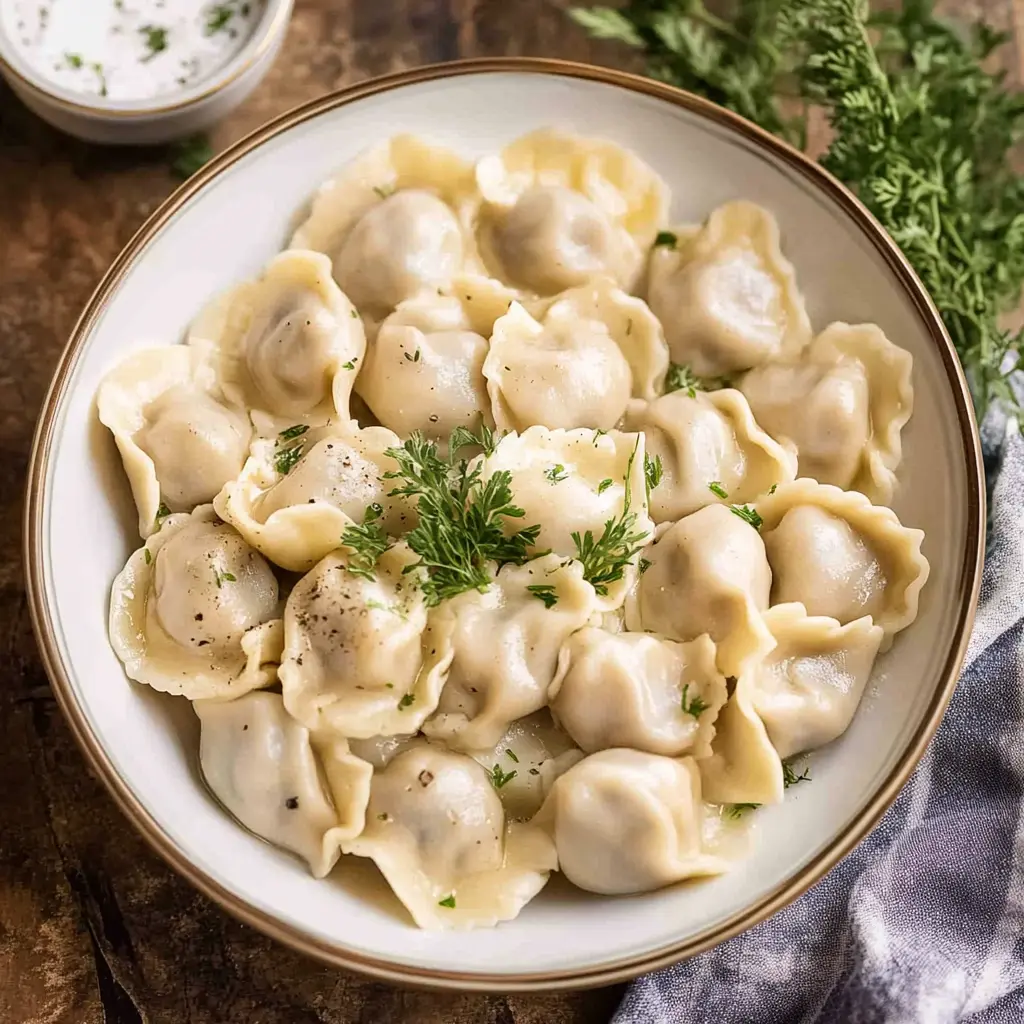
Serve the pelmeni hot with a dollop of sour cream (smetana) or a drizzle of melted butter. You can also add a sprinkle of fresh dill or a splash of vinegar for extra flavor. Pelmeni are traditionally served in a broth or with a side of mustard or horseradish. They make a comforting and satisfying meal any time of day.
Tips:
- Dough Consistency: The dough should be smooth and elastic, but not sticky. If it’s too sticky, add a little more flour, one tablespoon at a time, until it reaches the right consistency.
- Meat Filling: You can customize the meat filling with your favorite meats and seasonings. For a richer flavor, try using a combination of beef, pork, and lamb.
- Freezing: Pelmeni freeze exceptionally well. To freeze, place the uncooked pelmeni on a baking sheet lined with parchment paper. Freeze them until solid, then transfer them to a freezer bag. Cook them directly from frozen, adding a few extra minutes to the cooking time.
- Sealing: Ensure that the edges of the pelmeni are tightly sealed to prevent the filling from leaking out during cooking.
- Cooking Time: Do not overcook the pelmeni, as this can make the dough mushy. Cook them just until they float to the top of the pot and the meat filling is cooked through.
Prep Time:
60 minutes
Cook Time:
15 minutes
Total Time:
1 hour 15 minutes
Nutritional Information:
(Approximate values, may vary based on specific ingredients and portion sizes)
Calories: 350 kcal
Protein: 20 g
Sodium: 500 mg
Conclusion
Making pelmeni from scratch is a rewarding culinary experience that brings a taste of Russian tradition to your table. The combination of tender dough and savory meat filling creates a dish that is both comforting and delicious. Whether you’re shaping them by hand or using a mold, the process is a labor of love that results in a memorable meal. Gather your family and friends, and enjoy the warmth and flavor of homemade pelmeni. This recipe is a testament to the joy of cooking and sharing good food with the people you love. So, roll up your sleeves, get into the kitchen, and create some unforgettable pelmeni today!
Questions and Answers:
Q1: Can I use different types of meat for the filling?
A1: Absolutely! This recipe calls for a combination of ground pork and chicken, but you can easily customize the filling with your favorite meats. Ground beef, lamb, or even a mixture of all three can be used. Just make sure to adjust the seasoning accordingly to complement the flavors of the meat you choose.
Q2: How can I prevent the pelmeni from sticking together during cooking?
A2: To prevent the pelmeni from sticking together, make sure to use a large pot of boiling water and avoid overcrowding the pot. Add the pelmeni in batches, giving them enough space to move around. Stir them gently as they cook to keep them from clumping together. Adding salt to the boiling water also helps.
Q3: Can I make the dough ahead of time?
A3: Yes, you can definitely make the dough ahead of time. After preparing the dough, wrap it tightly in plastic wrap and store it in the refrigerator for up to 24 hours. When you’re ready to use it, let it sit at room temperature for about 30 minutes to soften before rolling it out.
Q4: How do I know when the pelmeni are cooked through?
A4: The pelmeni are cooked through when they float to the top of the boiling water. Once they float, continue cooking them for another minute or two to ensure that the meat filling is fully cooked. You can also cut one open to check if the meat is cooked through and no longer pink.
Q5: What are some other serving suggestions for pelmeni?
A5: While pelmeni are traditionally served with sour cream or melted butter, there are many other ways to enjoy them. Try serving them in a clear broth with a sprinkle of fresh dill. You can also add a splash of vinegar or a side of mustard or horseradish for extra flavor. Some people enjoy them with a simple tomato sauce or a spicy chili oil. Get creative and experiment with different toppings and sauces to find your favorite combination!