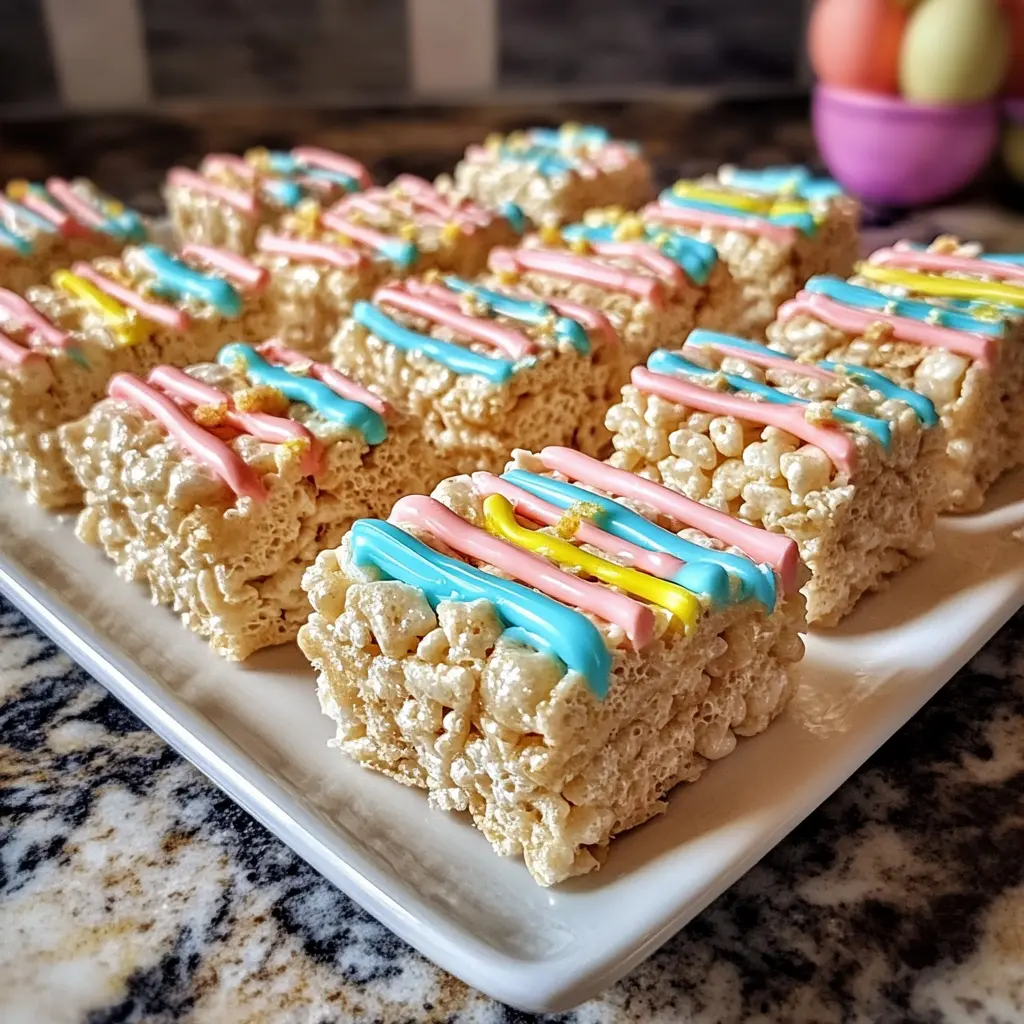
Description: These festive Easter Rice Krispie Treats are a delightful twist on the classic childhood favorite. Soft, chewy Rice Krispie squares are topped with a colorful drizzle of pastel candy melts, adorable mini chocolate eggs, and festive Easter sprinkles. They’re incredibly easy to make, perfect for involving kids in the kitchen, and guaranteed to bring a smile to everyone’s face this Easter.
Why You Will Love This Recipe:
- Simple and Quick: This recipe requires minimal ingredients and comes together in under an hour, making it ideal for busy schedules or last-minute Easter celebrations.
- Kid-Friendly: Little ones will love helping to mix, press, and especially decorate these treats. It’s a fun and engaging activity that creates lasting memories.
- Customizable: The decorations are entirely up to you! Use different colors of candy melts, various types of sprinkles, and any other Easter-themed candies you desire.
- Perfect for Gifting: These Easter Rice Krispie Treats are a charming and homemade gift idea for friends, family, or neighbors. Package them in cellophane bags tied with a ribbon for an extra special touch.
- Delicious and Nostalgic: The combination of the classic Rice Krispie texture with the sweetness of marshmallows and the festive decorations creates a treat that is both familiar and exciting.
Introduction
Easter is a time for renewal, celebration, and of course, delicious treats! While chocolate bunnies and jelly beans are staples, why not add a homemade touch to your Easter festivities with these adorable Easter Rice Krispie Treats? This recipe elevates the simple Rice Krispie Treat to a whole new level of festive fun. The base recipe remains the same – delightfully chewy and subtly sweet – but the decoration is where the magic happens. Think pastel-colored candy melts drizzled artistically, a generous scattering of Easter sprinkles, and those irresistible mini chocolate eggs that scream Easter joy.
These treats are not only visually appealing but also incredibly satisfying to eat. The textural contrast of the crunchy Rice Krispies, the soft marshmallows, the smooth candy melts, and the snappy chocolate eggs is a delightful experience for the palate. They’re perfect for serving at Easter brunch, packing in lunchboxes, or giving as a thoughtful homemade gift.
The beauty of this recipe lies in its simplicity and adaptability. It’s a fantastic way to get kids involved in the kitchen, encouraging their creativity and sparking their love for baking. Feel free to experiment with different colors, sprinkles, and candies to create your own unique Easter Rice Krispie Treat masterpieces.
Ingredients:
FOR THE RICE KRISPIE BASE:
- 6 cups Rice Krispies cereal
- 1 (10 oz) bag mini marshmallows
- 4 tbsp unsalted butter
- 1 tsp vanilla extract
- 1/4 tsp salt
FOR DECORATION:
- 1/2 cup pastel-colored candy melts (pink, blue, yellow)
- 1/2 cup mini chocolate eggs (Cadbury Mini Eggs or similar)
- 1/4 cup Easter sprinkles
Preparation:
Step 1: Prepare the Pan: Line a 9×13-inch baking dish with parchment paper, leaving an overhang on the sides. Lightly grease the parchment paper with butter or nonstick spray. This step is crucial to prevent the treats from sticking to the pan and allows you to easily lift the entire batch out for cutting. The parchment paper overhang will act as handles, making the removal process effortless.
Step 2: Melt the Marshmallow Mixture: In a large pot (preferably non-stick), melt the butter over low heat. Once melted, add the mini marshmallows and stir continuously with a silicone spatula until completely melted and smooth. It’s important to use low heat to prevent the marshmallows from burning or becoming too hard. Stirring constantly ensures even melting and prevents sticking. Be patient; this process may take a few minutes. Remove the pot from the heat once the marshmallows are fully melted.
Step 3: Add Vanilla and Salt: Once the marshmallow mixture is removed from the heat, stir in the vanilla extract and salt. The vanilla extract enhances the overall flavor of the treats, adding a touch of warmth and complexity. The salt balances the sweetness of the marshmallows and brings out the other flavors. Be sure to incorporate these ingredients evenly into the marshmallow mixture.
Step 4: Mix in the Cereal: Gently fold in the Rice Krispies cereal into the melted marshmallow mixture, making sure everything is evenly coated. Work quickly but carefully to avoid crushing the cereal. It’s important to coat every single Rice Krispie with the marshmallow mixture so that the entire thing holds together once it cools. Gently fold the cereal in, and do not stir vigorously, or the mixture will be overly dense.
Step 5: Press into the Pan: Transfer the Rice Krispie mixture to the prepared baking dish. Use a greased spatula, buttered hands, or a piece of parchment paper to gently press the mixture evenly into the pan. Make sure to pack the mixture firmly but not too tightly, creating a uniform thickness. A smooth, even surface will make it easier to decorate and cut the treats later. Let the treats set at room temperature for at least 30 minutes, or preferably an hour, before decorating. This allows the marshmallow mixture to cool and solidify, creating a firm base for the decorations.
Step 6: Decorate: Once the Rice Krispie Treats are set, melt the candy melts according to the package instructions. This usually involves microwaving the candy melts in a heat-safe bowl in short intervals (15-30 seconds), stirring in between until completely melted and smooth. Be careful not to overheat the candy melts, as they can become thick and unusable. Drizzle the melted candy melts over the Rice Krispie Treats in a crisscross pattern using a spoon or piping bag. Get creative with your drizzle pattern! While the candy melts are still wet, immediately sprinkle on Easter sprinkles and gently press in the mini chocolate eggs. The sprinkles and eggs will adhere to the melted candy, creating a festive and colorful decoration.
Step 7: Cut and Serve: Let the decorations set completely before cutting the Rice Krispie Treats into squares. This will prevent the candy melts from smearing and ensure clean cuts. Use a sharp knife or a pizza cutter to cut the treats into desired shapes and sizes. Serve immediately and enjoy! Store leftover treats in an airtight container at room temperature for up to 3 days.
COOKING Rating:
Easy
Serving Suggestions:
- Serve as a sweet treat at Easter brunch or dinner.
- Pack in lunchboxes for a festive surprise.
- Give as a homemade gift to friends, family, or neighbors.
- Serve with a scoop of vanilla ice cream for a decadent dessert.
- Pair with a cup of hot cocoa or coffee for a cozy treat.
Tips:
- Use fresh marshmallows for the best texture. Stale marshmallows will result in hard and chewy treats.
- Grease your hands or spatula with butter or nonstick spray to prevent the Rice Krispie mixture from sticking.
- Don’t overcook the marshmallows, or they will become hard and brittle.
- Press the mixture firmly into the pan for a cohesive treat.
- Let the treats cool completely before cutting for clean, even squares.
- Store leftover treats in an airtight container at room temperature to maintain their freshness.
- Get creative with your decorations! Use different colors of candy melts, various types of sprinkles, and other Easter-themed candies.
Prep Time: 15 minutes Cook Time: 5 minutes Total Time: 20 minutes (plus 30 minutes for setting)
Nutritional Information: (Approximate, per serving, varies depending on serving size and specific ingredients used) Calories: 200 Protein: 2g Sodium: 50mg
Conclusion
These Easter Rice Krispie Treats are a guaranteed crowd-pleaser, bringing together the classic comfort of a beloved childhood treat with the festive spirit of Easter. They are simple to make, endlessly customizable, and perfect for sharing with loved ones. So, gather your ingredients, put on some cheerful Easter music, and get ready to create a batch of these delightful treats that will bring smiles to faces of all ages. Happy Easter!
Questions and Answers about this Recipe
Q1: Can I use different cereal instead of Rice Krispies?
A: While Rice Krispies are the traditional choice for this recipe, you can certainly experiment with other cereals! Crisped rice cereals of any brand will work fine. Other options could include corn flakes, or even puffed wheat cereal. Keep in mind that the texture and flavor will be slightly different depending on the cereal you choose. Rice Krispies provide a light and airy crunch, while cornflakes will create a denser and slightly sweeter treat.
Q2: What can I do if I don’t have candy melts?
A: If you don’t have candy melts on hand, you can use white chocolate chips instead. Just be sure to melt them slowly and carefully, stirring frequently to prevent burning. You can add a few drops of food coloring to the melted white chocolate to create the pastel colors you desire. Alternatively, you can skip the candy melts altogether and simply decorate the Rice Krispie Treats with sprinkles, mini chocolate eggs, and other candies.
Q3: How do I prevent the Rice Krispie Treats from becoming too hard?
A: The key to preventing hard Rice Krispie Treats is to avoid overcooking the marshmallow mixture. Melt the marshmallows over low heat and stir constantly until they are just melted and smooth. Remove the pot from the heat immediately once the marshmallows are melted. Also, be sure to use fresh marshmallows, as stale marshmallows tend to result in harder treats. If you press the mixture too tightly into the pan, this can also lead to a harder treat, so press firmly, but gently.
Q4: Can I make these Rice Krispie Treats ahead of time?
A: Yes, you can definitely make these Rice Krispie Treats ahead of time! Once they are set and decorated, store them in an airtight container at room temperature for up to 3 days. The treats will maintain their freshness and texture as long as they are properly stored.
Q5: I don’t have parchment paper, what can I use instead?
A: if you dont have parchment paper, then use foil paper instead, and make sure to spray the foil with a non-stick cooking oil or butter. If you also don’t have foil paper you can just spray the non-stick oil or butter to the pan. Although that is not recommended because you will have a hard time getting it out and it might break.