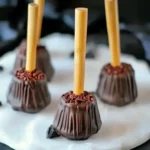
Description of this recipe: These Easy Chocolate Wafer Dipped Ghost Cookies are a delightful and spooktacular treat perfect for Halloween or any occasion where you want a fun and festive dessert. With just a few simple ingredients and minimal effort, you can create adorable ghost-shaped cookies that are sure to impress both kids and adults. These cookies combine the crispness of chocolate wafers with the creamy sweetness of melted white chocolate, decorated with chocolate chips to bring the ghosts to life. They are not only visually appealing but also incredibly delicious, making them a great option for parties, school events, or a fun family baking activity.
Why you will love this recipe: There are countless reasons to adore these Easy Chocolate Wafer Dipped Ghost Cookies. First and foremost, they are incredibly easy to make, requiring no baking or complex techniques. This makes them a perfect recipe for beginner bakers or those looking for a quick and satisfying treat. The recipe is highly customizable, allowing you to use different types of chocolate chips for decoration, or even add sprinkles for extra flair. The combination of chocolate wafers and white chocolate creates a delightful textural contrast, with the crisp wafer complementing the smooth, melted chocolate. These cookies are also a great way to get kids involved in the kitchen, as they can help with dipping, decorating, and assembling the ghosts. They are guaranteed to be a hit at any Halloween party or gathering, and their adorable appearance is sure to bring smiles to everyone’s faces. Finally, they are a simple yet impressive treat that can be made in under an hour, making them a convenient option for busy schedules.
Ingredients:
- 12 oz. White Chocolate Chips or White Candy Melts
- 5 oz. Chocolate Wafer Cookies (15 Wafers)
- 15 Chocolate Chips (Any Kind)
- 30 Miniature Chocolate Chips (Any Kind)
Preparation:
Step 1: Prepare your workspace by laying out a sheet of parchment paper on a baking sheet or flat surface. This will prevent the cookies from sticking and make cleanup easier. Gather all your ingredients and have them within easy reach. Ensure that your chocolate wafer cookies are intact and that you have your chocolate chips ready for decorating.
Step 2: Melt the white chocolate chips or candy melts. There are several ways to do this. You can use a microwave, melting the chocolate in 30-second intervals, stirring well in between each interval until fully melted. Alternatively, you can use a double boiler, placing the chocolate in a heat-proof bowl set over a pot of simmering water. Stir constantly until the chocolate is smooth and melted. Be careful not to overheat the chocolate, as this can cause it to seize or burn. The goal is to achieve a smooth, creamy consistency that is easy to dip the wafer cookies into.
Step 3: Dip each chocolate wafer cookie into the melted white chocolate, submerging it approximately ¾ of the way. Allow the excess chocolate to drip off back into the bowl. You can gently shake the cookie or use a fork to help remove any excess chocolate. Place the dipped wafer onto the prepared parchment paper.
Step 4: While the white chocolate is still wet, decorate the cookies to create the ghost faces. Place two miniature chocolate chips near the top of the cookie to serve as the ghost’s eyes. Position one larger chocolate chip in the center of the cookie to represent the mouth. Be creative with the placement to give each ghost a unique expression.
Step 5: Repeat the dipping and decorating process for all 15 chocolate wafer cookies. Once all the cookies are decorated, allow the white chocolate to set completely. This will take about 15-20 minutes at room temperature, or you can speed up the process by placing the cookies in the refrigerator for about 10 minutes. Once the chocolate is firm, the cookies are ready to serve.
COOKING Rating: Easy
Serving Suggestions:
These Easy Chocolate Wafer Dipped Ghost Cookies are perfect for a variety of occasions. Serve them as a festive treat at Halloween parties, school events, or family gatherings. They make a great addition to dessert platters or goodie bags. You can also package them in cellophane bags and tie them with ribbon for a cute and homemade gift. Pair them with a glass of milk or hot chocolate for a cozy and comforting snack. For a more elaborate presentation, arrange the cookies on a tiered serving tray or decorate them with edible glitter or colored sprinkles.
Tips:
- Use high-quality white chocolate chips or candy melts for the best flavor and texture.
- If the white chocolate becomes too thick during the dipping process, add a teaspoon of vegetable oil or shortening to thin it out.
- To prevent the chocolate from seizing, avoid getting any water or steam into the melted chocolate.
- If you don’t have chocolate wafer cookies, you can use graham crackers or other similar cookies as a substitute.
- Get creative with the decorations and use different types of chocolate chips, sprinkles, or edible markers to create unique ghost faces.
- Store the finished cookies in an airtight container at room temperature to maintain their freshness and prevent the chocolate from melting.
- For a fun twist, try using different colored candy melts, such as green or orange, to create different variations of the ghost cookies.
- If you are making these cookies with young children, consider using pre-melted candy melts or dipping the cookies ahead of time and letting them decorate with the chocolate chips.
Prep Time: 10 minutes
Cook Time: 5 minutes
Total Time: 15 minutes
Nutritional Information: (Estimates based on average ingredient values)
- Calories: Approximately 150-200 calories per cookie
- Protein: Approximately 2-3 grams per cookie
- Sodium: Approximately 50-75 milligrams per cookie
Conclusion:
These Easy Chocolate Wafer Dipped Ghost Cookies are a simple yet delightful treat that is perfect for any Halloween celebration or spooky-themed event. Their ease of preparation, combined with their charming appearance and delicious taste, makes them a winner for both kids and adults. Whether you’re a seasoned baker or a beginner in the kitchen, this recipe is sure to bring joy and smiles to everyone who tries them. So gather your ingredients, get creative with your decorations, and enjoy making these adorable ghost cookies that are guaranteed to be a hit!
5 Questions and Answers about this recipe:
Q1: Can I use regular chocolate chips instead of miniature chocolate chips for the eyes?
A: Yes, you can use regular chocolate chips if you don’t have miniature ones on hand. However, miniature chocolate chips work best for the eyes because they are smaller and fit better on the cookie. If you use regular-sized chips, you may want to break them in half to make them smaller and more proportionate to the ghost’s face.
Q2: How long will these cookies stay fresh?
A: These cookies will stay fresh for up to 7 days if stored in a sealed Tupperware container at room temperature. Be sure to keep them away from heat or direct sunlight to prevent the chocolate from melting. If you live in a warm climate, you may want to store them in the refrigerator to keep them firm.
Q3: Can I use a different type of cookie instead of chocolate wafers?
A: Yes, you can use other types of cookies as a substitute for chocolate wafers. Graham crackers, shortbread cookies, or even vanilla wafers would work well. Just keep in mind that the flavor and texture of the final product may vary depending on the type of cookie you use.
Q4: Is there a way to make these cookies vegan?
A: Yes, to make these cookies vegan, you will need to use vegan white chocolate chips or candy melts and vegan chocolate wafer cookies. There are many vegan chocolate options available at most grocery stores or online. Just be sure to check the ingredients list to ensure that they are free of any animal-derived products.
Q5: Can I add sprinkles or other decorations to these cookies?
A: Absolutely! Feel free to get creative with the decorations and add sprinkles, edible glitter, or colored sugar to the cookies. You can also use edible markers to draw faces or add other details to the ghosts. The possibilities are endless, so have fun and make them your own!