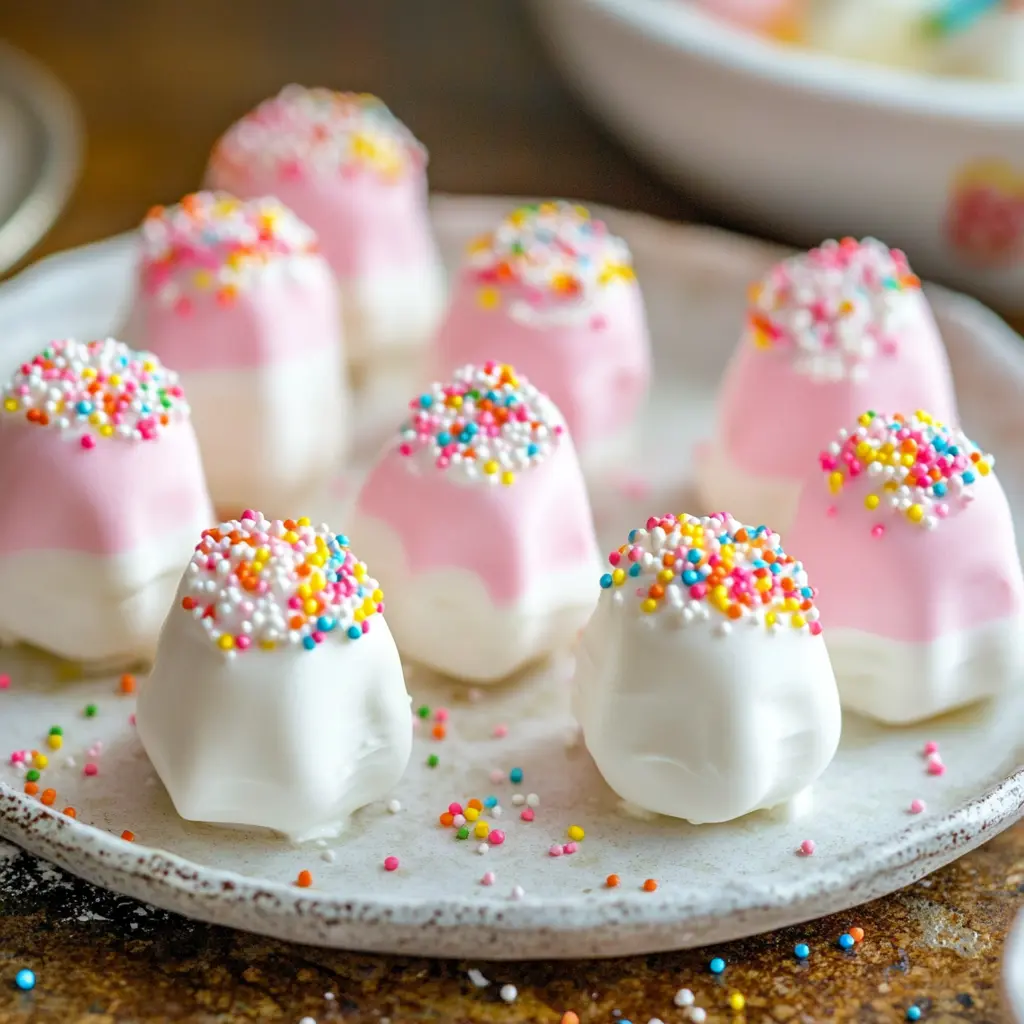
This delightful Easy Cool Whip Candy is a simple yet indulgent treat that combines the airy texture of Cool Whip with the rich flavors of instant pudding. Ideal for parties, holidays, or just a sweet snack, these candies are as fun to make as they are to eat. With endless flavor possibilities and a customizable appearance, this recipe will quickly become a favorite in your household.
Why You Will Love This Recipe
This recipe is perfect for anyone looking for a quick and easy dessert that requires minimal ingredients and effort. The creamy texture of the Cool Whip pairs beautifully with the flavor of the pudding mix, creating a melt-in-your-mouth experience. Additionally, the ability to customize the colors and toppings makes it a fantastic option for celebrations or themed events. Whether you’re making them for a birthday party, a holiday gathering, or just a fun afternoon treat, these candies are sure to impress!
Introduction
If you’re on the hunt for an easy, no-bake dessert that is sure to please a crowd, look no further than Easy Cool Whip Candy. This recipe is a perfect blend of simplicity and flavor, allowing you to whip up a batch in just a few minutes. With only a handful of ingredients, you can create a sweet treat that’s not only delicious but also visually appealing. The best part? You can customize the flavors and colors to suit any occasion! Let’s dive into this fun and straightforward recipe that will satisfy your sweet tooth and impress your friends and family.
Ingredients:
- 1 container (8 oz) of Cool Whip, thawed
- 1 small box (3.4 oz) of instant pudding mix (choose your favorite flavor)
- 1 cup powdered sugar
- 1 teaspoon pure vanilla extract
- Food coloring (optional, for customization)
- Sprinkles or colored sugar (optional, for decoration)
Preparation:
Step 1: Get Ready
Make sure your Cool Whip is completely thawed and gather all ingredients. This ensures smooth mixing without lumps, resulting in a creamy texture that is essential for the candy.
Step 2: Combine the Ingredients
In a large mixing bowl, blend the Cool Whip, pudding mix, powdered sugar, and vanilla extract. Use a hand whisk or mixer on low speed until the mixture is smooth, thick, and creamy—similar to a frosting-like consistency. This step is crucial for achieving the right texture.
Step 3: Add a Pop of Color (Optional)
For a festive touch, mix in a few drops of your favorite food coloring. Stir well to ensure an even color throughout the mixture. This is where you can get creative—think bright colors for birthday parties or pastel shades for baby showers!
Step 4: Prepare the Tray
Line a baking sheet or tray with parchment or wax paper. This prevents sticking as the candies freeze. The paper will also make it easier to remove the candies once they are set.
Step 5: Shape the Candies
Using a spoon or small scoop, drop dollops of the mixture onto the prepared tray. Adjust the size of the candies to your preference. You can make them bite-sized for easy snacking or larger for a more decadent treat.
Decorate (Optional):
Sprinkle each candy with colored sugar or festive sprinkles for added texture and visual appeal. This step enhances the presentation and makes your candies even more inviting.
Freeze Until Firm:
Place the tray in the freezer for 2-3 hours, or until the candies are fully set. The freezing process creates a delightful contrast between the creamy center and frozen exterior, making each bite a delightful experience.
Enjoy Your Treat:
Once firm, remove the candies from the freezer and serve immediately. Their creamy texture paired with a cool crunch is simply irresistible!
Cooking Note:
These candies can be stored in an airtight container in the freezer for future enjoyment. They maintain their texture and flavor well, making them a perfect make-ahead treat.
Suggestions for Presentation:
Serve the candies on a decorative platter or in colorful cupcake liners for a festive touch. You can also pair them with fresh fruit or chocolate sauce for an extra indulgent dessert experience.
Tips:
- For easier portioning, use a small cookie scoop to shape uniform candies.
- If you want to experiment with flavors, try using different pudding mixes like chocolate, vanilla, or even cheesecake for a unique twist.
- Store leftover candies in an airtight container in the freezer to keep them fresh and ready to enjoy.
Time Estimates:
- Prep Time: 10 minutes
- Freezing Time: 2-3 hours
- Total Time: ~2 hours 10 minutes
Nutritional Information (per piece):
- Calories: 85 (approximate, depending on size)
- Protein: 0.5g
- Sodium: 30mg
Conclusion
Easy Cool Whip Candy is a fantastic dessert option that is not only simple to make but also incredibly versatile. With just a few ingredients and some creativity, you can whip up a batch of these delightful candies that are sure to please everyone. So gather your ingredients, get the kids involved, and enjoy making this fun treat together!
Questions and Answers
1. Can I use different flavors of pudding mix?
Absolutely! The beauty of this recipe lies in its versatility. Feel free to experiment with different flavors of instant pudding to create unique candy variations.
2. How long do these candies last in the freezer?
These candies can be stored in an airtight container in the freezer for up to three months, maintaining their flavor and texture.
3. Can I use homemade whipped cream instead of Cool Whip?
While Cool Whip provides a specific texture and sweetness, you can use homemade whipped cream. Just make sure it’s stiff enough to hold its shape.
4. Is this recipe suitable for a gluten-free diet?
Yes, as long as you choose a gluten-free pudding mix, this recipe can be made gluten-free.
5. Can I add other mix-ins to the candies?
Certainly! You can incorporate mini chocolate chips, nuts, or even crushed cookies into the mixture for added texture and flavor. Just be mindful of the overall consistency.

