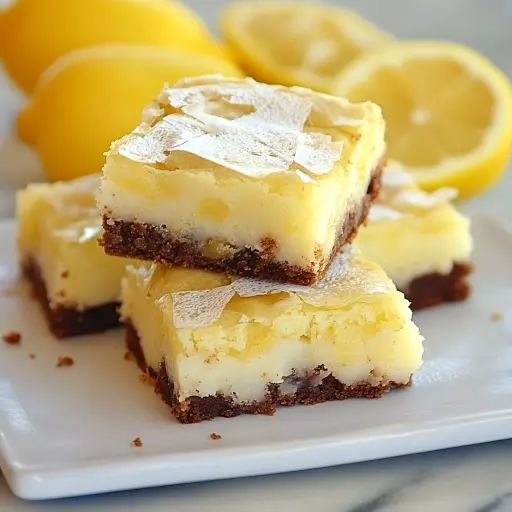
Description These Easy Lemon Brownies are a delightful twist on the classic chocolate brownie, offering a bright and zesty lemon flavor that is both refreshing and comforting. Perfect for spring and summer, these brownies are incredibly easy to make, requiring minimal ingredients and delivering maximum taste. The soft, chewy texture, combined with the tangy lemon glaze, makes them an irresistible treat for any occasion. Whether you’re baking for a party, a potluck, or simply to enjoy at home, these lemon brownies are sure to be a crowd-pleaser.
Ingredients:
For the lemon brownies:
- 1 cup (200g) granulated sugar
- ½ cup (113g) unsalted butter, softened
- 2 large eggs
- 2 tablespoons lemon juice (freshly squeezed)
- 1 tablespoon lemon zest
- ¾ cup (95g) all-purpose flour
- ¼ teaspoon salt
- ½ teaspoon baking powder (optional for a fluffier texture)
For the lemon glaze:
- ¾ cup (90g) powdered sugar
- 1–2 tablespoons lemon juice
- ½ teaspoon lemon zest (optional for extra flavor)
Preparation:
Step 1:
Preheat your oven to 350°F (175°C). This ensures that the oven is at the correct temperature when you put the brownies in, allowing them to bake evenly. Grease and line an 8×8-inch square baking pan with parchment paper. Greasing prevents the brownies from sticking to the pan, while the parchment paper creates an easy way to lift the brownies out cleanly after baking. Leave an overhang of parchment paper on the sides of the pan to make removal even simpler.
Step 2:
In a large mixing bowl, cream together the softened butter and granulated sugar until the mixture is light and fluffy. This step is crucial for creating a tender and airy texture in the brownies. Use an electric mixer if possible, and beat for about 3-5 minutes until the mixture turns pale and increases in volume. If you don’t have an electric mixer, you can use a wooden spoon, but it will require more effort.
Step 3:
Beat in the large eggs, one at a time, into the creamed butter and sugar mixture. Ensure each egg is fully incorporated before adding the next. Then, add the fresh lemon juice and lemon zest. Continue to beat until the mixture is smooth and slightly thickened. The lemon juice and zest add a burst of citrus flavor that complements the sweetness of the brownies. The batter should be well combined and appear glossy.
Step 4:
In a separate bowl, whisk together the all-purpose flour, salt, and baking powder (if using). Whisking ensures that the dry ingredients are evenly distributed, preventing lumps and ensuring a consistent texture. Gradually add the dry ingredients to the wet ingredients, stirring until just combined. Be careful not to overmix the batter, as this can result in tough brownies. Mix until the flour disappears, but don’t worry about a few small lumps.
Step 5:
Pour the batter evenly into the prepared baking pan. Use a spatula to spread the batter to the corners and create a uniform layer. This ensures that the brownies bake evenly. Bake in the preheated oven for 22–25 minutes, or until the edges are lightly golden and a toothpick inserted into the center comes out with moist crumbs. Be careful not to overbake the brownies, as they will become dry and crumbly. The toothpick test is the best way to determine when they are done.
Step 6:
Let the brownies cool completely in the pan. Cooling is essential to allow the brownies to set properly. Trying to slice them while they are still warm can result in a messy and gooey texture.
Step 7:
While the brownies are cooling, prepare the lemon glaze. In a small bowl, whisk together the powdered sugar, lemon juice, and lemon zest (if using) until the glaze is smooth and pourable. Add the lemon juice gradually, adjusting the amount to achieve the desired consistency. The glaze should be thick enough to coat the brownies but thin enough to drizzle easily.
Step 8:
Once the brownies have completely cooled, drizzle the lemon glaze generously over the top. Let the glaze set before slicing the brownies into squares. The glaze will harden slightly, creating a beautiful and flavorful topping.
Why You Will Love This Recipe
You will adore these Easy Lemon Brownies for their simplicity and incredible flavor. They are quick to prepare, requiring only a handful of ingredients and minimal effort. The bright lemon flavor is a refreshing change from traditional chocolate brownies, making them perfect for spring and summer gatherings. The combination of the soft, chewy brownie texture and the tangy lemon glaze is simply irresistible. These brownies are not only delicious but also visually appealing, making them a delightful treat to share with family and friends. Plus, they are easily customizable – you can adjust the amount of lemon zest to suit your taste preferences or add a sprinkle of powdered sugar for an extra touch of elegance.
Serving Suggestions:
- Serve the lemon brownies chilled or at room temperature.
- Pair them with a scoop of vanilla ice cream or a dollop of whipped cream.
- Garnish with fresh berries, such as raspberries or blueberries, for added flavor and visual appeal.
- Serve with a cup of tea or coffee for a delightful afternoon treat.
- Cut into small squares and arrange on a platter for parties or gatherings.
- Dust with powdered sugar for an elegant presentation.
Tips:
- Use high-quality ingredients for the best flavor. Freshly squeezed lemon juice and real butter make a significant difference.
- Don’t overmix the batter. Overmixing can result in tough brownies.
- Line the baking pan with parchment paper for easy removal.
- Adjust the amount of lemon zest to suit your taste.
- Store the brownies in an airtight container at room temperature for up to 3 days.
- For a more intense lemon flavor, add a few drops of lemon extract to the batter.
- If you don’t have an 8×8-inch pan, you can use a 9×13-inch pan, but the brownies will be thinner and may require a shorter baking time.
Prep Time: 10 minutes
Cook Time: 25 minutes
Total Time: 35 minutes
Nutritional Information:
- Calories: Approximately 210 per serving
- Protein: 2g
- Sodium: 50mg
Note: Nutritional information is an estimate and can vary based on specific ingredients and portion sizes.
Conclusion
These Easy Lemon Brownies are a must-try for any baking enthusiast. They offer a delightful combination of simplicity and flavor, making them perfect for any occasion. The tangy lemon glaze perfectly complements the soft and chewy brownie texture, creating a truly irresistible treat. Whether you’re baking for yourself or to share with others, these brownies are sure to be a hit. Enjoy the process of creating these delicious lemon brownies and savor every bite!
Questions and Answers About This Recipe
- Can I use bottled lemon juice instead of fresh lemon juice? Answer: While fresh lemon juice is recommended for the best flavor, you can use bottled lemon juice in a pinch. However, be aware that the flavor may not be as bright or intense as fresh lemon juice. If using bottled juice, consider adding a bit more lemon zest to compensate.
- Can I make these brownies gluten-free? Answer: Yes, you can easily adapt this recipe to be gluten-free by using a gluten-free all-purpose flour blend. Ensure that the blend you choose is designed for baking and contains xanthan gum for binding. Follow the recipe as written, and the brownies should turn out just as delicious.
- How do I prevent the brownies from sticking to the pan? Answer: To ensure the brownies don’t stick, grease the baking pan thoroughly with butter or cooking spray. Then, line the pan with parchment paper, leaving an overhang on the sides. This makes it easy to lift the brownies out of the pan after they have cooled.
- Can I add white chocolate chips to the batter? Answer: Absolutely! White chocolate chips would be a wonderful addition to these lemon brownies. The sweetness of the white chocolate complements the tangy lemon flavor perfectly. Add about 1/2 cup of white chocolate chips to the batter before pouring it into the baking pan.
- How long do these brownies stay fresh? Answer: These brownies will stay fresh for up to 3 days when stored in an airtight container at room temperature. To maintain their moistness, avoid refrigerating them, as this can dry them out. If you want to store them for longer, you can freeze them for up to 2 months. Thaw them at room temperature before serving.